How to Install PiCockpit on a Pico W

Simply follow these instructions to add your Pico W to PiCockpit.
This only works for the Pico W, not the Pico. The steps under ‘Reset to factory settings‘ are necessary if you have used your Pico for anything before.
If you bought a new one you can skip them, but they certainly don’t hurt in any case.
Here are 10 steps to installing the PiCockpit Client on your Pico W.
Reset factory settings
1) Save any files from your Pico that you don’t want to lose! (If it isn’t a brand new Pico – in general, better safe than sorry).
2) Press the BOOTSEL button while connecting it to your computer. The Pico should appear as a mounted volume.
3) Reset your Pico by downloading a Flash Nuke and copying the uf2 file onto the Pico. This resets the Pico to factory settings.
4) Disconnect the Pico.
Installing PiCockpit
5) Go to PiCockpit.com. Login and make sure that you only have either 4 Pis or have extended the limit. Currently we only allow max 5 Pis on our free tier.
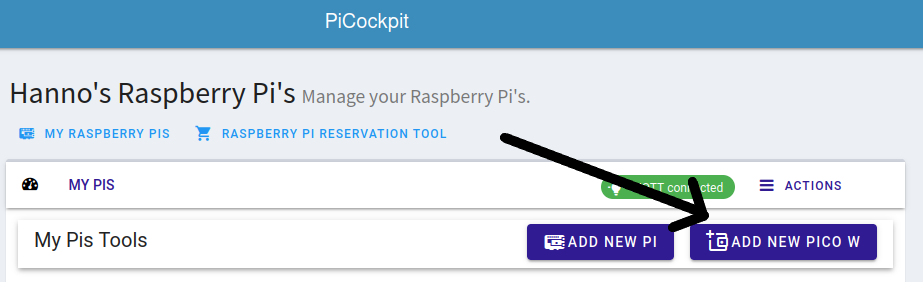
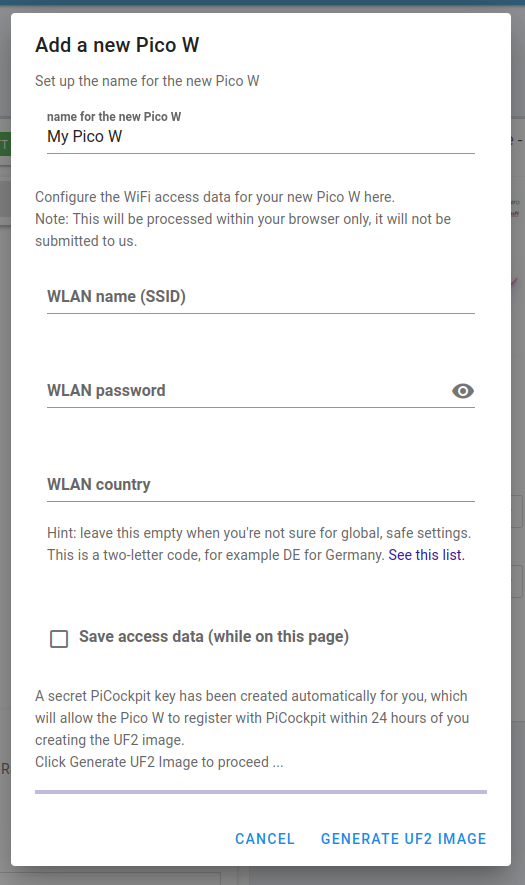
6) Click the “Add new Pico W” button, input your information. All information is only saved locally and written into the uf2 image – so we don’t send your WiFi credentials to our sever. They are safe!
7) Press “Generate uf2 Image“. This downloads the image.
8) Press the BOOTSEL button while connecting the Pico to your computer.
9) Copy the uf2 file (picockpit-picow-v2.5.0.uf2) onto the Pico.
10) Do not disconnect the Pico! Wait until the Pico shows up in the Web Interface. This should take about 2 minutes.
FAQ
Why isn’t my Pico W appearing as a mounted volume?
The most common reason for this problem is when you use the wrong kind of USB cable. Pico W’s have a micro USB port, but USB cables often come in two varieties: data cables and charging cables. A charging cable will not mount your Pico W, so you need to ensure that you’re using a data cable.
What is the Serial Number that appears in the Interface?
This is simply a UUID that is generated randomly. Currently, there is no serial number on a Pico W.