Время работы Raspberry Pi Zero 2 от аккумулятора, оптимизация и настройка
Как запустить Raspberry Pi от аккумулятора
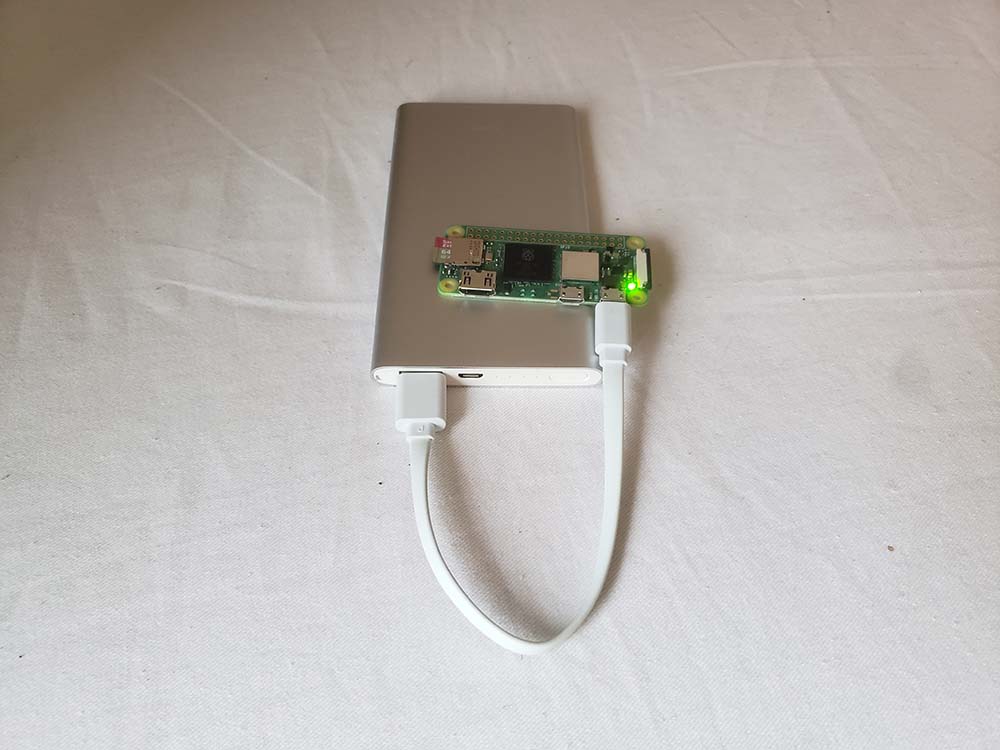
Самый простой способ подключить устройство к сети - запустить его от банка питания, предназначенного для подзарядки телефонов. Это самый простой вариант, потому что все работает, но он и наименее настраиваемый.
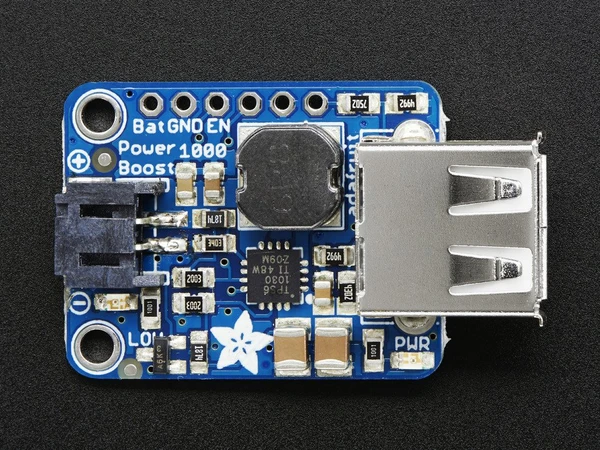
Если вам нужно более настраиваемое решение, подумайте о приобретении PowerBoost 1000 Basic что позволит вам повышать напряжение от 1,8 В, а значит, вы сможете использовать 2 NiMH аккумулятора или один литиевый аккумулятор для питания Raspberry Pi Zero 2 W.
Примеры приложений с питанием от аккумулятора для Pi Zero 2
Использование Raspberry Pi Zero 2 на аккумуляторе имеет смысл для таких приложений, как,
- Эмуляция ретро-игр: Чехол Retroflag GPi или сборка на заказ с 7-дюймовым экраном
- IoT/устройства автоматизации, находящиеся вдали от розетки (метеодатчики, датчики загрязнения, камеры для животных, устройства для полива растений, кормушки для домашних животных)
- Электронные дисплеи: цифровые таблички с именами, биржевые тикеры, списки дел
Как регистрировать время работы
Чтобы вести журнал времени работы, необходимо установить пакет uptimed.
Откройте Терминал и запустите его:
sudo apt-get install uptimedПосле установки необходимо запустить и запустить службу:
systemctl enable uptimedзатем
systemctl start uptimedПоскольку мы пытаемся определить, на какое время работы от аккумулятора мы можем рассчитывать, важно убедиться, что конфигурационные файлы uptimed позволяют вести журнал с гораздо меньшими интервалами, чем те, что установлены по умолчанию.
По умолчанию uptimed пишет в журналы только каждый час и не записывает записи длительностью менее одного часа.
Чтобы изменить это, необходимо внести изменения в файл конфигурации. По умолчанию
В терминале выполните команду:
sudo nano /etc/uptimed.confИзмените следующие переменные:
ИНТЕРВАЛ ОБНОВЛЕНИЯ=60
LOG_MINIMUM_UPTIMED = 60
По умолчанию обе переменные установлены на один час (либо 3600 секунд, либо 1h). Установив для них значение 60 секунд, мы можем регистрировать время работы батареи с точностью до минуты.
Время выполнения в режиме ожидания
Продолжительность: 30 часов 12 минут
Я запустил банк питания 5000 мА на Raspberry Pi Zero 2W без вложений и на Raspberry Pi OS (2021-10-31). Все работает по умолчанию.
Это наилучшее время автономной работы, которое вы можете получить от стандартного Raspberry Pi Zero 2 W.

Время выполнения стресса
В реальности у вас, скорее всего, будут определенные насадки, например HDMI или что-то на GPIO. Таким образом, следующий тест позволит выяснить, какой сценарий является наихудшим.
Продолжительность: 6 часов 54 минуты
Чтобы провести стресс-тест, я выполнил команду
stress-ng –cpu 4 –cpu-method fftИспользовались команды -cpu-method fft и -cpu 4 основываясь на выводах, сделанных на форуме Raspberry PiВ результате выяснилось, что он притягивает к себе одну из самых высоких нагрузок.
Выполнив эту команду, я сразу же заметил, что загрузка процессора выросла до 100%.
Оптимизации
Вы можете еще больше снизить энергопотребление, отключив различные компоненты Raspberry Pi Zero 2 W.
Вот какие способы экономии электроэнергии вы можете использовать:
Выключите светодиод: 5 мА1
Выключение WiFi: 11 мА-187 мА2
Использование устаревших драйверов + отключение HDMI: 21 мА + 17 мА 2
Выключите светодиод
Вы можете сэкономить 5 мА, отключив светодиод. Вот как.
Если вы хотите запустить его только один раз, выполните эту команду в терминале:
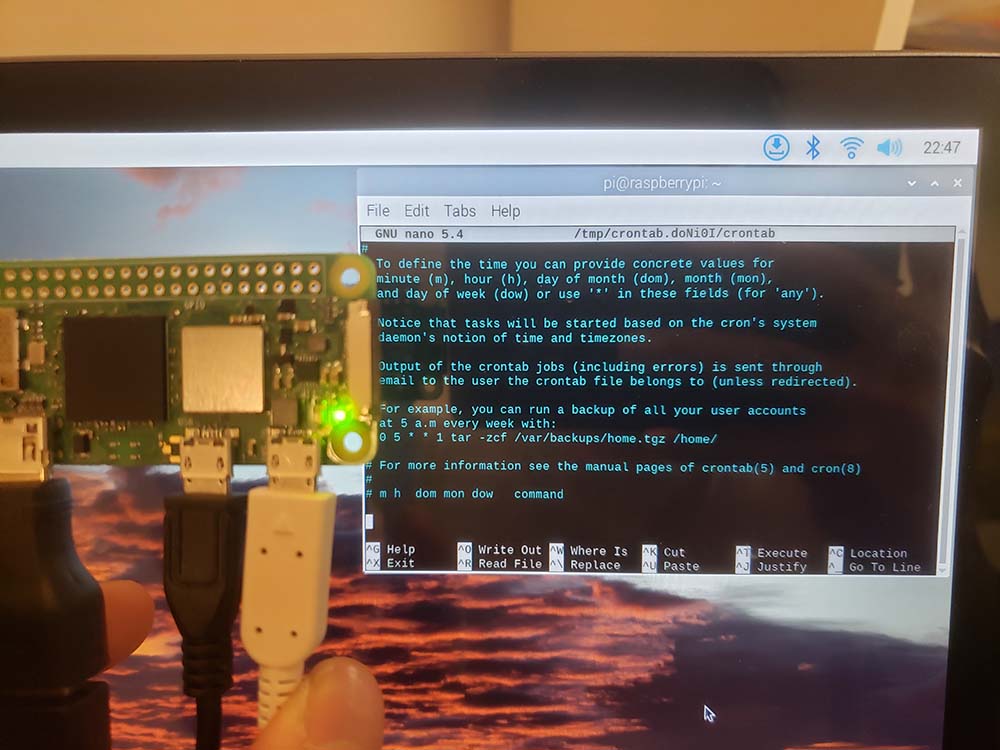
echo none | sudo tee /sys/class/leds/led0/triggerОднако если вы хотите, чтобы светодиод постоянно выключался при перезагрузке, откройте терминал и введите:
sudo crontab -eКогда вы окажетесь в файле, прокрутите его до самого низа и введите эти строки:
@reboot echo none | sudo tee /sys/class/leds/led0/trigger &После следующей и последующих перезагрузок зеленый светодиод Pi Zero 2 W будет гореть до тех пор, пока не загрузится ОС, после чего он выключится.
Отключите WiFi
Кроме того, вы можете навсегда отключить WiFi, выполнив команду
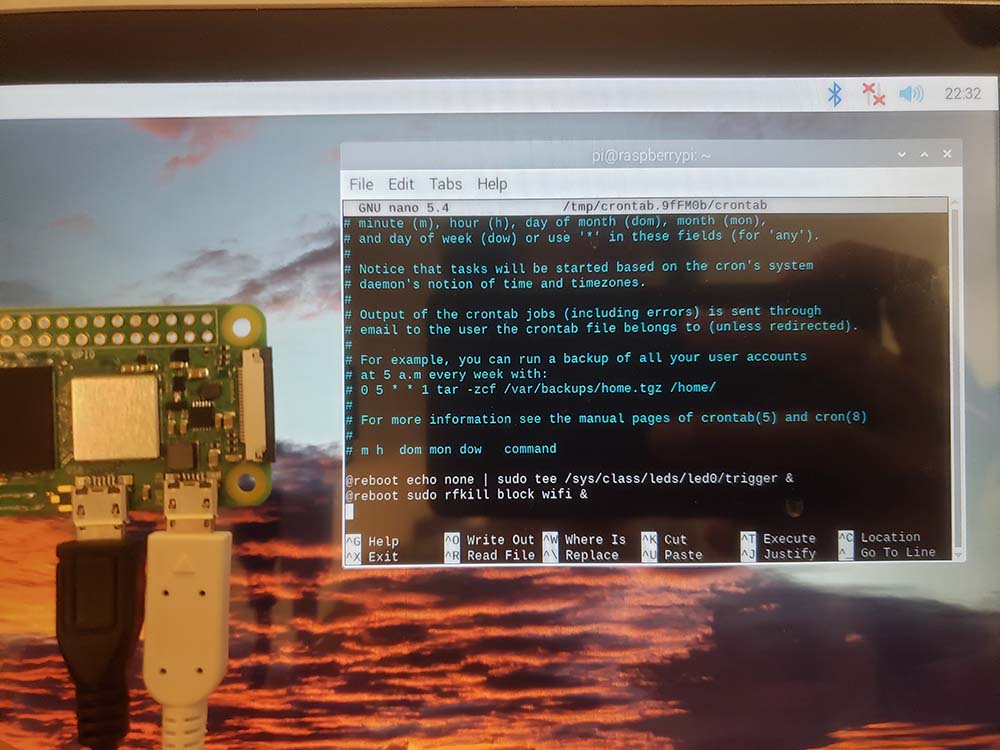
sudo rfkill block wifiЧтобы эта команда выполнялась при перезагрузке, откройте терминал и введите
sudo crontab -eПрокрутите страницу в самый низ и введите эту строку
@reboot sudo rfkill block wifi &После перезагрузки вы увидите, что WiFi отключен при запуске.
Используйте устаревшие драйверы + отключите HDMI
Если вы создали устройство, работающее от аккумулятора, вероятность того, что вы не будете использовать монитор, гораздо выше.
А может быть, вы планируете использовать Raspberry Pi Zero 2 W в безголовом режиме. Это еще одна причина отключить HDMI.
Противоречие заключается в том, что мне пришлось включить WiFi, что привело к потере энергии, чтобы отключить HDMI и управлять Pi Zero 2 через SSH. Так что выбирайте свои битвы.
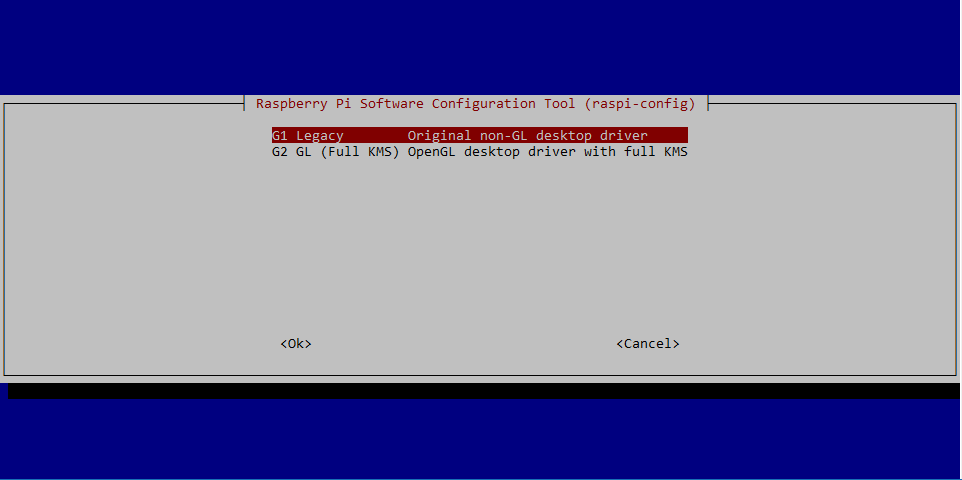
Включите устаревшие драйверы GL
Прежде чем отключить HDMI, необходимо использовать устаревший графический драйвер.
Откройте терминал и выполните команду:
sudo raspi-configЗатем перейдите к Дополнительные параметры -> Драйвер GL -> Наследие
Теперь, когда все готово, вы можете отключить HDMI, выполнив команду:
sudo nano /etc/rc.localЧуть выше строки "exit 0" введите /usr/bin/tvservice -o
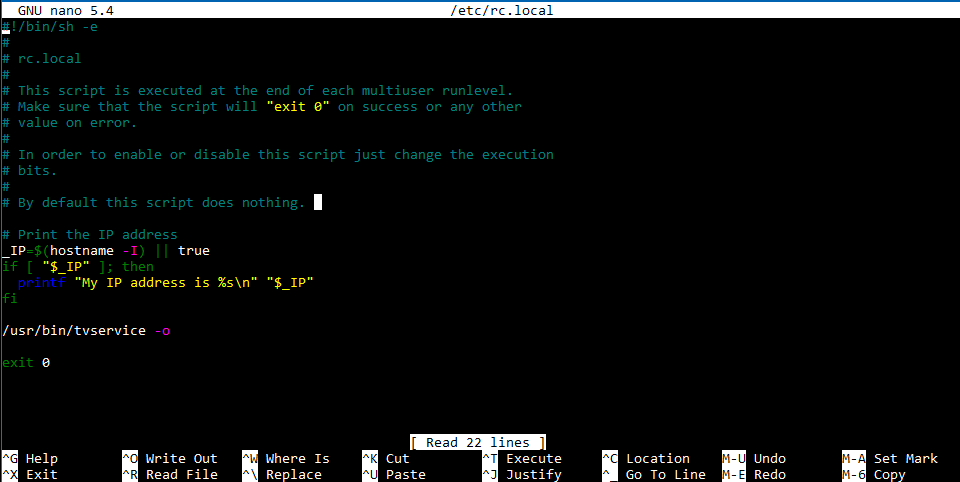
Чтобы снова включить HDMI, просто удалите эту строку. Я сделал это через SSH.
Отключить ядра
Хотя все вышеперечисленные советы позволяют снизить энергопотребление в режиме простоя, вы также можете ограничить максимальное энергопотребление, отключив ядра.
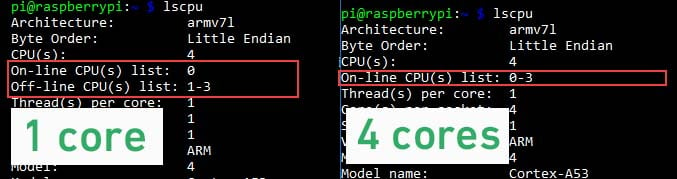
Чтобы сделать это, откройте терминал и введите:
sudo nano /boot/cmdline.txtВведите maxcpus=1 в первой строке и сохраните файл, нажав CTRL + X и сохранив его, нажав Y.
Затем перезагрузитесь.
После перезагрузки вы можете проверить, сработала ли ваша модификация, выполнив команду lscpu в терминале.
Если вы видите "Список автономных процессоров: 1-3", значит, все получилось и вы работаете на одном ядре.
Если вы хотите узнать больше о том, что можно сделать с помощью Raspberry Pi Zero 2, загляните на сайт эта статья.