Comment créer un portail captif pour votre entreprise avec un Raspberry Pi Pico W

Si vous dirigez une entreprise, la mise en place d'un portail captif peut être un outil important pour votre réseau. Dans cet article, je vais vous montrer comment créer un portail captif avec un Raspberry Pi Pico W.
Un portail captif est un moyen sécurisé d'offrir le WiFi à des invités, des clients ou des consommateurs. Il exige que les utilisateurs se connectent ou s'authentifient avant de pouvoir utiliser l'internet.
Pensez à ce qui se passe dans un aéroport ou dans une chaîne de cafés.
Un portail captif vous permet à la fois de contrôler et de surveiller votre réseau. Il offre également la possibilité d'étendre votre marque. Vous pouvez personnaliser le portail captif avec votre logo.
Que fait un portail captif ?
Lorsque vous vous connectez à un Pico W qui fait office de point d'accès, vous ne recevez pas de page web. Si un portail captif est mis en place, dès que votre WiFi se connecte à votre point d'accès, une page web s'affiche.
Vous pouvez donc sauter l'étape de la connexion au réseau, puis aller dans votre navigateur et taper manuellement une adresse IP.
C'est à ce stade que je dois créditer Kevin McAleer pour sa vidéo qui sert de base à ce tutoriel.
La création d'un portail captif avec un Pico W est une opportunité fantastique. Non seulement un portail captif est impératif pour le réseau de votre entreprise. A Raspberry Pi Pico W n'est que de quelques euros au maximum, ce qui en fait une solution extrêmement rentable.
Objectifs de ce tutoriel
Le tutoriel de Kevin vous montre seulement comment déclencher un portail captif sur un appareil Apple.
Ce tutoriel va plus loin en vous expliquant comment déclencher le portail captif pop-up sur les appareils Android, Windows et Apple.
Nous utiliserons Phew de Pimoroni, qui est une bibliothèque pour un serveur web Pico W. C'est un peu ce que Express est à NodeJS. C'est un peu ce que Express est à NodeJS.
J'ai testé mon code sur quatre appareils :
- Apple iPhone 8 avec OS version 15.4.1 ✔️
- Tablette Amazon Fire avec Android 9 ✔️
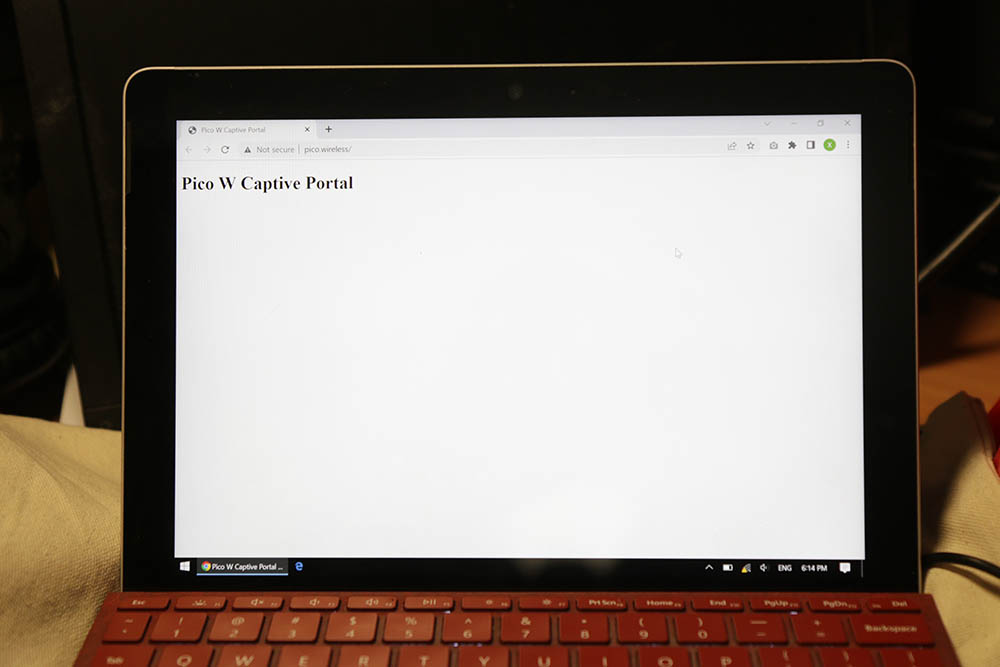
- Windows 10 PC ✔️
- Google Pixel 6 avec Android 13 ✔️
- Samsung Note 9 avec Android 10 ❌
Le code a fonctionné sur tous les appareils, sauf sur mon Samsung Note 9, et je ne l'ai pas testé sur Linux.
Cas d'utilisation ?
Il s'agit d'une question un peu difficile.
Au départ, je voulais créer quelque chose qui puisse faire ricaner quelqu'un, mais je me suis rendu compte que je ne pouvais pas intégrer une vidéo YouTube parce qu'il n'y aurait pas de connexion Internet puisque le Pico W n'en a pas.
Ensuite, j'ai voulu créer une carte de visite numérique portable où les gens se connecteraient au Pico W et verraient quelques liens. Un peu comme ces annuaires de liens Instagram. Encore une fois, pas d'internet...
Je suppose que l'un des principaux avantages du Pico W est qu'il vous permet de contrôler les composants sans fil.
Sur notre méga-tutoriel sur les composantsJ'ai parlé de la façon dont vous pouvez éviter d'utiliser des boutons physiques pour contrôler les LED, les buzzers et les servos en utilisant une interface web à la place. Si vous intégrez ces éléments dans votre portail captif, vous pourrez contrôler plus facilement vos appareils, car vous n'aurez pas à vous connecter à 192.168.4.1 chaque fois que vous voudrez accéder à un panneau de contrôle.
Bien entendu, j'aimerais savoir ce que vous pensez qu'il est possible de faire avec un portail captif. Laissez un commentaire ci-dessous !
Comment déclencher la fenêtre contextuelle
Lorsque vous vous connectez à un réseau sans fil, les appareils Windows, Android et Apple envoient des signaux à des sites web différents.
Chacun de ces pings nécessite une réponse. La bonne réponse débloque le pop-up. Voici comment se déroule la conversation en fonction du système d'exploitation :
Microsoft Windows 10
MS : "Psst... is /connecttest.txt là ?"
Pico W : "Oui, 200“.
MS : "OK, emmenez-moi à /redirect“
Pico W : "Euh, oui, 302, se rendre sur le site http://pico.wireless/ où nous vous servirons index.html“.
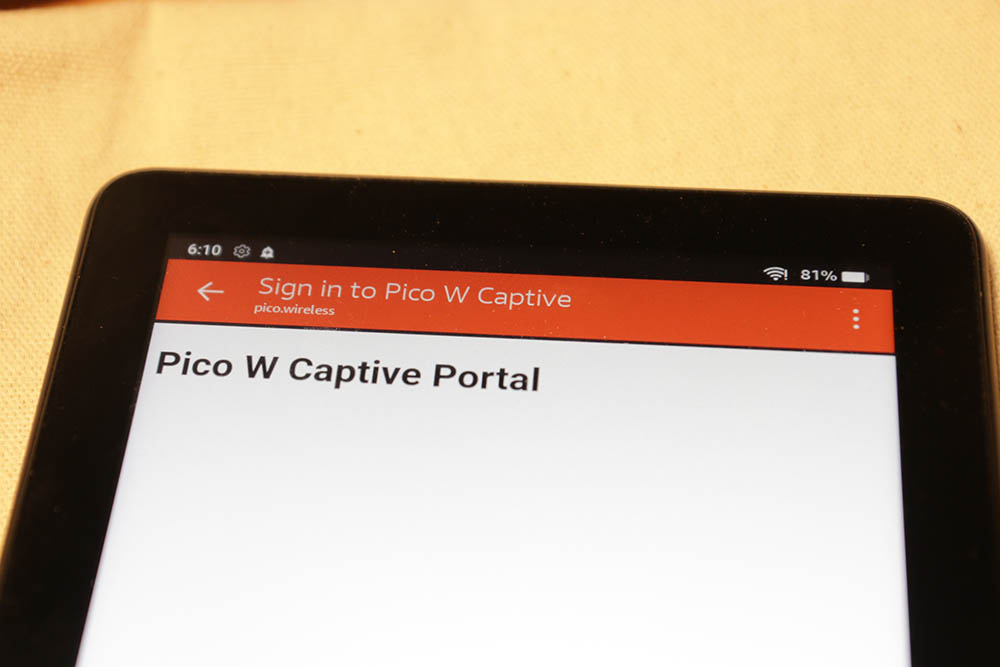
Amazon Fire Android 9
AMZ : "Psst... où est /generate_204 là ?"
Pico W : "Par défaut, j'allais dire 204mais je sais que ce que vous voulez vraiment, c'est 302 rediriger vers http://pico.wireless/ (qui rend index.html aka votre page captive)"
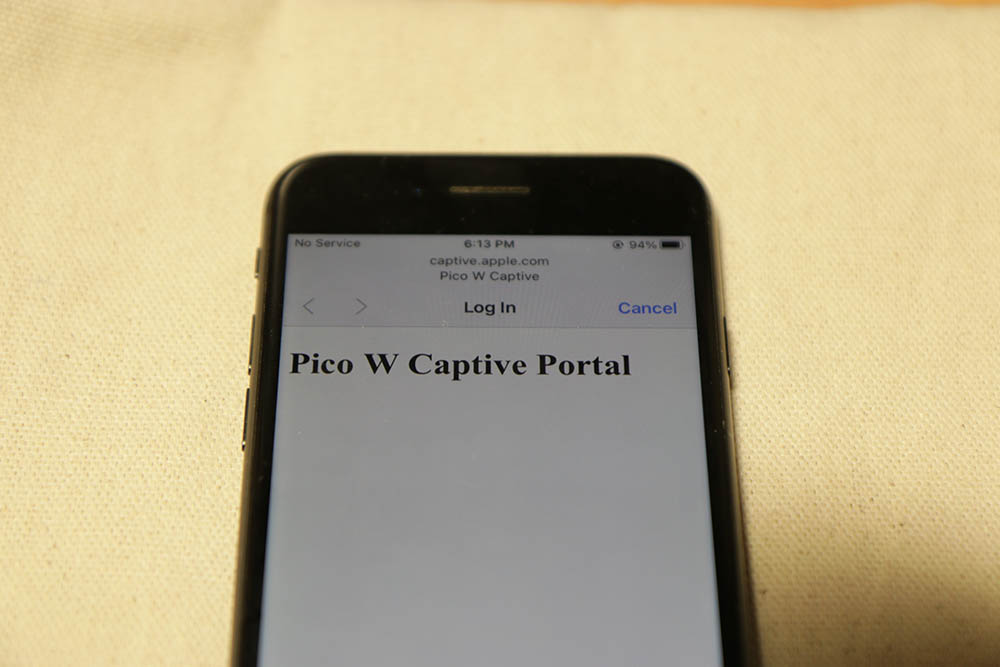
Apple iPhone 8 avec iOS 15
iPhone : "Je suis cool et tout ça, donc je cherche juste le fichier. /Détection de points chauds.html“
Pico W : "Oui, allez à http://pico.wireless/“
iPhone : "Hmm, ça semble complètement différent de ce que j'ai demandé, mais je vous fais confiance, alors je vais y aller maintenant".
Code de réponse 200 : "OK", 204 : "No Content", 302 : "Found".
Comme vous pouvez le constater, les différents appareils demandent des itinéraires et des pages web différents. Et si vous répondez correctement, ils déclencheront la fenêtre contextuelle.
Voici un résumé de ce dont vous avez besoin pour envoyer et recevoir :
Windows 10
| URL | Déclenchement de la réponse |
| www.msftconnecttest.com/ncsi.txt | 200 OK |
| www.msftconnecttest.com/connecttest.txt | 200 OK |
| www.msftconnecttest.com/redirect | 302 redirection (vers le portail captif, par exemple index.html) |
Android 9, 10
| URL | Déclenchement de la réponse |
| connectivitycheck.gstatic.com/generate_204 | Redirection 302 (vers la page du portail captif) |
D'autres versions d'Android peuvent interroger d'autres URL. Je pense que les nouvelles versions d'Android auront /generate_204 comme solution de repli.
Voici deux ressources pour les Androïdes plus anciens :
https://lemariva.com/blog/2017/11/white-hacking-wemos-captive-portal-using-micropython
iOS 15
| URL | Déclenchement de la réponse |
| captive.apple.com/hotspot-detect.html | 200 OK (réponse avec une page web) |
Mon Samsung Note 9 fonctionnant sous Android 10 a été le plus difficile à pirater. Ostensiblement, il fallait suivre les schémas typiques d'Android, mais hélas, rien ne fonctionnait !
J'ai réussi à obtenir l'invite "Connexion requise", mais seulement après avoir changé le DNS pour une IP LAN publique (une IP en dehors de la plage '10.0.0.0/8, 172.16.0.0/12, ou 192.168.0.0/16'). Voir ce commentaire sur Stack Exchange.
Mais l'opération ci-dessus a cassé le portail captif de tous les autres appareils...
Bibliothèque Pimoroni Phew pour le portail captif Pico W
L'Ouf du Pimoroni La bibliothèque facilite grandement la création d'un portail captif, car elle s'occupe de tout.
Tout d'abord, vous devez télécharger la bibliothèque. J'ai utilisé la version 0.0.3 qui peut être téléchargée ici.
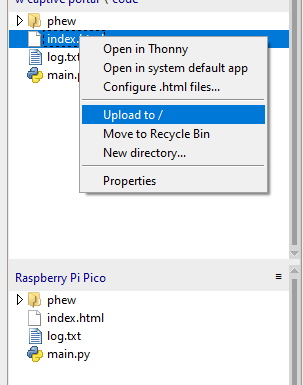
Ensuite, extrayez les fichiers et téléchargez le dossier nommé ouf sur votre Pico W. Personnellement, j'ai utilisé l'IDE de Thonny et vous pouvez apprendre à télécharger des fichiers ici.
Codons la fenêtre contextuelle du hotspot !
Je commencerai donc par main.py:
from phew import logging, server, access_point, dns
from phew.template import render_template
from phew.server import redirect

DOMAIN = "pico.wireless"  # This is the address that is shown on the Captive Portal


@server.route("/", methods=['GET'])
def index(request):
    """ Render the Index page"""
    if request.method == 'GET':
        logging.debug("Get request")
        return render_template("index.html")

# microsoft windows redirects
@server.route("/ncsi.txt", methods=["GET"])
def hotspot(request):
    print(request)
    print("ncsi.txt")
    return "", 200


@server.route("/connecttest.txt", methods=["GET"])
def hotspot(request):
    print(request)
    print("connecttest.txt")
    return "", 200


@server.route("/redirect", methods=["GET"])
def hotspot(request):
    print(request)
    print("****************ms redir*********************")
    return redirect(f"http://{DOMAIN}/", 302)

# android redirects
@server.route("/generate_204", methods=["GET"])
def hotspot(request):
    print(request)
    print("******generate_204********")
    return redirect(f"http://{DOMAIN}/", 302)

# apple redir
@server.route("/hotspot-detect.html", methods=["GET"])
def hotspot(request):
    print(request)
    """ Redirect to the Index Page """
    return render_template("index.html")


@server.catchall()
def catch_all(request):
    print("***************CATCHALL***********************\n" + str(request))
    return redirect("http://" + DOMAIN + "/")


# Set to Accesspoint mode
# Change this to whatever Wifi SSID you wish
ap = access_point("Pico W Captive")
ip = ap.ifconfig()[0]
# Grab the IP address and store it
logging.info(f"starting DNS server on {ip}")
# # Catch all requests and reroute them
dns.run_catchall(ip)
server.run()                            # Run the server
logging.info("Webserver Started")
Pour être clair, j'ai adapté ce code de Kevin McAleer et je l'ai modifié pour nos besoins. Si vous voulez regarder l'explication approfondie de Kevin sur la façon dont les choses fonctionnent, regarder cette vidéo sur YouTube.
Mais permettez-moi de passer brièvement en revue les différentes sections.
Il y a trois sections avec des commentaires "#android redirects", "#apple redir" et "# microsoft windows redirects". Ces sections gèrent les tests effectués par chaque système d'exploitation et fournissent la bonne réponse.
A la fin des réponses, elles sont redirigées vers http://{DOMAIN}/, sauf pour la route Apple (parce que Kevin l'a écrit ainsi et que si ce n'est pas cassé...).
La redirection vers le DOMAINE, déclaré comme "pico.wireless", nous donnerait une URL moins disgracieuse.
Ainsi, au lieu de voir "www.msftconnecttest.com" dans la barre d'adresse, nous verrons "pico.wireless" dans la barre d'adresse. Il s'agit bien sûr d'un élément à garder à l'esprit pour le portail captif de votre entreprise.
Pimoroni Phew réduit le code que vous devez écrire
L'avantage de Phew est que vous écrivez beaucoup moins de code que si vous le faisiez à partir de zéro.
Par exemple, si vous voulez lancer le SoftAP sur le Pico W, vous devez écrire un code qui ressemble à ceci :
import network
# start up network in access point mode
wlan = network.WLAN(network.AP_IF)
wlan.config(essid=ssid)
if password:
    wlan.config(password=password)
else:
    wlan.config(security=0)  # disable password
wlan.active(True)
return wlan
Avec le Pimoroni's Phew, votre fardeau est réduit à.. :
ap = access_point("Pico W Captive")À mon avis, la meilleure partie est la dns.run_catchall() qui exécute un code vital mais compliqué :
import uasyncio, usocket
from . import logging

async def _handler(socket, ip_address):
  while True:
    try:
      yield uasyncio.core._io_queue.queue_read(socket)
      request, client = socket.recvfrom(256)
      response = request[:2] # request id
      response += b"\x81\x80" # response flags
      response += request[4:6] + request[4:6] # qd/an count
      response += b"\x00\x00\x00\x00" # ns/ar count
      response += request[12:] # origional request body
      response += b"\xC0\x0C" # pointer to domain name at byte 12
      response += b"\x00\x01\x00\x01" # type and class (A record / IN class)
      response += b"\x00\x00\x00\x3C" # time to live 60 seconds
      response += b"\x00\x04" # response length (4 bytes = 1 ipv4 address)
      response += bytes(map(int, ip_address.split("."))) # ip address parts
      socket.sendto(response, client)
    except Exception as e:
      logging.error(e)

def run_catchall(ip_address, port=53):
  logging.info("> starting catch all dns server on port {}".format(port))

  _socket = usocket.socket(usocket.AF_INET, usocket.SOCK_DGRAM)
  _socket.setblocking(False)
  _socket.setsockopt(usocket.SOL_SOCKET, usocket.SO_REUSEADDR, 1)
  _socket.bind(usocket.getaddrinfo(ip_address, port, 0, usocket.SOCK_DGRAM)[0][-1])

  loop = uasyncio.get_event_loop()
  loop.create_task(_handler(_socket, ip_address))
Phew facilite également l'écriture d'itinéraires. Tout ce que vous avez à faire est d'écrire quelque chose comme ceci :
@server.route("/[your_route_here]", methods=["GET"])
def your_function_here(request):
  pass

@server.catchall()
def catchall(request):
  pass
Comme vous pouvez le voir ci-dessus, il est très facile de créer un itinéraire. Tout ce que vous avez à faire est d'utiliser @server.routeet transmet une route ainsi que les méthodes. Définissez ensuite une fonction ci-dessous avec l'attribut demande paramètre.
Enfin, il y a le @server.catchall() qui gère tous les itinéraires que vous n'avez pas attribués.
C'est super facile !
Visitez le dépôt Github de Phew ici.
index.html
Il s'agit d'une preuve de concept très simple. index.html qui émet un <h1> en disant "Pico W Captive Portal".
<!DOCTYPE html>
<html lang="en">
  <head>
    <meta charset="UTF-8" />
    <meta http-equiv="X-UA-Compatible" content="IE=edge" />
    <meta name="viewport" content="width=device-width, initial-scale=1.0" />
    <title>Pico W Captive Portal</title>
  </head>
  <body>
    <h1>Pico W Captive Portal</h1>
  </body>
</html>
Conclusion
Voilà, c'est fait. C'est tout ce que vous devez savoir pour mettre en place un portail captif sur un Pico W pour votre entreprise.
Si vous avez des questions, n'hésitez pas à nous en faire part dans les commentaires ci-dessous !
Un bon remplacement pour une piratebox (bien que sans la fonction de chat et l'upload).
C'est exactement ce que je cherchais !
Les choses fonctionnent pour l'essentiel, mais le site web ne s'affiche pas de lui-même et, au lieu de cela, je vois une erreur :
2023-03-31 12:02:35 [info / 160kB] > GET /generate_204 (302 Found) [236ms]
L'exception de tâche n'a pas été récupérée
futur : coro=
Traceback (dernier appel le plus récent) :
File "uasyncio/core.py", line 1, in run_until_complete
Fichier "phew/server.py", ligne 242, dans _handle_request
File "phew/server.py", line 161, in _parse_headers
ValueError : il faut plus d'une valeur pour décompresser
Je me demande si cela n'a pas un rapport avec le fait que mon ancien téléphone est toujours sous Android 6...
Comment modifier ce code pour inclure le code HTML dans le programme ? J'ai essayé et cela n'a pas fonctionné pour moi.
Je trouve le déroulement du programme très confus.
Bonjour, je suis ravi de vous aider ! Pourriez-vous décrire votre problème plus en détail et me dire quel appareil vous utilisez pour le portail captif ?
Je ne sais pas si c'est le cas, mais c'est le cas. J'essaie de faire fonctionner ceci sur un Pico W. L'AP démarre, le DNS démarre, le serveur web ne démarre jamais ou prend un looooooong moment (plusieurs minutes) pour démarrer. Est-ce que vous avez des idées/cliniques/suggestions sur la raison de ce problème ? Je vous remercie.
Pouvez-vous m'aider à comprendre quelle ligne de code applique/ouvre automatiquement le portail captif sur le navigateur du client, après une connexion réussie au hotspot ? Il ne semble pas ouvrir automatiquement quoi que ce soit. Je me connecte depuis mon ordinateur portable.
Merci pour cette bonne description.
J'aimerais ajouter un deuxième ou même un troisième SSID au même AP. Y a-t-il un moyen de le faire avec Phew ?
Qu'en pensez-vous ?
Non, il faut utiliser un raspberry pi pico pour chaque ssid.