Everything about the Raspberry Pi Pico W
Today, 30 June 2022 at 8.00 AM UK time Raspberry Pi released the Pico W.
Here is everything (that we know) about the newest Raspberry Pi.
This new variant of the beloved Pico has wireless capabilities thanks to the CYW43439 wireless chip.
Just like the Pico, at the heart of each Pico W is RP2040, which is Raspberry Pi’s first silicon chip.
To top it off, Raspberry Pi also released the Pico H and Pico WH variants.
Note: if you are looking to reserve a Raspberry Pi 4 / 4 GB or Pi 4 / 8 GB or Coral USB accelerator, and are located within the EU + Switzerland, take a look at our brand new PiCockpit Feature, the Raspberry Pi Reservation Tool – one per customer, and you are in a fair queue instead of needing to rush when Pis become available. If enough people ask us, we might also make the Pico W available for reservation.
Raspberry Pi Pico Variants
| Variant | Price | Headers? | Wireless? | Release (M/YY) |
| Pico | $4 | No | No | 1/21 |
| Pico H | $5 | Yes | No | 6/22 |
| Pico W | $6 | No | Yes | 6/22 |
| Pico WH | $7 | Yes | Yes | Sometime in 2022 |
Pico H – $5 – A Raspberry Pi Pico with pre-soldered headers
Pico W – $6 – A Raspberry Pi Pico with wireless
Pico WH – $7 – A Raspberry Pi Pico with both wireless and pre-soldered headers.
The Pico H and Pico W were released on 30 June 2022, while the Pico WH will be released in August 2022.
The Pico WH has an updated release timeline that is “later this year” in 2022, according to Raspberry Pi’s Alasdair Allen, who said “Later this year you’ll probably see the arrival of the Pico WH, and my guess is you can work out what that is yourselves.”
Here’s an update on the Pico WH in October. I got an update from Alasdair Allen who said,
“It’s awfully close to being out […] and it should be out ‘any time now.’ We wanted to make sure that we had a decent volume before pushing it out the door so folks could easily buy it.”
It’s not out yet, but it’s awfully close to being out. There is production hardware (and it is being produced in good numbers) and it should be out “any time now.” We wanted to make sure that we had a decent volume before pushing it out the door so folks could easily buy it.
— Alasdair Allan (@aallan) October 24, 2022
In this post, we will explain the similarities and differences between the Pico W and the Pico. Of course we will also present some cool Pico W projects.
Is the Pico H just a traditional Pico with pre-soldered headers?

In essence, yes.
But there’s a slight difference at the SWD debug headers and there’s no castellation (semi-circle holes at the edge) on the pins.
In order to use the SWD debug header on the Pico H, you must use these connectors: 1.0mm pitch 3-pin JST ‘SH’ connector either BM03B-SRSS-TB (top entry) or SM03B-SRSS-TB (side entry) types, or compatible alternatives.
Ground pins are also distinctly square on the Pico H, rather than being a regular round hole.
Where can I buy a Pico W?
Pick up your Pico W at our store.
For a quick overview watch this video.
Hardware
Pico W wireless interface (CYW43439)
The Infineon CYW43439 supports IEEE 802.11 b/g/n wireless LAN and Bluetooth 5.2. At launch, only the wireless LAN will be supported.
As opposed to the Raspberry Pi 4, the Pico W only has single-band 2.4 GHz Wi-Fi 4. The Pi 4 has dual-band Wi-Fi 2.4/5 GHz, but regarding the Bluetooth, the Pico W outshines Raspberry Pi’s flagship, which only has Bluetooth 5.0. The CYW43439 supports BLE and a single antenna shared between Wi-Fi and Bluetooth.
Note Bluetooth is not available yet. It will likely be added in a future firmware update.
If you take a closer look at the Pico W, you will notice the triangle shaped PCB antenna similar to the Raspberry Pi 4. Raspberry Pi uses an onboard antenna licensed from ABRACON.
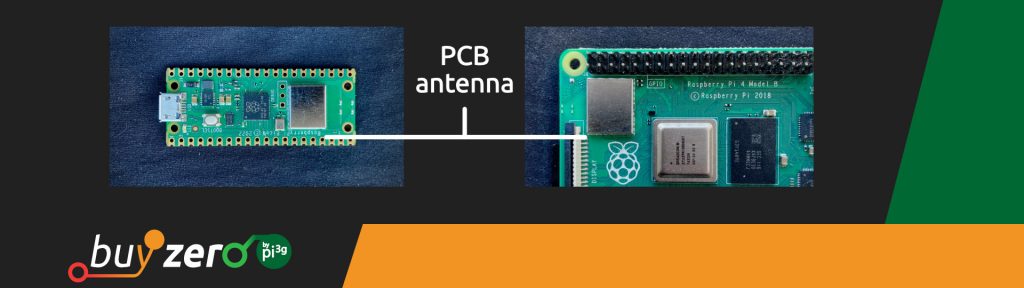
That means that no additional antenna is needed. The wireless interface is connected via SPI to the RP2040.
According to the official datasheet, the Infineon CYW43439 also has the following features:
• WiFi 4 (802.11n), Single-band (2.4 GHz)
• WPA3
• SoftAP (Up to 4 clients)
The official datasheet also suggests that for best wireless performance, you should place the antenna in free space.
Putting metal under or close to the antenna can reduce its performance in gain and bandwidth.
However, adding grounded metal to the sides of the antenna can improve the antenna’s bandwidth.
Can the Pico W be turned into a WiFi access point?
Yes, because its Infineon CYW43439 supports SoftAP (up to 4 clients).
In fact, you can also make the Pico W into a captive portal!

Processing hardware
Except for the wireless interface, the hardware is almost identical to the original Pico.
- RP2040 microcontroller with 2MB of flash memory
- On-board single-band 2.4GHz wireless interfaces (802.11n)
- Micro USB B port for power and data (and for reprogramming the flash)
- 40 pin 21mmx51mm ‘DIP’ style 1mm thick PCB with 0.1″ through-hole pins also with edge castellations
- Exposes 26 multi-function 3.3V general purpose I/O (GPIO)
- 23 GPIO are digital-only, with three also being ADC capable
- Can be surface mounted as a module
- 3-pin ARM serial wire debug (SWD) port
- Simple yet highly flexible power supply architecture
- Various options for easily powering the unit from micro USB, external supplies or batteries
- Dual-core cortex M0+ at up to 133MHz
- On-chip PLL allows variable core frequency
- 264kByte multi-bank high performance SRAM
- External Quad-SPI Flash with eXecute In Place (XIP) and 16kByte on-chip cache
- High performance full-crossbar bus fabric
- On-board USB1.1 (device or host)
- 30 multi-function general purpose I/O (four can be used for ADC)
- 1.8-3.3V I/O voltage
- 12-bit 500ksps analogue to digital converter (ADC)
- Various digital peripherals
- 2 × UART, 2 × I2C, 2 × SPI, 16 × PWM channels
- 1 × timer with 4 alarms, 1 × real time clock
- 2 × programmable I/O (PIO) blocks, 8 state machines in total
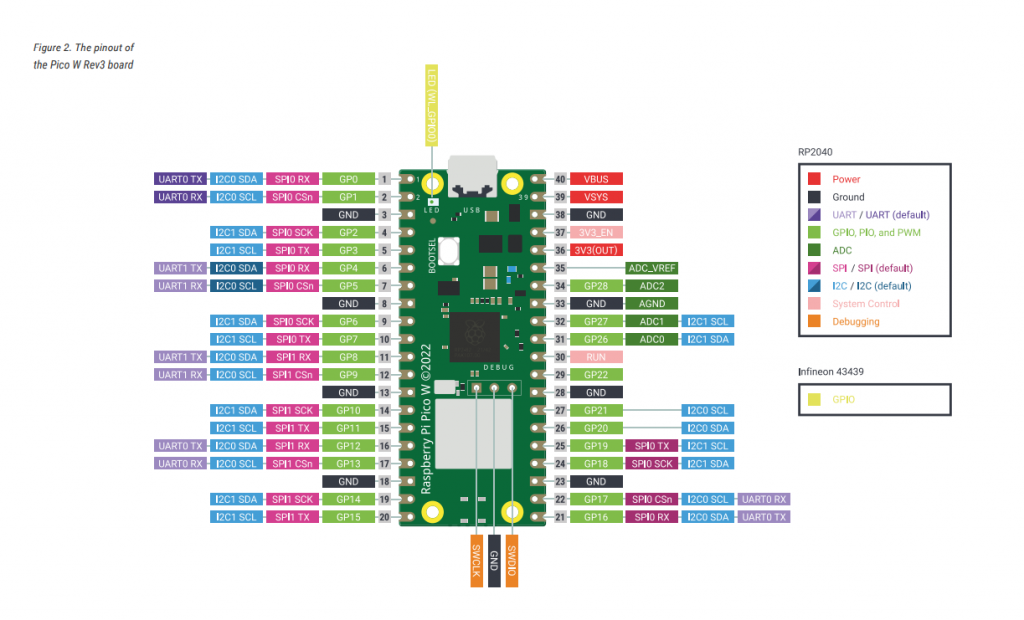
The external pinout nearly identical to the Raspberry Pi Pico.
The only difference is with the LED and SWD debug pins.
The onboard LED is controlled via the WL_GPIO0 Pin of the Infineon 43439 chip. On the Pico, the LED was connected to GPIO Pin 25.
Furthermore, the SWD debug pins were moved towards the center of the board, to create space for the PCB antenna. You can find them between the RP2040 and the CYW43439 and the order from left to right is still SWCLK, GND, SWDIO.
Software
Since the Pico W is based on the RP2040 chip, you can program it just like the Pico. That means you can program it in C/C++ and MicroPython and that code written for the Pico (that does not use the onboard LED) should work on the Pico W.
Raspberry Pi provides a ‘Connecting to the Internet with Raspberry Pi Pico W’ guide for C/C++ and MicroPython. To make your start with the Pico W easier, we also put together some example projects.
C/C++ and the Pico-SDK
There is an update to the Pico-SDK to enable the wireless capabilities of your Pico W. The setup and usage is exactly the same as with the Pico. Watch our video to get started with the Pico W and C/C++.
The updated Pico-SDK also contains some examples for wireless use.
MicroPython and Thonny
The most convenient way to use MicroPython with the Pico W is to use the Thonny IDE. Raspberry Pi released a new MicroPython port for the Pico W.
Note MicroPython is board specific. Hence there are different (and incompatible) MicroPython versions for the Pico and the Pico W. Make sure to always use the correct version for your board.
That being said, the way of programming the Pico W is exactly the same, so if you have used the Pico with MicroPython before, it should be a breeze.
Pico H and Pico WH
As mentioned, Raspberry Pi also released the Pico H and Pico WH. The ‘H’ added to the name means it comes with presoldered headers. The Pico H is just like our Pico Comfort, but for the SWD debug Pins Raspberry Pi uses a horizontal JTAG debug header. The Pico WH will likely use the same two rows of 1×20 headers and some vertical header for the debug pins.
Getting started with the Raspberry Pi Pico W
This section will highlight simple tricks and patterns that will help you get started with your Raspberry Pi Pico W.
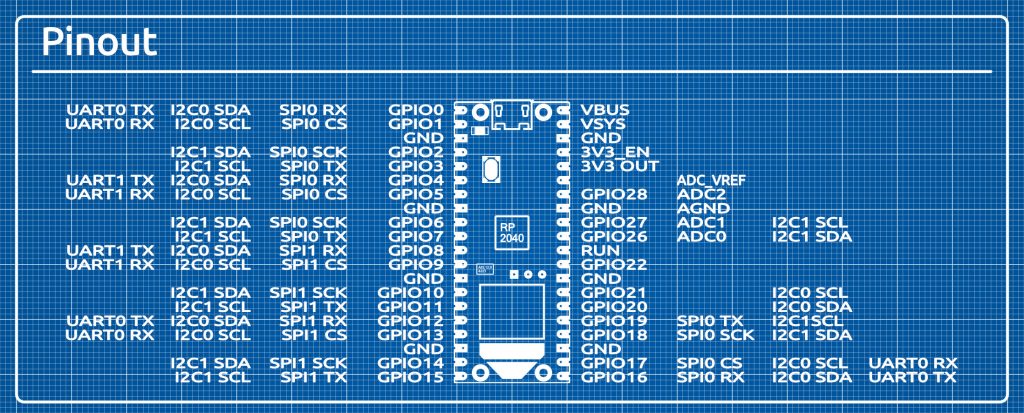
Raspberry Pi Pico W pinout
Flashing the MicroPython UF2
A fundamental setup task that you’ll need to do is to flash the MicroPython UF2 onto your Pico W.
First, download the UF2 file specifically made for the Raspberry Pi Pico W here. Alternatively, you can find the nightly builds here.
Do note that you cannot use the UF2 from the original Raspberry Pi Pico.
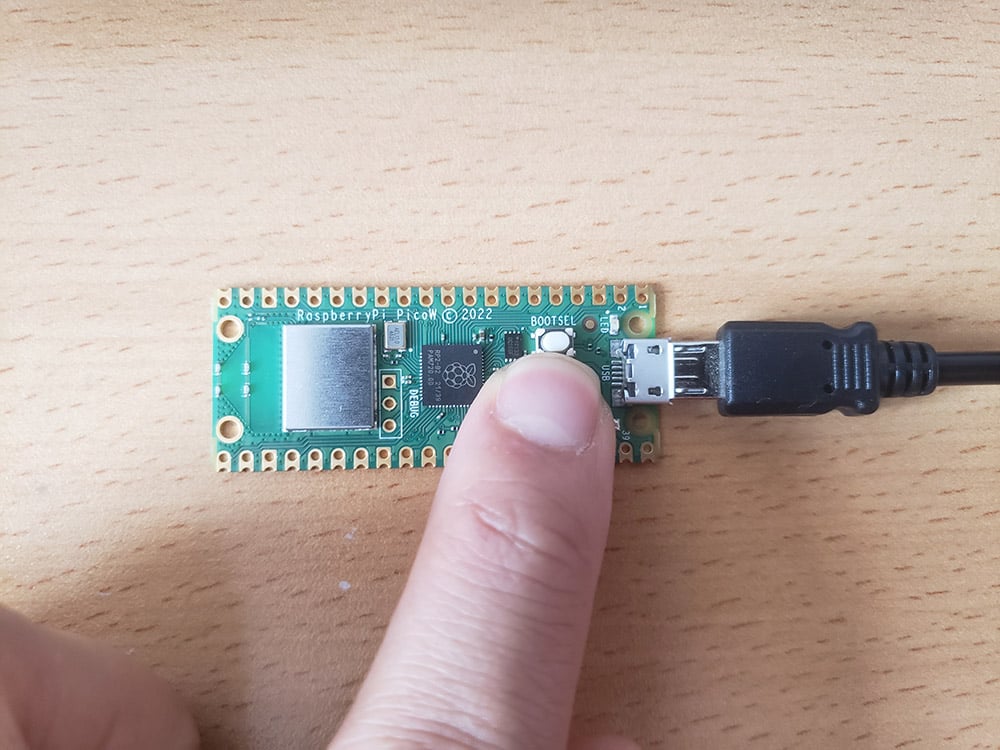
To upload the UF2 file, you will need to press and hold the BOOTSEL button and then plugging in the USB.
You will see a new volume called RPI-RP2 on your file explorer.
Copy the UF2 file onto that drive.
It will automatically disconnect upon upload.
That’s it! Your Raspberry Pi Pico W is now ready to accept MicroPython code.
Onto the next step…
Installing Thonny IDE
The easiest way to run MicroPython code and to access a shell on the Raspberry Pi Pico W is to use the Thonny IDE.
Thonny comes by default on the Raspberry Pi OS. However, you might want to install it on your main computer for your convenience.
Here’s how: go to https://thonny.org/ and you will be able to find the latest versions on the front page.
You will likely be greeted by a pop-up window asking you to update. Go ahead with it.
The update ran fine when I ran Thonny on my Raspberry Pi OS, however, on Windows, there was this error saying “SSL: CERTIFICATE_VERIFY_FAILED”.
You can fix this by downloading this certificate (https://letsencrypt.org/certs/lets-encrypt-r3.der), then right click on the downloaded file and “Install Certificate” and you’ll no longer encounter this error.
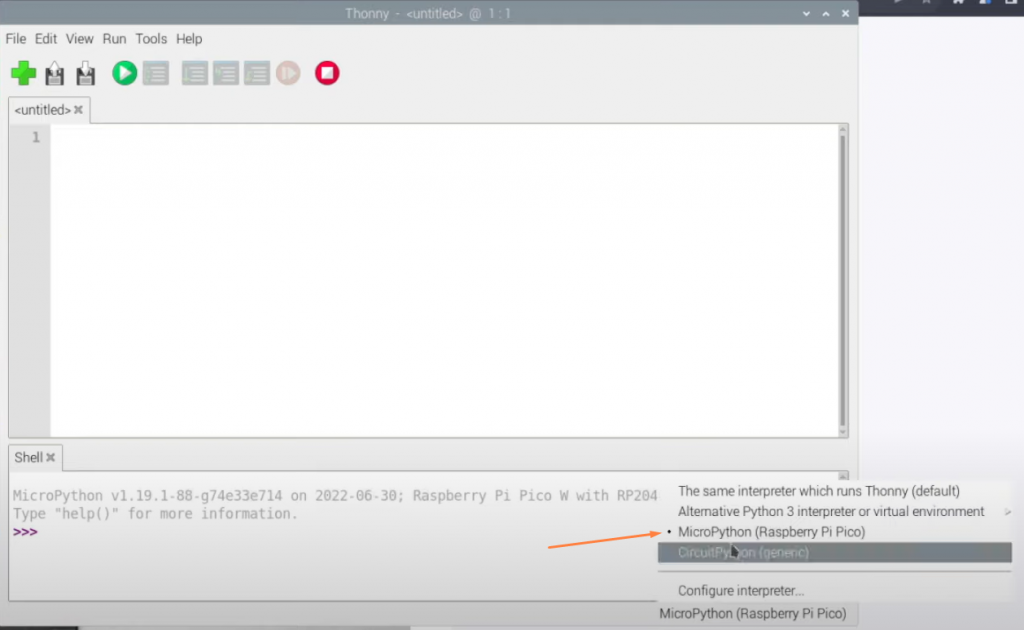
Make sure you have chosen “MicroPython (Raspberry Pi Pico)” on the bottom right corner.
Uploading files to your Raspberry Pi Pico W
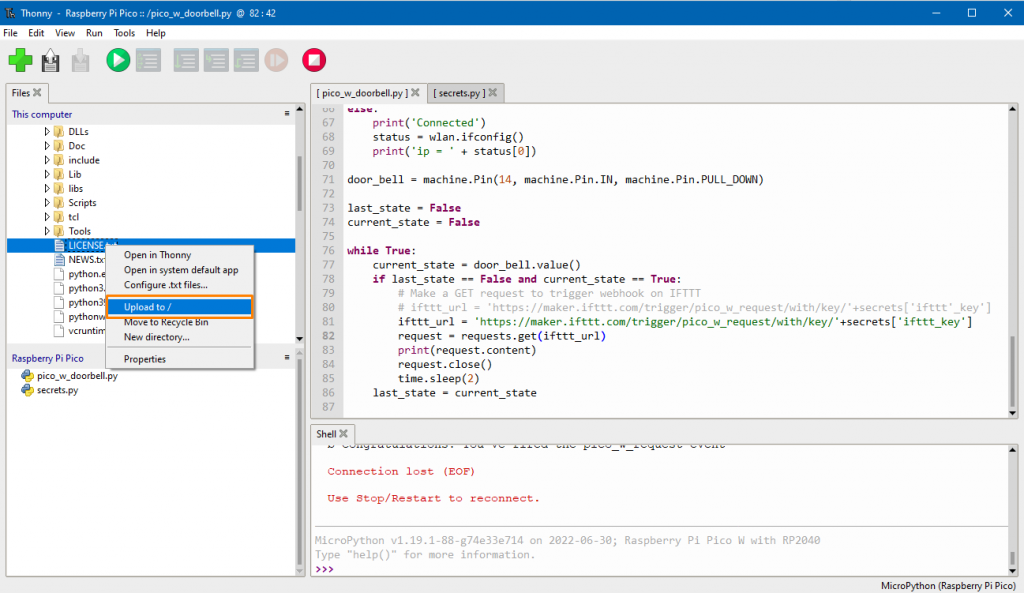
Here’s how you can upload your MicroPython files onto the Raspberry Pi Pico W with Thonny.
Plug in your Raspberry Pi Pico W.
In Thonny, go to View > Files.
You will see two sections. Files on your computer on top and files on the Raspberry Pi Pico W.
Right click on the files you want to upload and select Upload to /
Blink onboard LED
A fundamental difference between the original Raspberry Pi Pico and the Pico W is how you would blink the onboard LED.
In the past, you would control the LED by using this code:
led = machine.Pin(25, machine.Pin.OUT)However, on the Raspberry Pi Pico W, you would use “LED” rather than 25.
led = machine.Pin('LED', machine.Pin.OUT)Hence, in order to blink the onboard LED, you will write this code:
import machine
import time

led = machine.Pin('LED', machine.Pin.OUT)

while (True):
    led.on()
    time.sleep(.2)
    led.off()
    time.sleep(.2)
Save this as main.py and it will automatically run when the Pico W is powered.
Connecting to WiFi
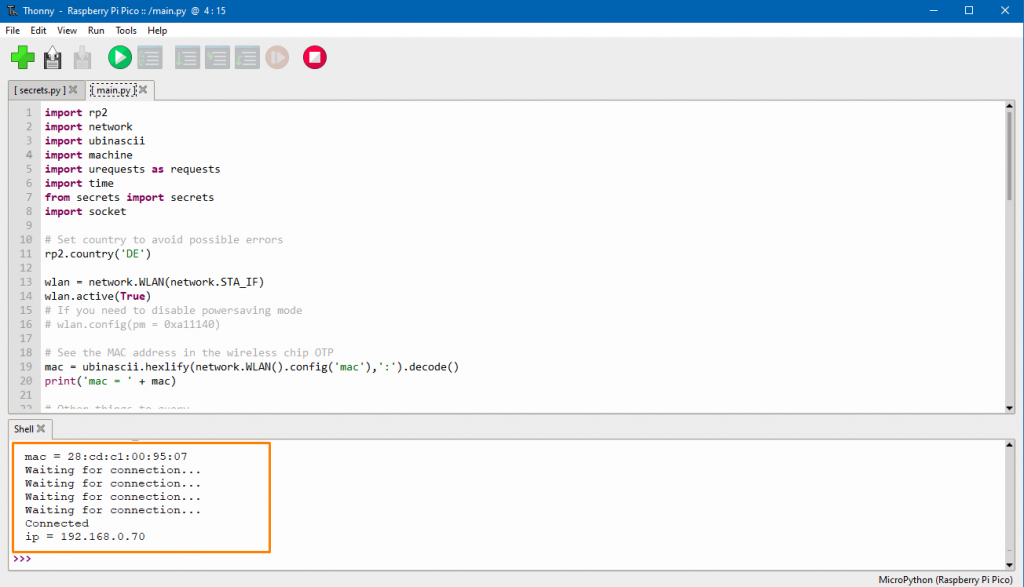
Below is simplified code that will allow you to
- Connect to WiFi
- 10-second timeout
- Print “Waiting for connection” while connecting to the network defined in the variables ssid and pw
- Light the onboard LED upon a successful connection
import network
import time

wlan = network.WLAN(network.STA_IF)
wlan.active(True)

ssid = "insert-your-SSID-here"
pw = "insert-your-pw-here"

wlan.connect(ssid, pw)

def light_onboard_led():
    led = machine.Pin('LED', machine.Pin.OUT)
    led.on();

timeout = 10
while timeout > 0:
    if wlan.status() >= 3:
        light_onboard_led()
        break
    timeout -= 1
    print('Waiting for connection...')
    time.sleep(1)

wlan_status = wlan.status()
In a real-world project, it would be preferable to create a separate file (for example, secrets.py) and store the ssid and pw there, then import it into the main file.
There is also not much feedback with this code nor any error handling. If you’re successful, you get a lit LED. If you are not, you get no feedback.
Hence, here’s a more elegant way to connect to a network.
The following code adjusts for regional differences in the rp2.country(“DE”). Change this to your country, such as “GB”, “US”, etc.
When you successfully connect to a WiFi network, you will see three blinks of the onboard LED upon successful connection. Any other number of blinks will mean something else, based on the following number of blinks:
# Handle connection error
# Error meanings
# 0  Link Down
# 1  Link Join
# 2  Link NoIp
# 3  Link Up
main.py
import rp2
import network
import ubinascii
import machine
import urequests as requests
import time
from secrets import secrets
import socket

# Set country to avoid possible errors
rp2.country('DE')

wlan = network.WLAN(network.STA_IF)
wlan.active(True)
# If you need to disable powersaving mode
# wlan.config(pm = 0xa11140)

# See the MAC address in the wireless chip OTP
mac = ubinascii.hexlify(network.WLAN().config('mac'),':').decode()
print('mac = ' + mac)

# Other things to query
# print(wlan.config('channel'))
# print(wlan.config('essid'))
# print(wlan.config('txpower'))

# Load login data from different file for safety reasons
ssid = secrets['ssid']
pw = secrets['pw']

wlan.connect(ssid, pw)

# Wait for connection with 10 second timeout
timeout = 10
while timeout > 0:
    if wlan.status() < 0 or wlan.status() >= 3:
        break
    timeout -= 1
    print('Waiting for connection...')
    time.sleep(1)

# Define blinking function for onboard LED to indicate error codes
def blink_onboard_led(num_blinks):
    led = machine.Pin('LED', machine.Pin.OUT)
    for i in range(num_blinks):
        led.on()
        time.sleep(.2)
        led.off()
        time.sleep(.2)

# Handle connection error
# Error meanings
# 0  Link Down
# 1  Link Join
# 2  Link NoIp
# 3  Link Up
# -1 Link Fail
# -2 Link NoNet
# -3 Link BadAuth

wlan_status = wlan.status()
blink_onboard_led(wlan_status)

if wlan_status != 3:
    raise RuntimeError('Wi-Fi connection failed')
else:
    print('Connected')
    status = wlan.ifconfig()
    print('ip = ' + status[0])
secrets.py
secrets = {
    'ssid': 'your-ssid',
    'pw': 'your-pw',
    }
Serve a webpage on local IP
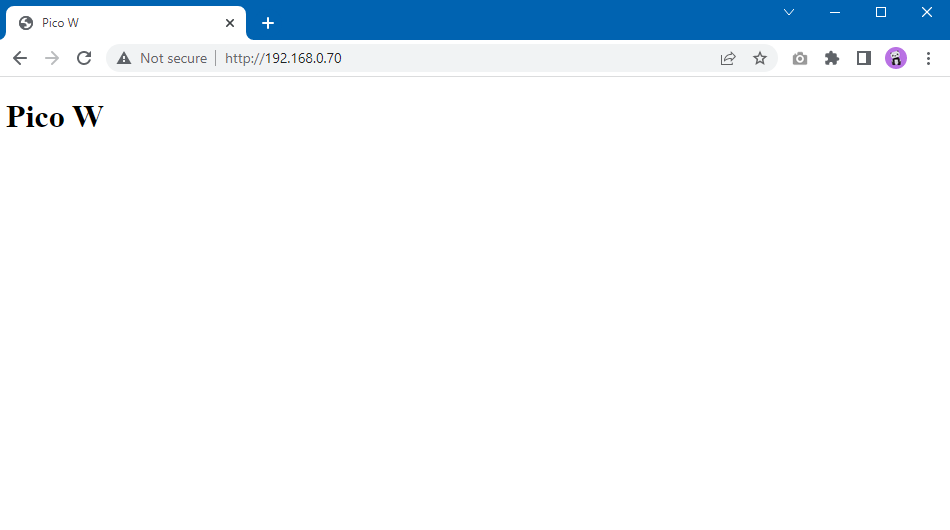
In order to serve a webpage using the Raspberry Pi Pico W, you will need three files.
- main.py – the main bulk of the code (which automatically runs on the Pico W)
- secrets.py – containing ssid and pw
- index.html – containing the webpage that will be served
main.py will connect to your WiFi network, defined in secrets.py. Then, it will open up a socket that will listen for any connections to the Raspberry Pi Pico W.
If someone connects, it will deliver the webpage, named index.html.
Here’s the code for main.py and index.html. secrets.py can be taken from the previous example.
main.py
import rp2
import network
import ubinascii
import machine
import urequests as requests
import time
from secrets import secrets
import socket
# Set country to avoid possible errors
rp2.country('DE')
wlan = network.WLAN(network.STA_IF)
wlan.active(True)
# See the MAC address in the wireless chip OTP
mac = ubinascii.hexlify(network.WLAN().config('mac'),':').decode()
print('mac = ' + mac)
# Load login data from different file for safety reasons
ssid = secrets['ssid']
pw = secrets['pw']
wlan.connect(ssid, pw)
# Wait for connection with 10 second timeout
timeout = 10
while timeout > 0:
if wlan.status() < 0 or wlan.status() >= 3:
break
timeout -= 1
print('Waiting for connection...')
time.sleep(1)
# Define blinking function for onboard LED to indicate error codes
def blink_onboard_led(num_blinks):
led = machine.Pin('LED', machine.Pin.OUT)
for i in range(num_blinks):
led.on()
time.sleep(.2)
led.off()
time.sleep(.2)
wlan_status = wlan.status()
blink_onboard_led(wlan_status)
if wlan_status != 3:
raise RuntimeError('Wi-Fi connection failed')
else:
print('Connected')
status = wlan.ifconfig()
print('ip = ' + status[0])
# Function to load in html page
def get_html(html_name):
with open(html_name, 'r') as file:
html = file.read()
return html
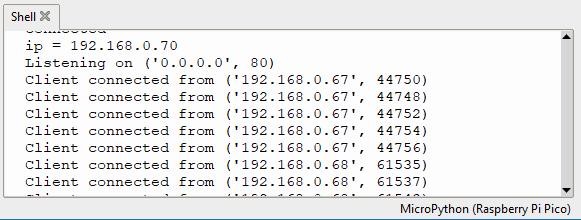
# HTTP server with socket
addr = socket.getaddrinfo('0.0.0.0', 80)[0][-1]
s = socket.socket()
s.bind(addr)
s.listen(1)
print('Listening on', addr)
# Listen for connections
while True:
try:
cl, addr = s.accept()
print('Client connected from', addr)
response = get_html('index.html')
cl.send('HTTP/1.0 200 OK\r\nContent-type: text/html\r\n\r\n')
cl.send(response)
cl.close()
except OSError as e:
cl.close()
print('Connection closed')
index.html
<!DOCTYPE html>
<html>
    <head>
        <title>Pico W</title>
    </head>
    <body>
        <h1>Pico W</h1>

    </body>
</html>
Broadcasting a WiFi network (SoftAP access point)
I’m writing this in the middle of July 2022, so things are rapidly changing.
If you haven’t flashed your Raspberry Pi Pico W with the latest MicroPython UF2, then do so now as the engineers at Raspberry Pi are updating it as we speak. Get the latest build here.
The latest nightly build, released July 15, has several updates. For one, it allows you to secure your WiFi network with a password (previously it was broken).
There are some bugs. For example, I wasn’t able to change the SSID name by stopping and running the script in Thonny. I had to do a harder reset by pulling the USB from the Pico W.
The crucial part to set up an access point is this segment here:
import network
import machine

ssid = '<your-ap-name>'
password = '<your-pw>'

ap = network.WLAN(network.AP_IF)
ap.config(essid=ssid, password=password)
ap.active(True)

while ap.active() == False:
  pass

print('Connection successful')
print(ap.ifconfig())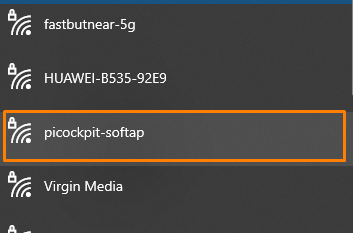
Here’s a complete gist from Raspberry Pi’s head of documentation, Alasdair Allen, which makes your Pico W an access point with SSID MicroPython-AP, password 123456789.
When you connect to it, it will send a web page with “Hello from Pico W”
import socket
import network
import machine

ssid = 'MicroPython-AP'
password = '123456789'

led = machine.Pin("LED",machine.Pin.OUT)

ap = network.WLAN(network.AP_IF)
ap.config(essid=ssid, password=password)
ap.active(True)

while ap.active() == False:
  pass

print('Connection successful')
print(ap.ifconfig())

html = """<!DOCTYPE html>
<html>
    <head> <title>Pico W</title> </head>
    <body> <h1>Pico W</h1>
        <p>Hello from Pico W.</p>
    </body>
</html>
"""

addr = socket.getaddrinfo('0.0.0.0', 80)[0][-1]
s = socket.socket()
s.bind(addr)
s.listen(1)

print('listening on', addr)
led.off()

# Listen for connections
while True:
    try:
        cl, addr = s.accept()
        print('client connected from', addr)
        request = cl.recv(1024)
        led.on()
        print(request)

        cl.send('HTTP/1.0 200 OK\r\nContent-type: text/html\r\n\r\n')
        cl.send(html)
        cl.close()
        led.off()

    except OSError as e:
        cl.close()
        print('connection closed')
Raspberry Pi Pico W beginner tutorials
We have compiled a few beginner tutorials to help you learn about the Raspberry Pi Pico W.
Raspberry Pi Pico W mega tutorial
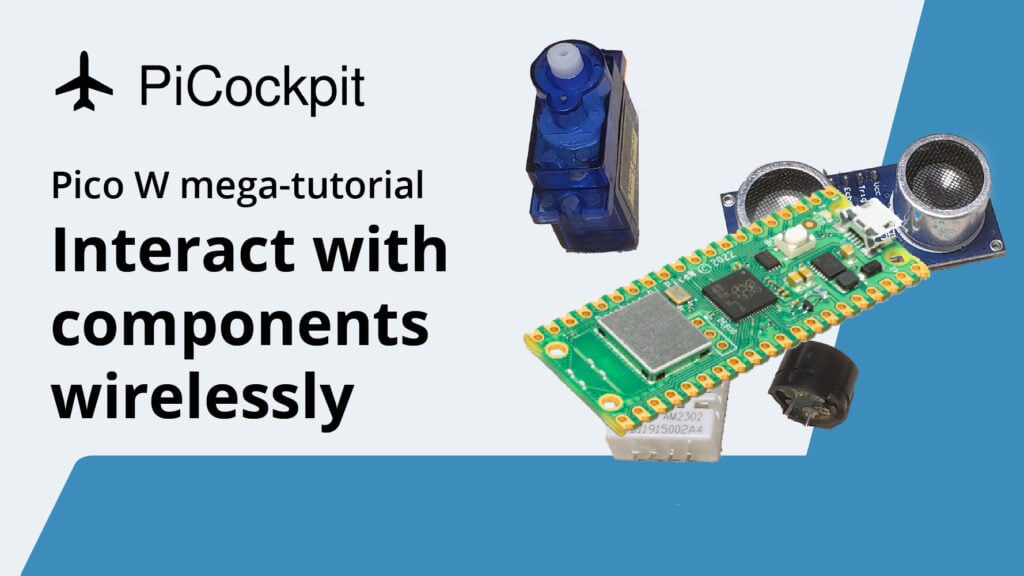
For absolute beginners with a kit of components, this tutorial will walk you through interacting with your components wirelessly.
This tutorial is specifically focused on the Pico W, which means it attempts to use the WiFi module as much as possible. So, instead of buttons, we’ll use a web browser with virtual buttons to control LEDs, buzzers. We’ll use a browser to view temperature and distance data instead of an LCD.
CLICK HERE: Raspberry Pi Pico W beginner’s components tutorial
Control Pico W onboard LED with a web server
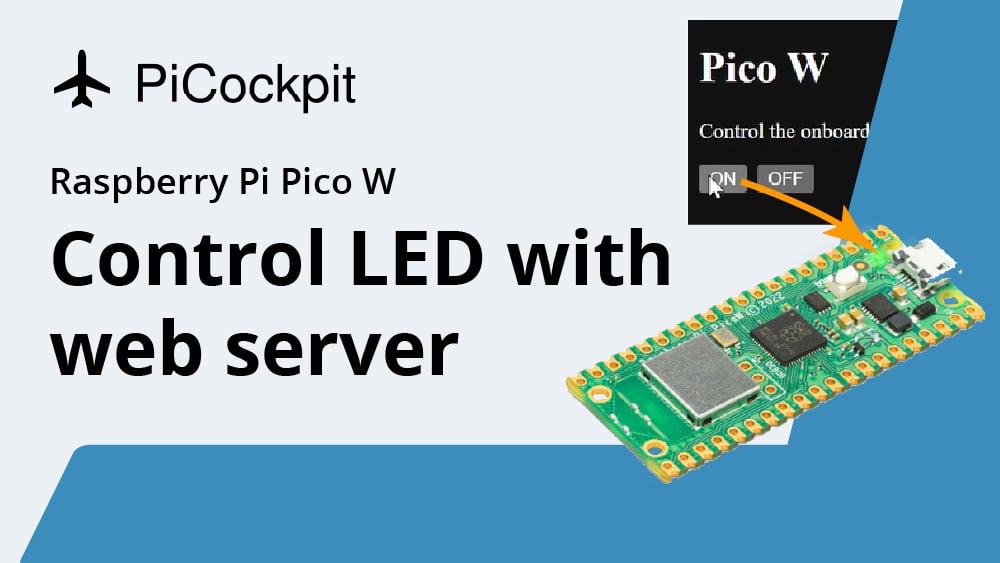
This is the most basic tutorial that will help you understand how to connect your Raspberry Pi Pico W to WiFi, launch a web server and control the onboard LED with the web server.
A web page will be served with an “on/off” button that can be used to control the onboard LED.
This tutorial forms the basis for many further projects that require remote control over WiFi.
CLICK HERE: Control Pico W onboard LED with a web server
Stream sensor data via web server on the Raspberry Pi Pico W
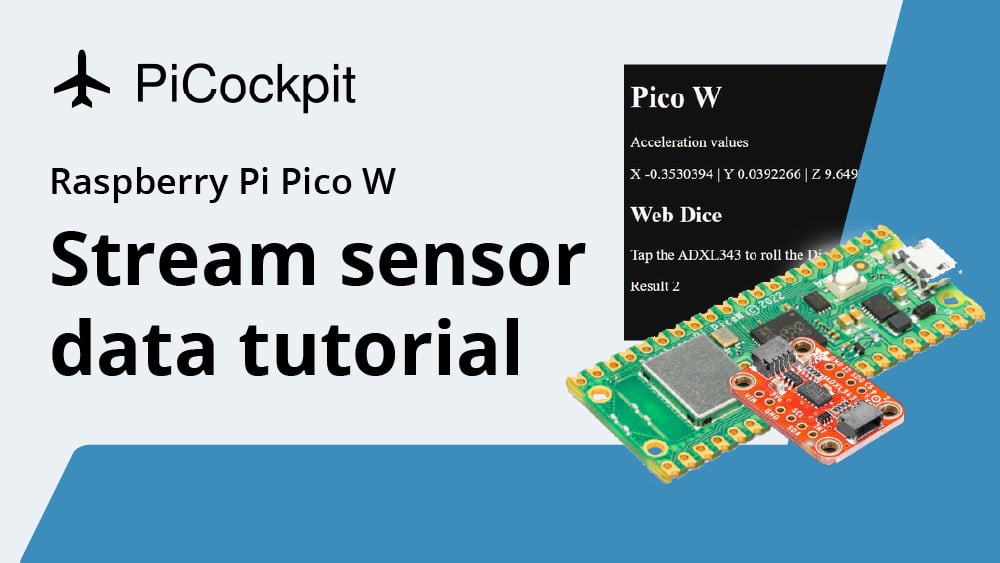
Using the accelerometer ADXL343, this tutorial will show you how to dynamically update the readings on a web page that’s served by your Raspberry Pi Pico W.
The web page updates every second when a client visits the Pico W’s IP address. There’s also a digital web dice function that’s activated when the ADXL343 is tapped.
You will learn how to use libraries, set up WiFi, serve a web page and how to display the sensor’s values on the web page.
CLICK HERE: Stream sensor data over WiFi with Raspberry Pi Pico W
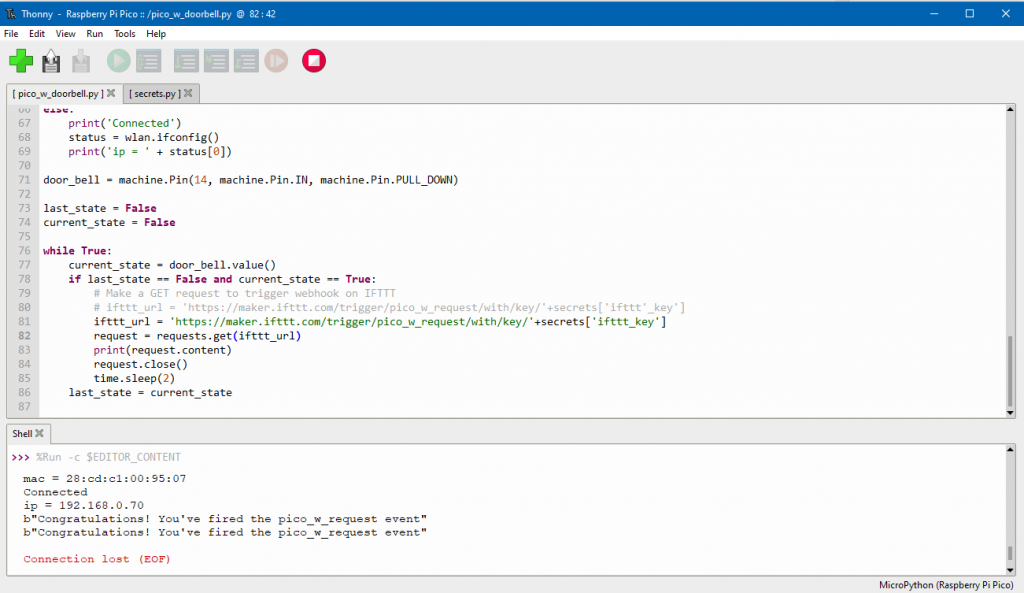
Raspberry Pi Pico W Wi-Fi Doorbell tutorial (HTTP requests & IFTTT)
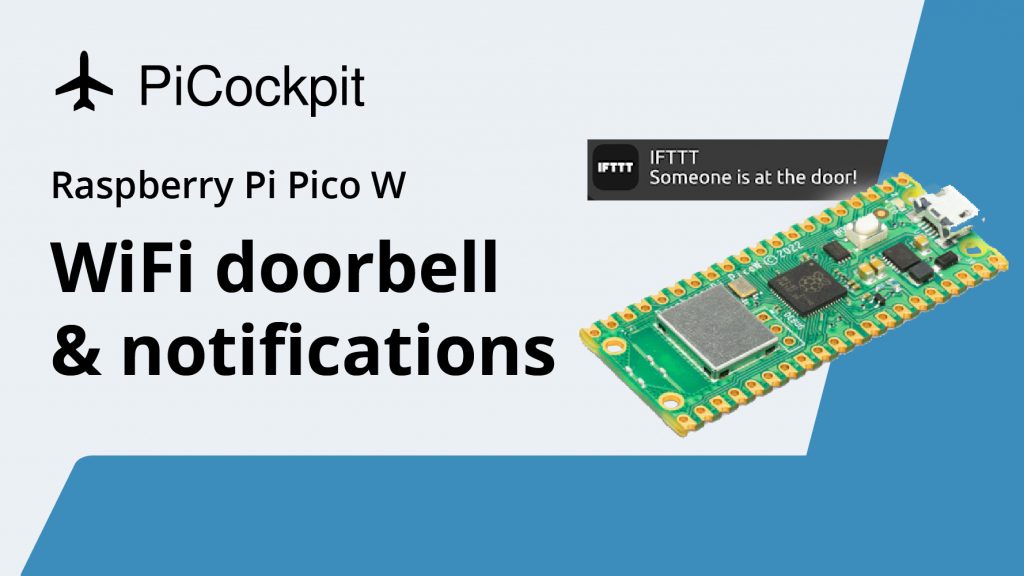
This tutorial will teach you how to use the Raspberry Pi Pico W to shoot a HTTP request.
We will use a button to simulate a doorbell. When pressed, the button will trigger the Pico W to hit IFTTT’s endpoint, which will then trigger an email notification or app notification.
CLICK HERE: Raspberry Pi Pico W Wi-Fi Doorbell tutorial (HTTP requests & IFTTT)
Raspberry Pi Pico W remote weather station (solar powered and SoftAP)
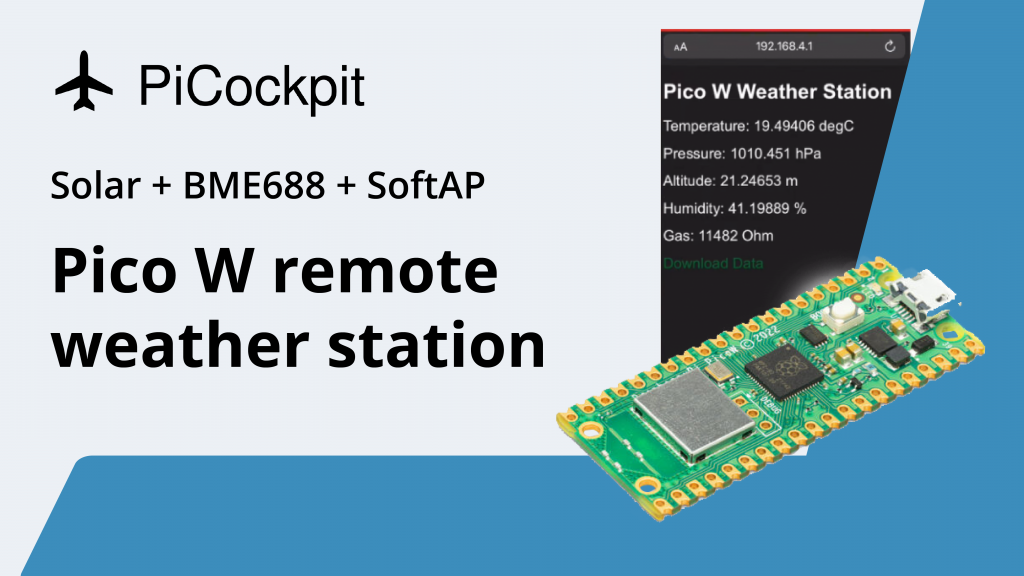
In this tutorial, learn to broadcast a SoftAP access point that transmit weather station data wirelessly and power it with solar power!
CLICK HERE: Raspberry Pi Pico W remote weather station (solar powered and SoftAP)
Control your Pico W wirelessly with PiCockpit!

You can control and get data from your Pico W wirelessly by using PiCockpit.
PiCockpit allows you to get values, control and use PWM through a GUI via its GPIO applet.
You can also see your Pico W’s stats through the PiStats applet.
Integrating PiCockpit into your Pico W is super easy.
Write even less code with PiCockpit and the Pico W
PiCockpit makes it easy for you to control your GPIO pins without having to write any code.
If you look at tutorial number 2, notice how much code is necessary just to toggle an LED.
With our new Pico W integration, PiCockpit makes it so much easier as you don’t have to program anything at all. Not even the WiFi configuration — that’s done with our setup wizard.
10. Simple LED control with PiCockpit and Pico W
If you have your LED configured exactly the way I’ve done it in tutorial no. 2, then all that’s left is to set it up on PiCockpit.
If you’re coding it out, you’ll declare which pin your LED is on using led = machine.Pin(2, machine.Pin.OUT)
On PiCockpit, you’ll go to your GPIO applet, and the scroll to “GPIO Output (On/Off)”.
Choose BCM02 from the dropdown menu because your LED is on GPIO 2.
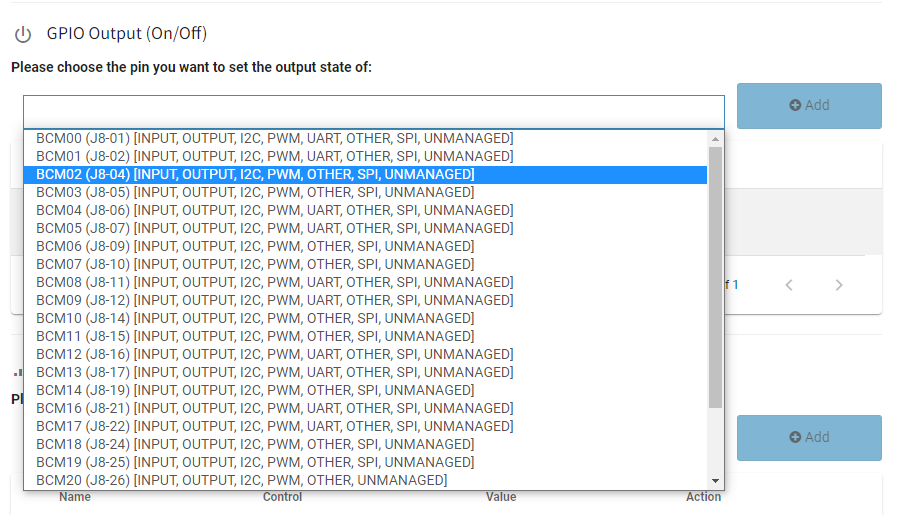
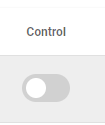
Then, on the “Control” column, toggle the switch to turn the LED on.
You can also easily use the Software PWM section below to control the brightness of your LED.
Note that you will need to remove the previous setting because you cannot have two outputs on the same GPIO.
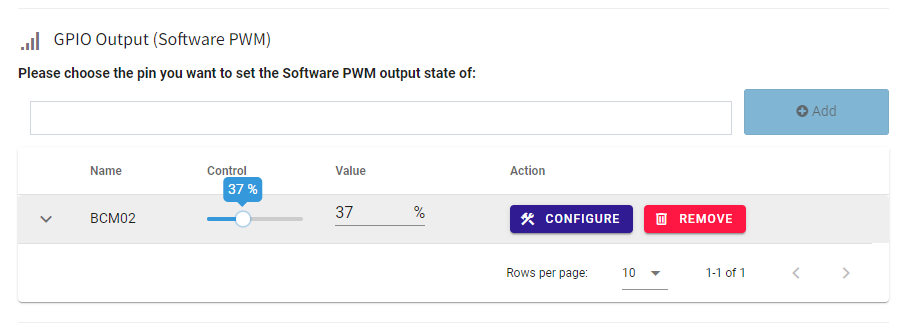
As you toggle the “Control” slider, you’ll notice the brightness of the LED changing.

11. Pico W, 5V fan and a transistor, controlled by PiCockpit
Let’s try something a little bit more comprehensive but using the same GPIO Output toggle.
To illustrate some real-world use cases, I will power a 5V fan using PiCockpit.
This is a low-power 5V fan taken from my Raspberry Pi 4, so it’s well within the output capabilities of the Raspberry Pi Pico W.
That said, because it’s a 5V fan, I can’t use a GPIO pin. In less power-intensive components, like an LED, you can have the GPIO do double duty of supplying power to the component and being the “switch” that turns it on and off.
But the 5V fan would require too high a voltage. So, the next best way is to put a transistor in the middle.
This allows me to supply 5V to the fan, while ensuring that I can turn it on and off.
Once again, because of PiCockpit, I did zero programming. I only did the hardware, which is wired as follows:
The fan is a 5V/0.12A fan, connected to 5V on the positive end (red wire), and the negative wire goes to the emitter leg of the transistor.
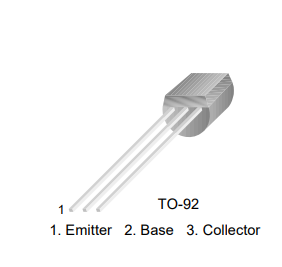
The transistor is a PN2222 (NPN) transistor, which means that it switches ON when it receives a high signal.
From left to right, with the semi-circled part facing away from you, the legs are the Emitter, Base and Collector.
The Base leg is connected to a 1K resistor, then connected to GPIO 15.
The Collector leg is connected to ground.
Configuring PiCockpit to work with transistor
Once again, super easy.
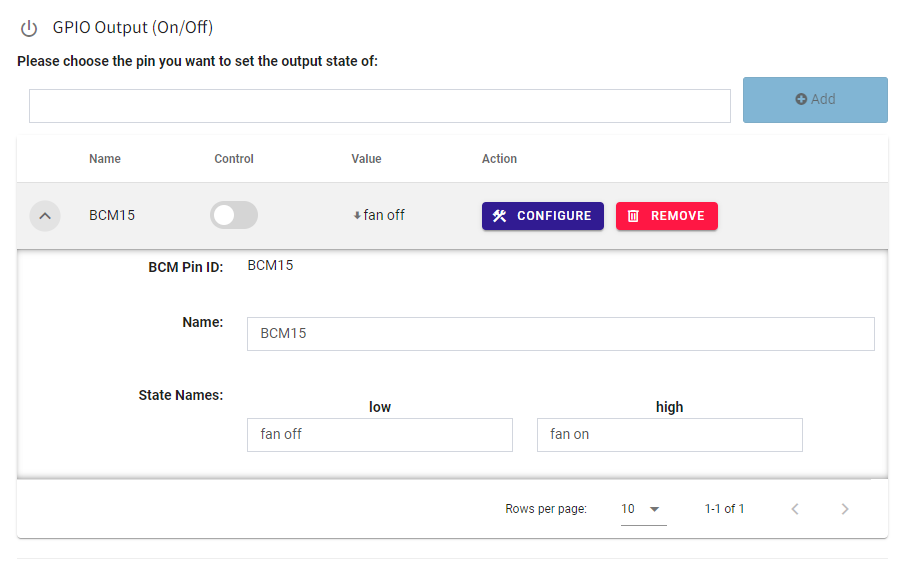
Go to the dropdown menu in the GPIO Output section and add BCM15.
Once it’s in, you can click the downward arrow and change the State Names to “fan off” and “fan on”.
Toggle the control switch and you should see the fan turning on.
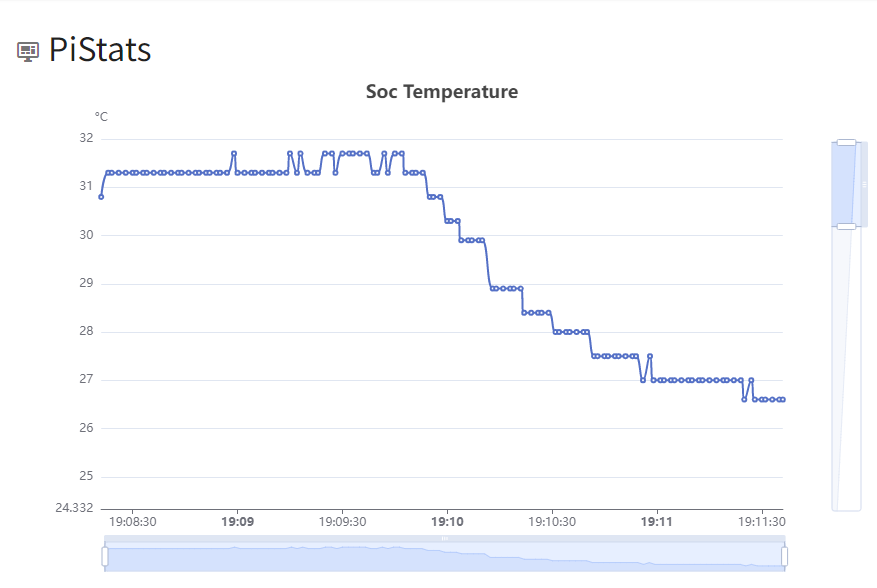
You can also use PiStats to see the drop in temperatures on your board.
Pico W projects
With the Raspberry Pi Pico W you can do everything that you can do with the Pico. But you can make it better by adding wireless control or output.
Most projects require some additional hardware, hence we got you covered with our Pico Kits.
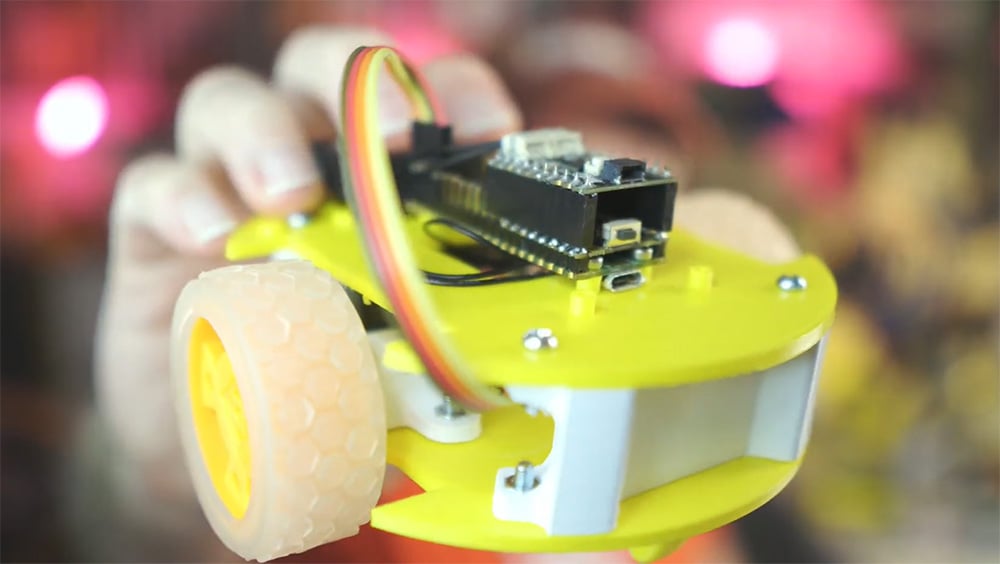
Burgerbot: upgraded from a regular Pico
Kevin McAleer built a Burgerbot with the regular Pico and when the Pico W came out, he took the chance to upgrade it.
In his YouTube video, he covers how he uses the Pico W, Node-Red and updated his code in order to connect the Pico W to the Burgerbot via MQTT.
Kevin chose Node-Red to build a dashboard and program his MQTT messages because it makes the process easier.
e-paper kitten image randomizer
Assemble in quiet reverence at the power of wireless! @Raspberry_Pi Pico W Placekitten randomiser! pic.twitter.com/U5jxbeWUwx
— Phil Howard (@Gadgetoid) June 30, 2022
Placekitten is a website that hosts cute cat pictures for use as a placeholder for web designers.
What Phil Howard did was to get the Pico W to ping Placekitten’s website and load a random photo of a cat onto his e-ink display.

Pimoroni makes the Pico Inky Pack which is a 2.9″ e-ink display which fits perfectly with a Pico W (with headers soldered on).
Once connected to WiFi, Phil pinged a URL in order to get an image to display on the e-ink display. The Pico Inky has a 296x128px display, which means that if you used the url http://placekitten.com/296/128, you will get an image that fits perfectly into the display.
Get your plants to text you
The @Raspberry_Pi Pico W is perfect for smart home devices, including smart plants!🪴
— Arm (@Arm) June 30, 2022
Yep, you read that right.@sandeepmistry details how to get plants texting you using the Pico W alongside tech from @pimoroni, @micropython and @twilio on @Hacksterio: https://t.co/5oyu9W81S8 pic.twitter.com/7xbxGvmYey
When your friends are thirsty, they’ll text you to ask if you want to go for a drink.
Why not get the same experience with your house plants?
Sandeep Mistry has done exactly that with the Raspberry Pi Pico W, Pimoroni Grow Kit and the Twilio SMS API.
Most fundamentally, the plant will tell you when it needed water. The sensor outputs a digital pulse signal with a frequency between 1 Hz and 30 Hz. If it’s dry, it will have a high frequency, and this triggers the Pico W to ping the Twilio SMS API to send a message.
Raspberry Pi Pico W vs Espressif ESP32
What a game changer the Raspberry Pi Pico W is.
When we compared the Raspberry Pi Pico to the ESP32, we picked the PICO-KIT because it had the most similar form factor to the Pico.
The big advantage the ESP32 had over the Pico W is WiFi and Bluetooth.
But that’s no longer the case. The Pico W has WiFi now and while the WLAN chip can do Bluetooth, as of early July, it’s not yet enabled.
So, if you need Bluetooth capability now, then you will do better with the ESP32.
That said, the ESP32 does have other advantages including varying CPU frequencies, including two faster speeds versus the Pico W.
The ESP32 has been on the market for much longer too, leading there to be many more projects that are built on it. Its documentation, experimentation and add-ons are miles ahead of the Raspberry Pi Pico range.
| Raspberry Pi Pico W | Espressif ESP32-PICO-KIT | |
| CPU Frequency | 133MHz | 80/160/240MHz |
| Microcontroller | RP2040 | Xtensa LX6 |
| Cores | 2 | 2 |
| Flash memory | 2MB | 4MB |
| RAM | 264KB | 520KB |
| GPIO | 26 (user-usable) | 36 |
| Has USB? | microUSB | microUSB |
| WiFi and/or BT? | Yes, both, BT not enabled at launch | Yes, both |
| Voltage | 1.8 – 5.5V or 5V USB | 3.3V (via pins) or 5V via USB or 5V-12V (via voltage regulator) |
| Size | 51x21mm | 52x20mm |
| Languages | MicroPython / C | MicroPython / C |
Community thoughts on Pico W vs ESP32
We started a thread on the Raspberry Pi forum about this exact topic and here are some great thoughts from the community:
Raspberry Pi forum user scruss said that the ESP32 has more processing power with the 160MHz variant, quoting 1639 pystones/second vs 1243 on the Pico W. The 240MHz is even faster.
He also listed out the following reasons why the ESP32 would triumph over the Pico W.
- hardware timers
- really nice ADC, with range tuning and direct voltage reading
- 2-channel DAC
- capacitive touch
- Hall effect magnetic sensor (wave a magnet at it, and it can tell you you’re waving a magnet at it)
- RMT channels for rather clever PWM
On the other hand, user scotty101 has this to say about the Pico W’s advantages:
- Development environment
- Supporting Raspberry Pi and its educational aims
- Prevalence and the size of the community.
- Ease of putting a new binary on to the Pico
“I like ESP32 but I hate having to download the esptool each time I restart an abandoned project. I have so little time that MicroPython on the Pico is quick and easy for me to get going with,” scotty101 said.
Finally, cleverca22 gave a balanced view of what he saw in both boards. Beyond the arguments made above, here are the additional points:
The Raspberry Pi Pico W has Programmable IO (PIO).
cleverca22 says he believes the ESP platform has a special memory management unit between the XIP and flash, so you can store multiple apps at once and this allows for rollbacks.
And the ESP platform controls the WiFi and Bluetooth directly from the CPU, which allows non-standard RF actions whereas the Pico W’s is likely to be managed using a closed-source blob, hence only allowing approved RF actions.
Pico W vs Zero 2 W
You might be rolling your eyes because you think we’re comparing apples to oranges.
But are we, really?
Let’s talk about the fundamental difference here. The Raspberry Pi Pico W is a microcontroller while the Raspberry Pi Zero 2 W is a microcomputer.
Put simply, the Raspberry Pi Pico W is designed to run one thing. The Zero 2 W is meant to be more dynamic – it can run multiple tasks, different OSes and you can program it in multiple languages.
Here’s a table explaining the differences:
| Can it… | Microcontroller (e.g. Raspberry Pi Pico W) | Microcomputer (e.g. Raspberry Pi Zero 2 W) |
| Run a server? | No | Yes |
| Blink a LED? | Much faster from start to end | Much slower; many more processes to go through |
| Auto-restart program on power failure? | Yes | Not by default |
| Play video games | Not without a lot of effort | Yes |
| Runs on battery? | Yes, much likely to last longer on average | Yes, does not last as long on average |
| Heat management? | None required usually | Heatsinks, fans, thermally conductive cases |
| Costs? | Lower | Higher |
| Size? | Smaller | Larger |
WiFi now no longer the Pi Zero W’s advantage
Now, one of the things that really attracted some users to the Pi Zero series is the integrated wireless.
In the past, you had to buy an accessory to give the original Pico wireless capability. It was pretty much the point that pushed people to use the Zero as a substitute for their projects.
That said, with the Pico W having wireless now, the advantage that the Zero W had no longer exists.
Bluetooth remains a Pi Zero W advantage… for now
At the time of release, the Pico W does have a Bluetooth chip in it but has not been enabled.
Raspberry Pi has said they will enable it in the future. Whenever that is.
So, as of now, if you need Bluetooth, the Pi Zero W is the better option.
Raspberry Pi Zero 2 W shortages = Pico W advantage
Another element that gives the Pico W such an advantage over the Zero 2 W is its availability.
In the first two weeks of its release, stock was still available in many stores, including ours. This certainly doesn’t reflect the situation for the Pi Zero 2, which is slated for low supply for the rest of 2022.
Of course, if you have a PiCockpit account, EU/Swiss users can also use our Reservation Tool to reserve your next Raspberry Pi.
How to decide?
Here’s the logic which I use to decide which to use:
| Scenario | What to get |
| I am better at a language other than C/Python | Zero |
| I have “unlimited” power (i.e. non-solar or battery use case) | Zero |
| I need to save data (such as temperature logs) | Zero |
| I need to use a camera | Zero |
| I want a GUI/video output | Zero |
| I need WiFi | Either |
| I need Bluetooth | Zero (as of July 2022) |
| I need the most compact setup | Pico W |
| I need quick restart on crash/power failure | Pico W |
| I don’t want to set up an OS | Pico W |
| I want the cheaper option | Pico W |
Under the microscope
Peter Mount filmed this video of the Pico W…
As usual @pimoroni delivered quickly… so I put the new @Raspberry_Pi PicoW under the microscope… #ebenana #RaspberryPi #RaspberryPicoW pic.twitter.com/MvJHfENvKF
— Peter Mount (@peter_mount) July 1, 2022
How did Raspberry Pi tease the Pico W’s release?
According to Raspberry Pi, nobody got the teaser which was a cow with Raspberry Pi graphics all over it.

They said, “We still can’t believe not one of you got the very abstract teaser we dropped on Twitter the night before Pico W launched. It’s a cow. Get it?”
Raspberry Pi Cow rearranged is Raspberry Pico W.
I guess now that the cat is out of the bag, talking about it is pretty moot.
More information
We have an encyclopedia of information for the regular Raspberry Pi Pico that will help you get started with the Raspberry Pi Pico W. Here’s where you can start learning about the Raspberry Pi Pico.
CLICK HERE: Everything you need to know about the Raspberry Pi Pico
There’s also general and specific documentation available straight from Raspberry Pi:
The Pico H debug connectors for the cable/wires side are actually
SHR-03V-S (without flange) or SHR-03V-S-B (with flange).
https://www.jst.co.uk/downloads/series/eSH_(21-03-24).pdf
https://shop.pimoroni.com/products/pimoroni-pico-debug-cable
https://kabel-me.eu/details/48010
Hmm, am I missing something or is that just a compatible connector? Here’s what I got from the official docs:
“We specify the connector to be a 1.0mm pitch 3-pin JST ‘SH’ connector either BM03B-SRSS-TB (top
entry) or SM03B-SRSS-TB (side entry) types, or compatible alternatives.”
https://datasheets.raspberrypi.com/debug/debug-connector-specification.pdf
Great work, would be even more useful, if you hadn‘t pushed the python code through the translater.
Thanks JJE for bringing this up to our attention. It’s definitely something to work on.
Danke!
Endlich funktioniert es!
Thank you for providing this info to the community, I found it very helpful.
[…] already have an article covering everything you need to know about the Pico W. Furthermore, if you’re a beginner with the Pico W, you can check out this […]
[…] While the web development world has moved on to using a frontend framework like React, Angular or Vue, serving websites on the Raspberry Pi Pico generally requires you to know how to write vanilla JavaScript. If you look at our tutorials in our Pico W mega article, you’ll see. […]
[…] At the time of writing, the Pico WH (H for headers) hasn’t been released. Our Pico W mega-article is keeping track of its release. […]
[…] Follow this link to learn how to update it. The link will also show you a quick-start method to broadcasting your own WiFi network. […]
[…] In many ways, a plant moisture meter is the perfect companion to the plant texting program that we’ve covered on this blog before. […]