关于使用Pico W的声音输出的一切

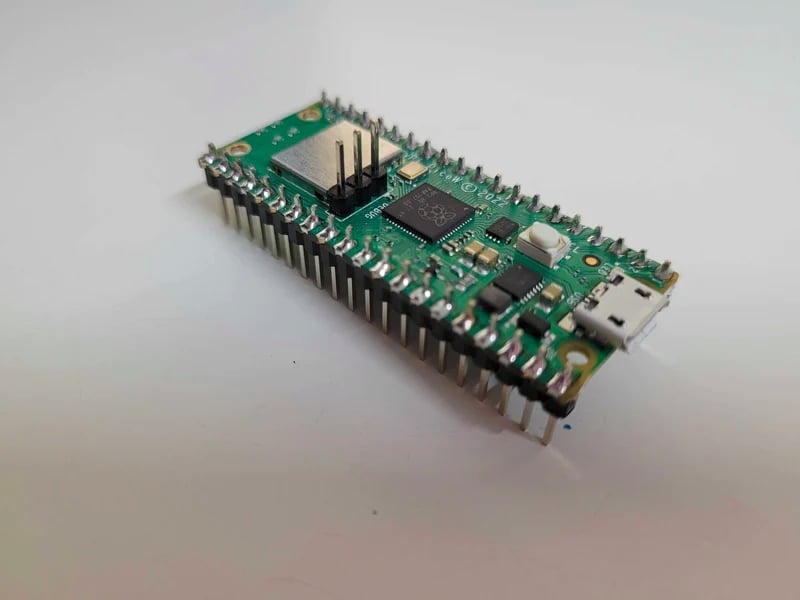
Raspberry Pi Pico W是一款功能强大的微控制器板,它基于Raspberry Pi自己的微控制器芯片RP2040。您可以查看一系列基于RP2040的微控制器板。 这里 或继续阅读,了解使用Pico W进行声音输出所需的一切信息。
您是否考虑过制作一个音乐播放器,创建一个音频频谱分析仪,或者制作一个beatbox,但是在使用微控制器播放音频时遇到了问题?不用再找了,这篇文章就是为您准备的!
在这里,我将向您介绍脉宽调制(PWM)、Pico W 的通信协议以及如何利用 Pico W 的无线连接优势。
脉宽调制
在Pico W(或任何其他微控制器)上播放声音的一种方法是脉宽调制,简称PWM。
PWM是一种使用数字信号控制模拟设备的技术。尽管微控制器的数字输出只能是开或关(0或1),但通过PWM,我们可以模拟模拟信号(值得一提的是,PWM不是真正的模拟信号)。(值得一提的是,PWM并非真正的模拟信号。)PWM通过在开和关之间快速切换电源状态,从而控制电流来实现这一目的。
请观看我们的视频:
由于PWM效率极高、功耗极低、精度极高,因此在许多应用中都采用这种技术来创建不同的音频效果。
Pico W的每个引脚都能进行PWM调节。这只是一个编码问题!
下面我将举例说明PWM的工作原理。
项目
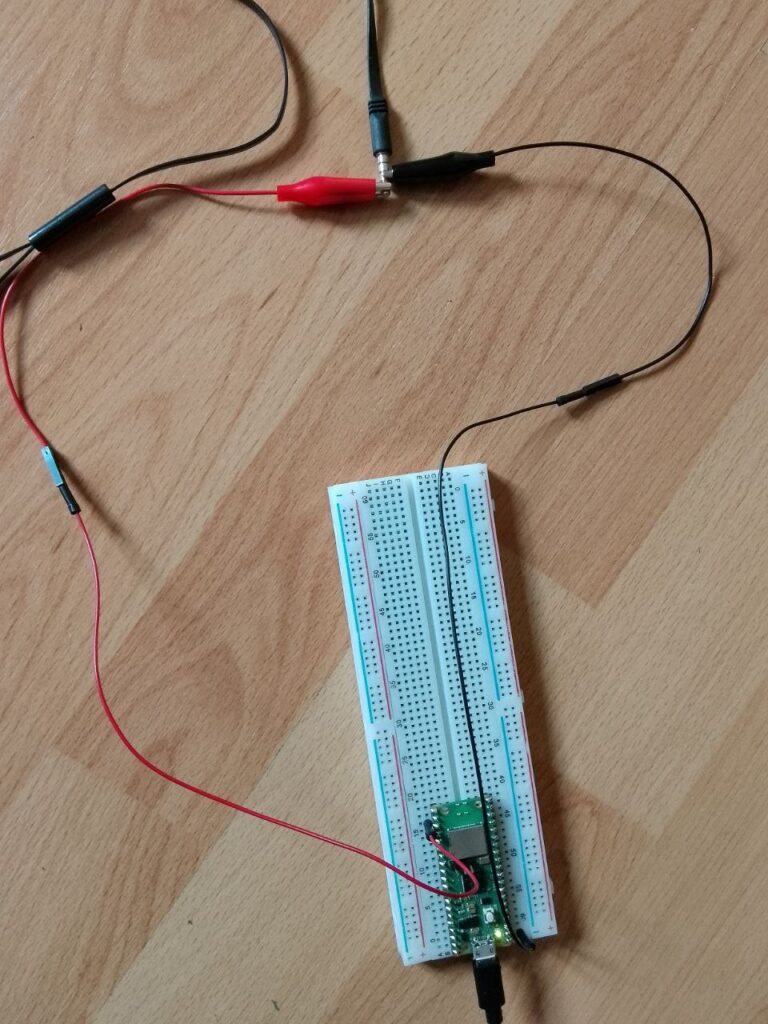
为了演示用Pico W的PWM产生音频,我使用了2根公头鳄鱼皮电缆、一块面包板和耳机。
另外,如果您想避免焊接,您可以尝试将鳄鱼缆线的另一端直接剪接在耳机或立体声插头上 (我强烈建议不要使用耳机,以保护您的耳膜!).
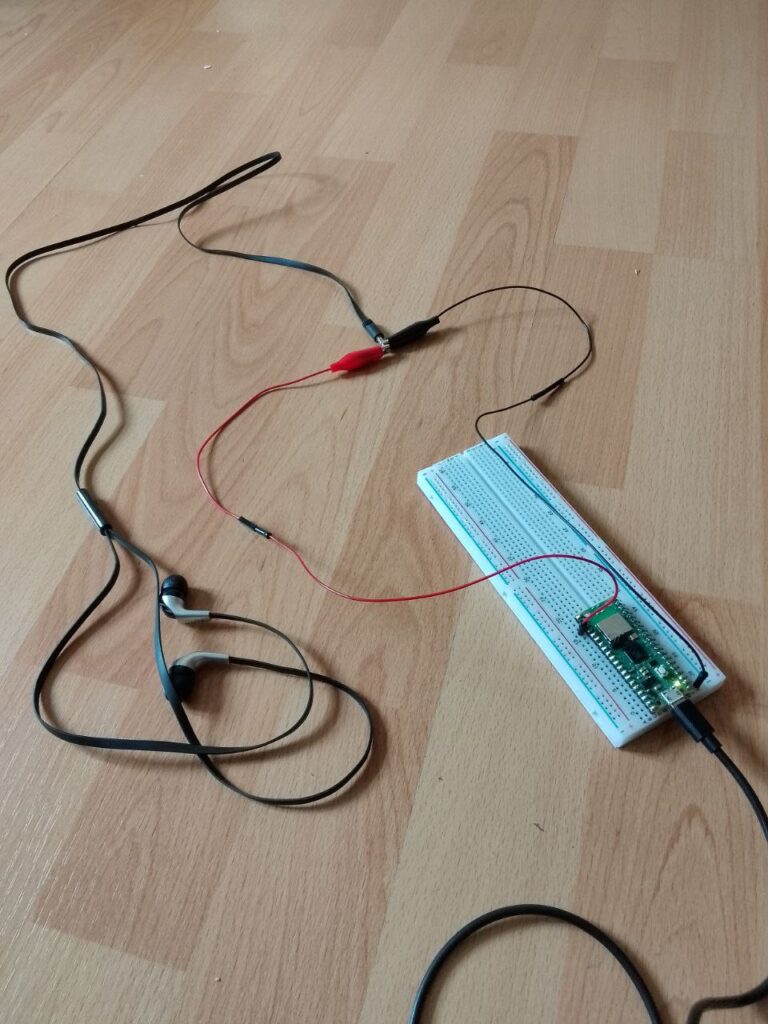
我将红色鳄鱼皮电缆插入第23针,这是一个接地引脚(任何接地引脚都可以)。PWM可以通过任何一个GP引脚产生。如上图所示,我使用的是GP0。
任何现代耳机或立体声插孔都有三到四个部分,外侧两个分别是左音频和右音频。因此,我将红色鳄鱼皮线夹在左侧,黑色鳄鱼皮线夹在右侧。
如果采用这种设置,请注意鳄鱼皮电缆不要相碰。
完成物理设置后,下一步是下载音频文件。
如果您使用.wav文件,请确保它们符合以下规格:
通道:单声道(非立体声)
比特率:22 kHz或更低
3. 采样:16位
下面是一个使用CircuitPython生成.wav音频的代码示例:
# PiCockpit.com
# audio output via digital PWM

import board
# loads a wav file for audio playback
from audiocore import WaveFile
# the audiopwmio module contains classes to provide access to audio ID
from audiopwmio import PWMAudioOut

# outputs an analog audio signal by varying the PWM duty cycle under the hood
audio_out = PWMAudioOut(board.GP0)

def play_wave(filename):
    with open(filename, "rb") as wave_file:
        sample = WaveFile(wave_file)
        audio_out.play(sample, loop=True)
# outputs an analog audio signal by varying the PWM duty cycle under the hood
audio_out = PWMAudioOut(board.GP0)

def play_wave(filename):
    with open(filename, "rb") as wave_file:
        sample = WaveFile(wave_file)
        audio_out.play(sample, loop=True)

        while audio_out.playing:
            pass

# audio will loop until program interruption
play_wave("meditation-music.wav")
如果您使用的是.mp3文件,需要满足与.wav文件相同的规格,您可以参考该代码示例:
# PiCockpit.com
# audio output via digital PWM

import board
# loads an mp3 file for audio playback
from audiomp3 import MP3Decoder
# the audiopwmio module contains classes to provide access to audio IO
from audiopwmio import PWMAudioOut

# outputs an analog audio signal by varying the PWM duty cycle under the hood
audio_out = PWMAudioOut(board.GP0)

mp3 = MP3Decoder("meditation-music.mp3")

audio_out.play(mp3)
while audio_out.playing:
    pass
使用.mp3文件还需注意的一点是比特率的恒定。如果音频听起来失真,请尝试进一步降低采样率和比特率。我能得到的最高比特率是192 kbps。
如果您使用的是MicroPython而不是CircuitPython,您可以参考下面的代码示例,通过设置占空比和改变频率,用PWM产生3种不同的音调。
# PiCockpit.com

from machine import Pin, PWM
from utime import sleep

# lower right corner with USB connector on top
SPEAKER_PIN = 16

# create a PWM object on this pin
speaker = PWM(Pin(SPEAKER_PIN))

# the time each tone will be on
ON_TIME = .25
# the time between tones
OFF_TIME = .1

# low tone
speaker.duty_u16(1000)
speaker.freq(300)
sleep(ON_TIME)
speaker.duty_u16(0)
sleep(OFF_TIME)

# high tone
speaker.duty_u16(1000)
speaker.freq(800)
sleep(ON_TIME)
speaker.duty_u16(0)
sleep(OFF_TIME)

# medium tone
speaker.duty_u16(1000)
speaker.freq(400)
sleep(ON_TIME)

# turn off the PWM
speaker.duty_u16(0)
通信协议
为了让 Pico W 和外部部件相互通信,有许多不同的协议可供选择。如果您使用过 MicroPython 中的机器库,您就会知道 Pico W 上 GPIO 引脚的标准通信协议是 GPIOZero 库,它为控制和监视 GPIO 引脚提供了一个简单的接口。此外,Pico W 还支持其他通信协议。
在这里,我想谈谈UART、SPI、I2C和I2S,因为它们在Pico W上处理音频时都有一定的优缺点。
首先,通用异步接收器/发送器协议,即UART,理论上实现简单,只需2根导线,可靠性高。但是,UART范围有限,带宽有限,只能支持与一个设备通信。
此外,通过研究,我发现UART不适合在Pico W上播放声音。如果您在Pico W上使用UART进行音频输出,请在评论中告诉我!
SPI
UART无法完成工作,而串行外设接口(SPI)可提供较高的数据传输速率,并且非常可靠。其最大的缺点是SPI只允许一个控制器,并且使用4根导线。我使用以下代码使其工作:
# PiCockpit.com
# registers addresses for the PCM5102A module
REG_POWER_CONTROL = 0x02
REG_MODE_CONTROL = 0x03
REG_DAC_CONTROL = 0x0A
REG_DAC_VOLUME = 0x0B

# powers on the PCM5102A module
cs_pin.value(0)
spi.write(bytes([REG_POWER_CONTROL, 0x08]))
cs_pin.value(1)

# sets the mode to I2S
cs_pin.value(0)
spi.write(bytes([REG_MODE_CONTROL, 0x04]))
cs_pin.value(1)

# sets the DAC control bits
cs_pin.value(0)
spi.write(bytes([REG_DAC_CONTROL, 0x00]))
cs_spin.value(1)

# sets the DAC volume
cs_pin.value(0)
spi.write(bytes([REG_DAC_VOLUME, 0x88]))
cs_pin.value(1)

# generates a sine save for testing
sample_rate = 44100
frequency = 440
duration = 5
samples = int(sample_rate * duration)
amplitude = 0x7FFF
sine_wave = bytearray(samplex * 2)
for i in range(samples):
    value = int(amplitude * math.sin(2 * math.pi * frequency * i / sample_rate))
    sine_wave[i*2] = value & 0xFF
    sine_wave[i*2+1] = (value >> 8) & 0xFF

# writes the sine wave to the PCM5102A module
cs_pin.value(0)
spi.write(sine_wave)
cs_pin.value(1)

# Waits for the sound to finish playing
utime.sleep(duration)

# Powers off the PCM5102A module
cs_pin.value(0)
spi.write(bytes([REG_POWER_CONTROL, 0x00]))
cs_pin.value(1)
I2C
我想介绍的第三个协议是Inter-Integrate Circuit,即I2C,它只需要2根导线,实现简单,功耗低。与UART一样,I2C的范围和带宽有限,但与UART不同的是,I2C可以与多个设备通信。然而,最重要的是,我能够用以下代码实现I2C:
# PiCockpit.com

import machine
import utime

# I2C bus
i2c = machine.I2C(0, sda=machine.Pin(0), scl=machine.Pin(1), freq=400000)

# I2C address of the PCM5102A module
i2c_address = 0x4C

# register addresses for the PCM5102A module
REG_POWER_CONTROL = 0x02
REG_MODE_CONTROL = 0x03
REG_DAC_CONTROL = 0x0A
REG_DAC_VOLUME = 0x0B

# powers on the PCM5102A module
i2c.writeto_mem(i2c_address, REG_POWER_CONTROL, b'\x08')

# sets the mode to I2S
i2c.writeto_mem(i2c_address, REG_MODE_CONTROL, b'\x04')

# sets the DAC controls
i2c.writeto_mem(i2c_address, REG_DAC_CONTROL, b'\x00')

# sets the DAC volume
i2c.writeto_mem(i2c_address, REG_DAC_VOLUME, b'\x88')

# generates a sine wave to test
sample_rate = 44100
frequency = 440
duration = 5
samples = int(sample_rate * duration)
amplitude = 0x7FFF
sine_wave = bytearray(samples * 2)
for i in range(samples):
    value = int(amplitude * math.sin(2 * math.pi * frequency * i / sample_rate))
    sine_wave[i*2] = value & 0xFF
    sine_wave[i*2+1] = (value >> 8) & 0xFF

# writes the sine wave to the PCM5102A module
i2c.writeto(i2c_address, sine_wave)

# waits for the sound to finish playing
utime.sleep(duration)

# power of the PCM5102A module
i2c.writeto_mem(i2c_address, REG_POWER_CONTROL, b'\x00')
由于I2C的复杂性较低,并且支持单个总线上的多个设备,因此对于需要较低数据传输速率的简单音频应用而言,I2C可能是更好的选择。然而,SPI可能更适合更高质量的音频回放,因为它支持更快的数据传输速率。
I2S
我想讨论的第四个也是最后一个协议是集成声音协议(Inter-Integrated Sound),或称 I2S,这是一个针对音频数据传输进行了优化的协议。到目前为止,I2S是Pico W生成音频的理想协议,因为它能提供高保真音频、快速传输数据、极其可靠且易于使用。此外,支持 I2S 的硬件组件选择范围很广,例如 Pimoroni Pico音频包.
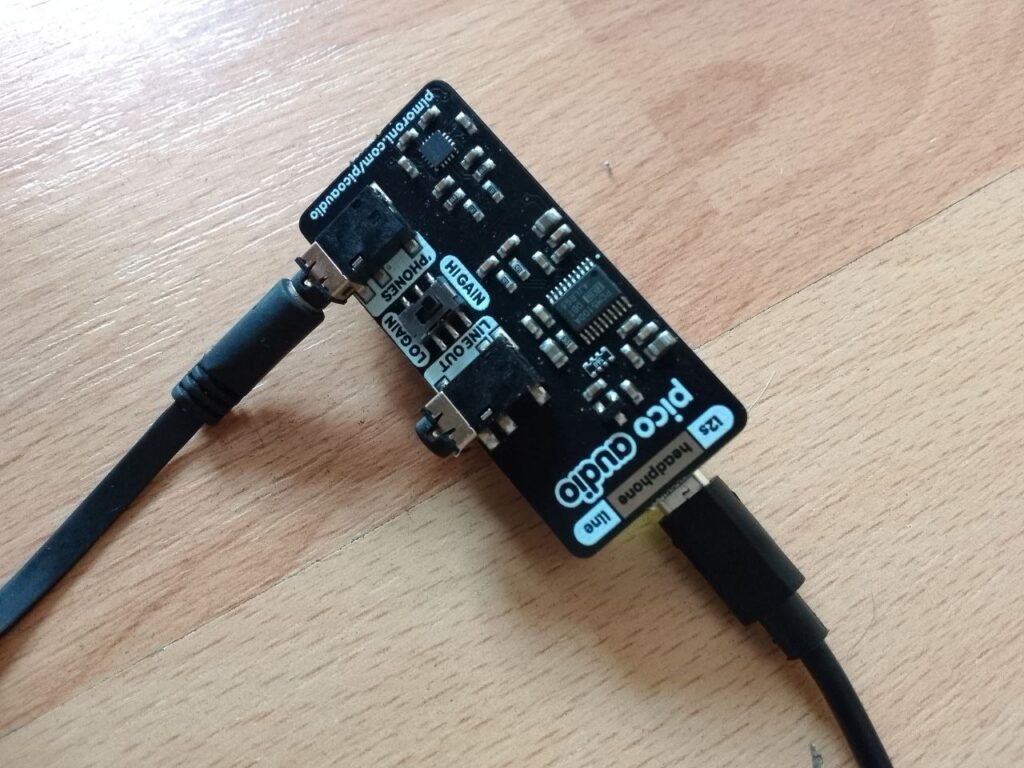
为了听到 I2S 的声音,我必须从 MicroPython 切换到 CircuitPython,因为 MicroPython 尚不支持 I2S。但您可以将Pico音频包轻轻推到Pico W的针座上,确保音频包的 "USB "面朝向Pico W的微型USB方向。
连接耳机或其他设备,就可以了!
还有一件事:听这首歌时,您可能需要把音量调低一点(您以后会感谢我的)
以下是示例代码:
# PiCockpit.com

import audiobusio
import audiocore
import board
import array
import time
import math

# sets up I2S, pointing at the correct pins
i2s = audiobusio.I2SOut(board.GP10, board.GP11, board.GP9)

# generates one period of sine wave
# calculates sine wave's length with floor division based on the sample rate and frequency
length = 8000 // 400

# creates an array of signed 16-bit integers based on the length
sine_wave =array.array("H", [0] * length)

for i in range(length):
# calculates sample value with the sin function
    sine_wave[i] = int(math.sin(math.pi * 2 * i / length) * (2 ** 14) + 2 ** 14)

# creates a raw audio sample buffer in memory using the audiocore library
sine_wave = audiocore.RawSample(sine_wave, sample_rate=8000)

i2s.play(sine_wave, loop=True)
time.sleep(1)
i2s.stop()
无线网络
既然Pico W展示的是无线功能,那么就让我向您展示一些利用无线连接的产品。
该代码从URL抓取.mp3,下载完成后从文件中播放:
# PiCockpit.com

import adafruit_requests
import wifi
import socketpool
import ssl
import board
import audiomp3
import audiobusio
import os

# sets up I2S for sound output
audio = audiobusio.I2SOut(board.GP10, board.GP11, board.GP9)

# url for the mp3 file to download, 1 minute mp3
mp3_url = 'https://codeskulptor-demos.commondatastorage.googleapis.com/descent/background%20music.mp3'

# chunk size for downloading the mp3 file in parts
chunk_size = 1024

# connects to SSID
wifi.radio.connect(os.getenv('WIFI_SSID'), os.getenv('WIFI_PASSWORD'))

pool = socketpool.SocketPool(wifi.radio)
requests = adafruit_requests.Session(pool, ssl.create_default_context())

# requests the url and writes the mp3 to a file
try:
    doc = requests.get(mp3_url)
    # opens the file in binary write mode
    with open('sound.mp3', 'wb') as f:
    # writes the file in chunks
    for chunk in doc.iter_content(chunk_size=chunk_size):
        f.write(chunk)
except Exception as e:
    print("Connection error:\n", str(e))

# plays the mp3 file from flash memory
try:
    # creates an mp3 object
    mp3 = audiomp3.MP3Decoder(open("sound.mp3", "rb"))
    # optimizes the sample rate for your setup before playing
    mp3.sample_rate=24000
    # mp3.bits_per_sample=50
    audio.play(mp3)

    while audio.playing:
        pass

    print("Done playing!")
except Exception as e:
    print("Error in creating mp3 or playing audio:\n", str(e))
设置.toml:
# PiCockpit.com
# SSID is your network name
# replace myssid with your wi-fi name
WIFI_SSID = "myssid"

# replace mypassword with your wifi password
WIFI_PASSWORD - "mypassword"
请注意,下载.mp3的时间可能比音频的实际长度要长。为使其正常工作,我还必须启用写入权限,并通过boot.py中的垃圾回收增加下载内存:
# PiCockpit.com

import gc
import storage

gc.collect(150000)
storage.remount("/", False)
添加外部存储,按下按钮,尝试从在线广播电台串流音乐。没有什么能阻止您使用Raspberry Pi Pico W享受您喜爱的音乐。
总结
Pico W拥有多种不同的发声选择,但一定要注意Pico W提供的有限空间。
本文章根据Zita B.的原创文章改编。
我可以使用 UART 通过 USB 发送声音。 使用 Pico USB 可以获得近 6Mbps 的速度。 https://github.com/earlephilhower/arduino-pico/discussions/1765
这对我帮助很大!你涵盖了所有方法,而不仅仅是 "最喜欢的"。 这正是我在教授高级模拟电子学课程时所需要的,我在该课程的大部分实验中都使用了 PICO 某处。 从 PWM 的基本音调一直到高质量的 I2S 功能!希望其他人能看到我的评论!
蓝牙怎么样?