Lego Submarine & Camera: Raspberry Pi Projects
Boy, oh, boy do we have some interesting Raspberry Pi projects this week.
The first project is a radio-controlled submarine that can sink, surface, turn and move. At the heart of the submarine is a Raspberry Pi Zero 2.
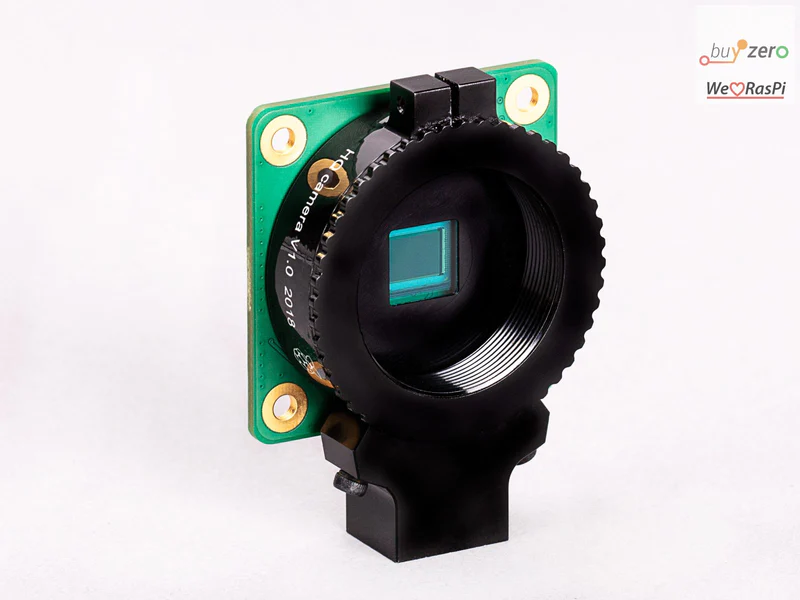
The second project is a “Pieca” camera, named after a Leica camera. The key similarity between the Pieca and a Leica is the use of a M-mount interchangeable lens, which is then paired to the Raspberry Pi 4 and the High-Quality image sensor module
Raspberry Pi Zero + Lego Technic submarine
Fourth time’s the charm for Brick Experiment Channel (BEC), who created this project using Lego Technic parts and a Raspberry Pi Zero 2.
The biggest challenge BEC faced is keeping the submarines at the depth he wanted it to be, but for the fourth project, he decided to use a syringe. The past three failed because,
“Unsteady depth had been a nuisance with the three submarines I made earlier, especially subs 1 and 3. Those submarines were always either at the bottom or at the surface. A good challenge to overcome.”
How BEC integrates the Raspberry Pi into the submarine
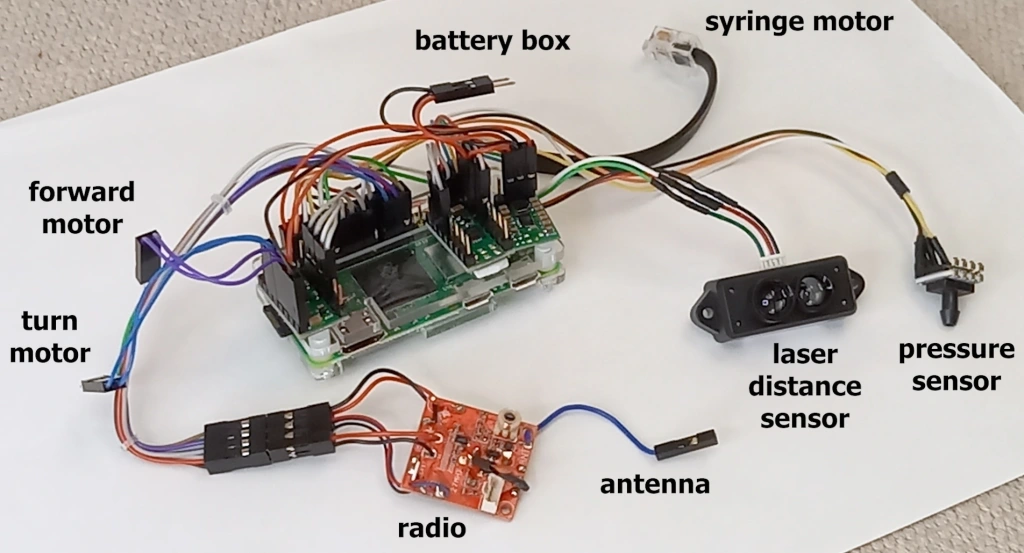
The main purpose of BEC’s Raspberry Pi Zero 2 is to control the depth of the submarine.
BEC initially wanted to use a Raspberry Pi Pico but the Pico’s limited flash memory of 2MB was too little for his data logging needs.
Collecting pressure data with a pressure sensor

BEC used an absolute pressure sensor in the submarine.
BEC initially used a relative pressure sensor, but the data was not reliable and so he switched up for a Honeywell SSCMANV030PA2A3, which is an absolute pressure sensor.
The pressure sensor tells how deep the submarine is.
Alternative way to measure depth: laser distance sensor

BEC integrated a Sparkfun TFMini-S Micro laser distance sensor in an attempt to find another way to measure depth by measuring the distance from the bottom.
Unfortunately, laser depth measurements aren’t very reliable in muddy waters. BEC said, “data is very patchy and not really usable for control” so BEC didn’t really use the laser distance sensor much.
How depth is determined

The data from the depth sensors are then used to drive the syringe.
The syringe is connected to a Lego Technic motor which stores how far pushed in or retracted the syringe is.
With data from the pressure sensor and/or the laser distance sensor, BEC wrote a program that calculates the syringe’s position, gets depth data, calculates PID control output, then drives the syringe motor to the target depth.
And that’s how BEC built his Raspberry Pi + Lego submarine. You can read the 10 part blog post here.
Pieca Camera
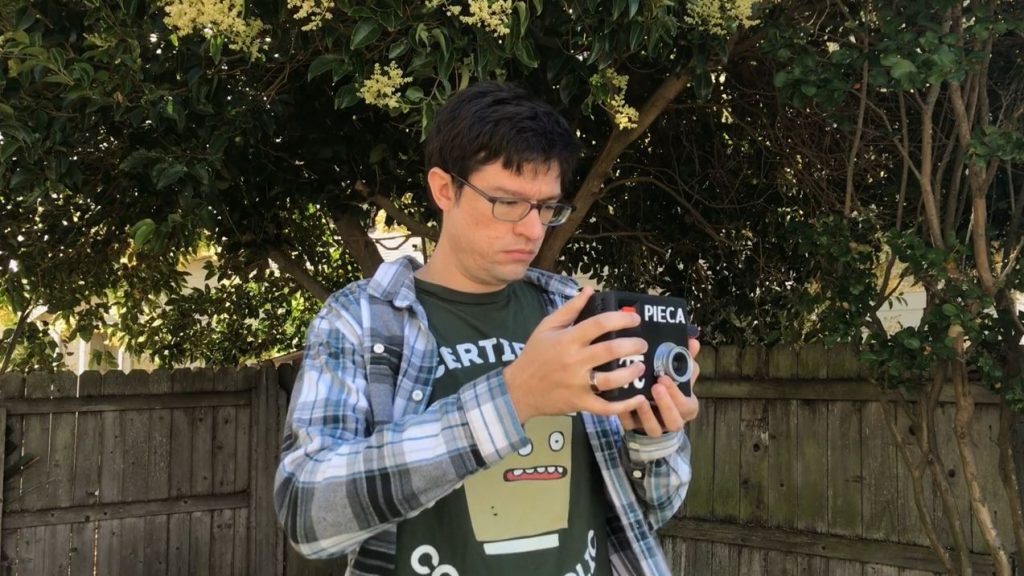
Tom Schucker built his Pieca using a Raspberry Pi 4, the Raspberry Pi High Quality Camera, a 5″ display that connected via the DSI port and a 3D printed case. The whole system is powered by the PiSugar battery system.
It’s the ideal Raspberry Pi project to now take photos of your cool new Lego submarine!
The camera also has other exciting features such as a GPS module, a battery life gauge and a USB thumb drive for ease of transferring files.

Use any M-mount rangefinder lens
The best part about this project is the ability to use any M39 rangefinder lens.
Over the past century, many of these lenses were produced. You can buy Russian-made lenses very cheaply and you can buy German-made ones too.
These lenses were created in an era of manual cameras with no autofocus or auto aperture. So, you’d have to set your aperture and focus on the lens, just as you would with an old rangefinder.
All images are zoomed in
Using a lens meant for 35mm format on a smaller sensor would mean all images are inherently zoomed in.
Think of it this way: the lenses are meant to project a 35mm x 24mm image. However, the sensor might only capture a 6mm x 4.5mm out of that 35mm x 24mm image. That means all pictures are cropped (and hence look like they’re zoomed in).
Tom compensated by using a focal reducer which halves the focal length of the lenses.
Video
Interested in more Raspberry Pi projects?
You can check out our Paragon Projects series here.
What would you do with lego submarine and a pieca camera?