How to Set Up a Minecraft Server on a Raspberry Pi
Minecraft is one of the most popular games ever created. You can play it with your friends in multiplayer game mode. Did you know that a Raspberry Pi 4 is powerful enough to run a Minecraft server? In this article, you’ll learn the basics of which different variations exist, a little bit of the history of Minecraft, and how to set up and operate your own Minecraft server on your Raspberry Pi.
The History of Minecraft Servers
To talk about Minecraft servers, we have to briefly discuss the two “big” forks of Minecraft.
Mojang, the creators of Minecraft, originally created Minecraft in Java.
Fun side note: Although Java is supposed to be really portable (“write once and run anywhere”), the game depends on native libraries that are x86. This means that the Java version of Minecraft will not run on other platforms, like the Raspberry Pi. The Raspberry Pi is ARM-based (ARMv6 / ARMv7 / ARMv8, depending on which Raspberry Pi you look at).
Raspi Berry’s Java explanations
This Java Minecraft version runs on PC, Mac and Linux (x86) machines.
Accordingly, there is server software compatible with the Java edition (see below for a full discussion of the different available choices).
A second version of Minecraft, written from scratch, was called MCPE (Minecraft Pocket Edition). It originally appeared on Android, and was written in C++. This edition was ported to Windows 10, iOS, PlayStation 4, XBox and Nintendo Switch. It is now known as Minecraft Bedrock edition. (Bedrock refers to the engine written in C++). This is now the main version, including cross-platform play.
Unfortunately the Bedrock edition is not compatible with the Java edition. This means that Mac and Linux players can’t join in the cross-platform play with it.
More importantly, it requires it’s own server software, which we’ll go into, below, briefly.
Installation of Spigot on Raspberry Pi OS 32 bit
This will walk you through the installation of Spigot. I use an 8 GB Raspberry Pi 4 for this, under the default 32 bit OS to begin with.
Prepare the installation
Open a terminal, and run the following commands:
sudo apt-get update
sudo apt-get install git openjdk-8-jre-headless
mkdir /home/pi/spigot-build
cd /home/pi/spigot-build
This will update the packages list, and install git and OpenJDK 8 (Java Runtime Environment, JRE). Also, it will create a new directory for building Spigot, and will change into it.
Then, download the most current BuildTools.jar from the SpigotMC website. You can use wget for this:
wget https://hub.spigotmc.org/jenkins/job/BuildTools/lastSuccessfulBuild/artifact/target/BuildTools.jarThis is a quick download with around 4 MB.
Build Spigot
Now start the build:
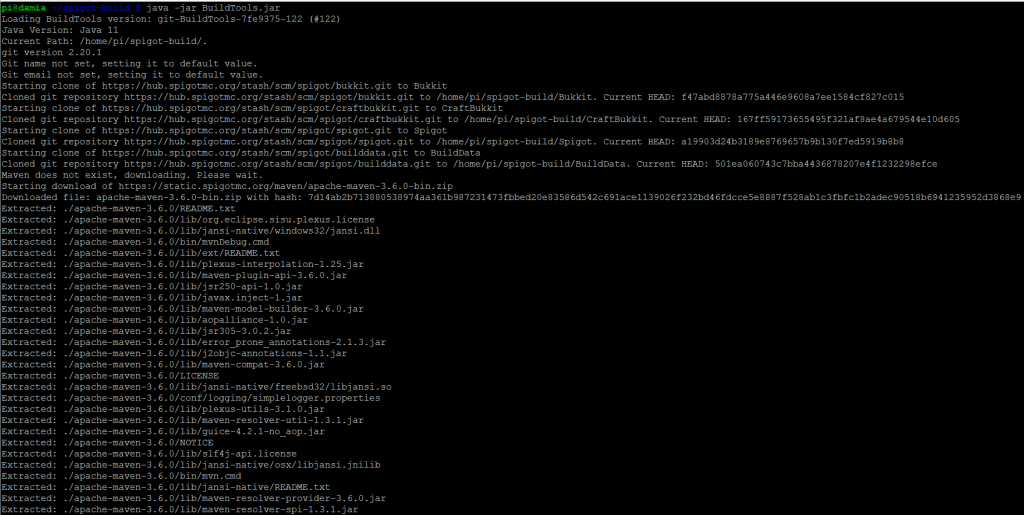
java -jar BuildTools.jarI’ve started the build at 13:00, using my Raspberry Pi 4 8GB, and it finished at about 13:15 – so it took about one hour and 15 minutes. Here’s a screenshot of the initial output you will see:
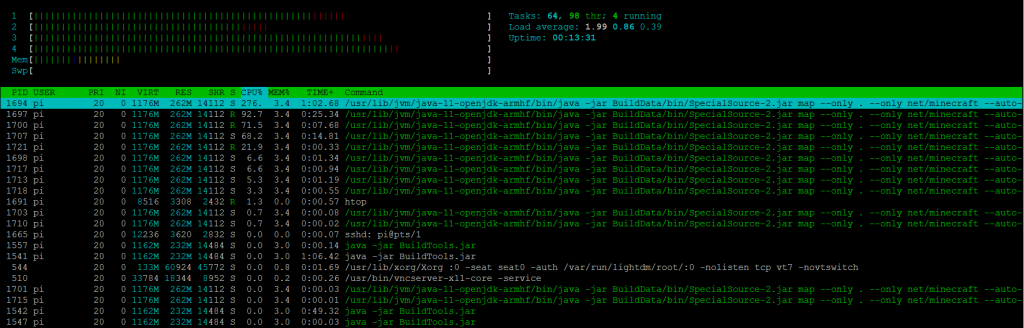
The build process uses multiple cores on your Raspberry Pi:
And here is the final screen you’ll see:
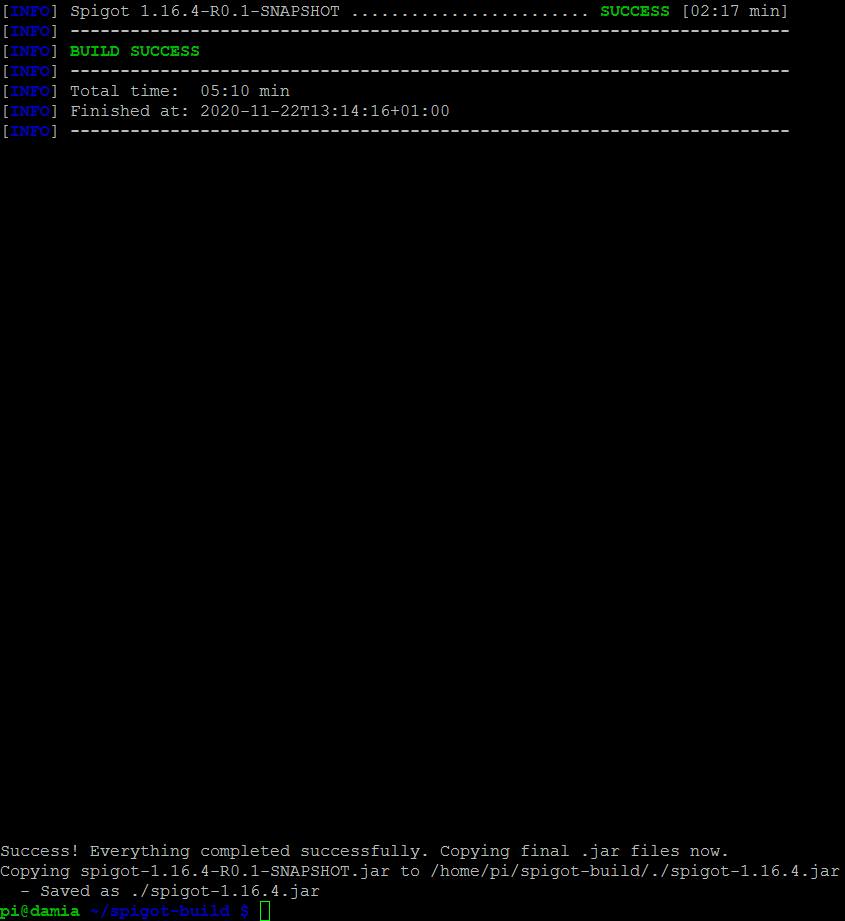
Once the build is finished, you’ll see where the finished Spigot server .jar file was saved to. In my case (as it has built spigot-1.16.4.jar), it is:
/home/pi/spigot-build/./spigot-1.16.4.jar
The remaining files are not needed anymore, we just need the final spigot-*.jar
Install your new Minecraft server
I suggest to install the Minecraft server into the /opt directory hierarchy. Let’s do that in the next step, and rename the .jar file to just spigot.jar:
sudo mkdir /opt/spigot
sudo mv /home/pi/spigot-build/spigot-*.jar /opt/spigot/spigot.jar
sudo chown -R pi:pi /opt/spigot
The last command changes the owner of this directory to the user pi, which will make it easier for you to get started with the necessary rights, without having to create a new user. For a system which is in use by multiple people, and for extra security / control over rights, you might want to create your own system user to run spigot under.
security tip
Now you can try to start your new Minecraft server, allocating 2 GB RAM to it:
java -Xms2G -Xmx2G -XX:+UseG1GC -jar spigot.jar noguiAllocating more than 2700M to spigot on a 32bit Raspberry Pi OS has resulted in the server not starting for me:
[47.195s][warning][os,thread] Failed to start thread – pthread_create failed (EAGAIN) for attributes: stacksize: 320k, guardsize: 0k, detached.
[07:57:48] [Server thread/ERROR]: Encountered an unexpected exception
java.lang.OutOfMemoryError: unable to create native thread: possibly out of memory or process/resource limits reached
at java.lang.Thread.start0(Native Method) ~[?:?]
at java.lang.Thread.start(Thread.java:803) ~[?:?]
at java.util.Timer.(Timer.java:177) ~[?:?]
at org.spigotmc.Metrics.start(Metrics.java:217) ~[spigot.jar:git-Spigot-a19903d-167ff59]
at org.spigotmc.SpigotConfig.registerCommands(SpigotConfig.java:91) ~[spigot.jar:git-Spigot-a19903d-167ff59]
at net.minecraft.server.v1_16_R3.DedicatedServer.init(DedicatedServer.java:149) ~[spigot.jar:git-Spigot-a19903d-167ff59]
at net.minecraft.server.v1_16_R3.MinecraftServer.w(MinecraftServer.java:809) ~[spigot.jar:git-Spigot-a19903d-167ff59]
at net.minecraft.server.v1_16_R3.MinecraftServer.lambda$0(MinecraftServer.java:164) ~[spigot.jar:git-Spigot-a19903d-167ff59]
at java.lang.Thread.run(Thread.java:834) [?:?]
[07:57:48] [Server thread/ERROR]: This crash report has been saved to: /opt/spigot/./crash-reports/crash-2020-11-23_07.57.48-server.txt
[07:57:48] [Server thread/INFO]: Stopping server
[07:57:48] [Server thread/INFO]: Saving players
[07:57:49] [Server thread/INFO]: Saving worldsAs outlined below (error handling / insufficient memory), even if the server starts OK, it might crash with out of memory errors, if you give it too much memory – that is why we’re sticking with a safe maximum of 2 GB here. On a 64 bit OS that can be higher, so you can use more of the Raspberry Pi 4 / 8 GB’s RAM.
Spigot memory limits on 32 bit Raspberry Pi OS
Spigot will now generate two new files (eula.txt & server.properties) and a directory (logs). You will see an error on the first run, because the EULA have not been accepted yet:
Loading libraries, please wait…
[15:01:09] [main/ERROR]: Failed to load properties from file: server.properties
[15:01:09] [main/WARN]: Failed to load eula.txt
[15:01:09] [main/INFO]: You need to agree to the EULA in order to run the server. Go to eula.txt for more info.
If you have a look at eula.txt, you’ll see the following:
#By changing the setting below to TRUE you are indicating your agreement to our EULA (https://account.mojang.com/documents/minecraft_eula).
#Sun Nov 22 15:01:09 CET 2020
eula=false
Please head on over to Mojang’s website and read the EULA (end user licence agreement), before actually accepting it.
Here’s how you accept it. Run
nano /opt/spigot/eula.txtAnd edit the last line to read
eula=trueSave with Ctrl + O (and press Enter), and Exit with Ctrl + X
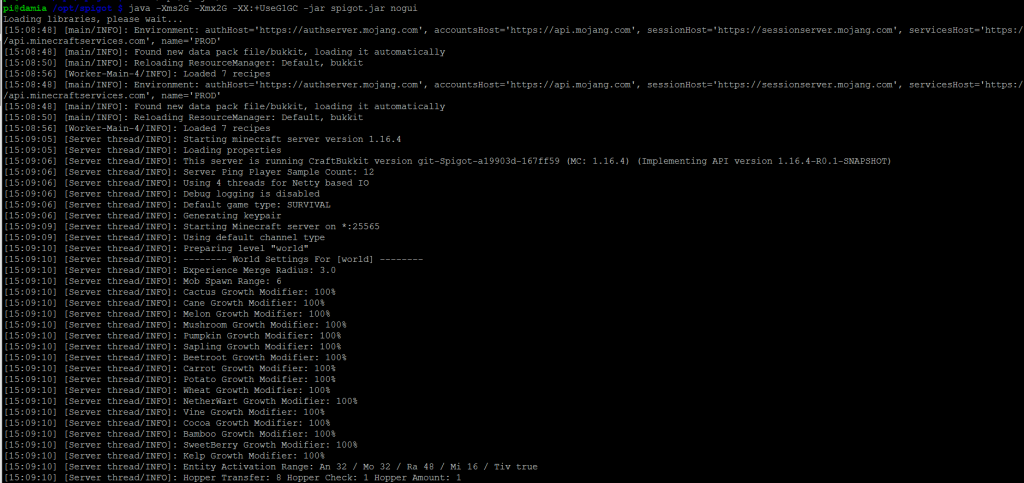
Starting Spigot from the command line
Now try to run the command to start the server again:
java -Xms2G -Xmx2G -XX:+UseG1GC -jar spigot.jar noguiThe Spigot Minecraft server will now start, and initialize.
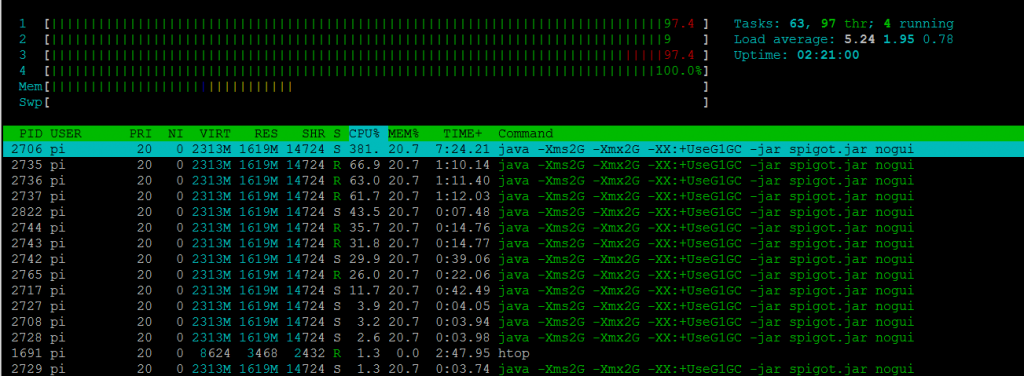
During this time, your CPU load will be near 100 % on all cores:
During the start, some useful information will be shown (excerpted here):
[15:09:05] [Server thread/INFO]: Starting minecraft server version 1.16.4
[15:09:06] [Server thread/INFO]: Default game type: SURVIVAL
[15:09:09] [Server thread/INFO]: Starting Minecraft server on *:25565
The last line cited above shows that your Minecraft server binds to all IP addresses on the Raspberry Pi, and to port 25565 on those IP addresses.
The startup took 190.812 s (or about three minutes) on my stock Raspbery Pi 4 / 8GB. Once it’s finished, you’ll see a prompt:

Interacting with the Spigot server
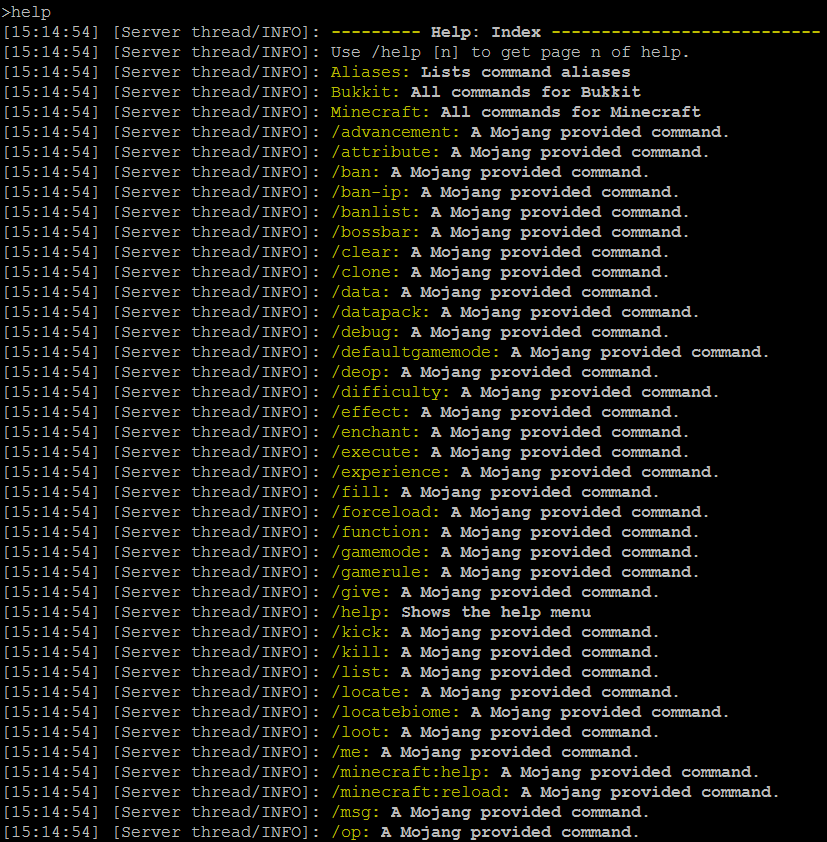
Type
helpat this prompt (without the /), to get a list of possible commands:
For example, with the command list, you can see how many players are online:

Using the command version, you can see the current version of your server, and whether a newer server is available. Note that you will have to rebuild the spigot.jar to update the server.

Can’t keep up! Is the server overloaded? The Running behind warning
You will most likely see output such as
[08:06:11] [Server thread/WARN]: Can’t keep up! Is the server overloaded? Running 8444ms or 168 ticks behind
Find your Raspberry Pi Minecraft server’s IP address
If you are not sure what your Raspberry Pi’s IP address is, you can simply find it by typing:
ip -4 addr showThis will show output similar to the following:

Look for the eth0 entry (2 in my case), which is the LAN on the Raspberry Pi. The IP address is the bit after inet, and before the slash. In my case 192.168.1.235 :

Connect to your Minecraft server
You will (of course 🙂 need Minecraft, which you can get from the official Minecraft website. You need the Java version of Minecraft, as discussed previously.

If you do not have Minecraft yet, and need to buy it, you will need to set up a Mojang Account. You will receive a receipt e-Mail with your purchase, which includes the download links for Windows, macOS, Linux, Arch Linux and Debian (note these have to be x86 systems as discussed before!)
For Windows, for example, you’ll get MinecraftInstaller.msi:

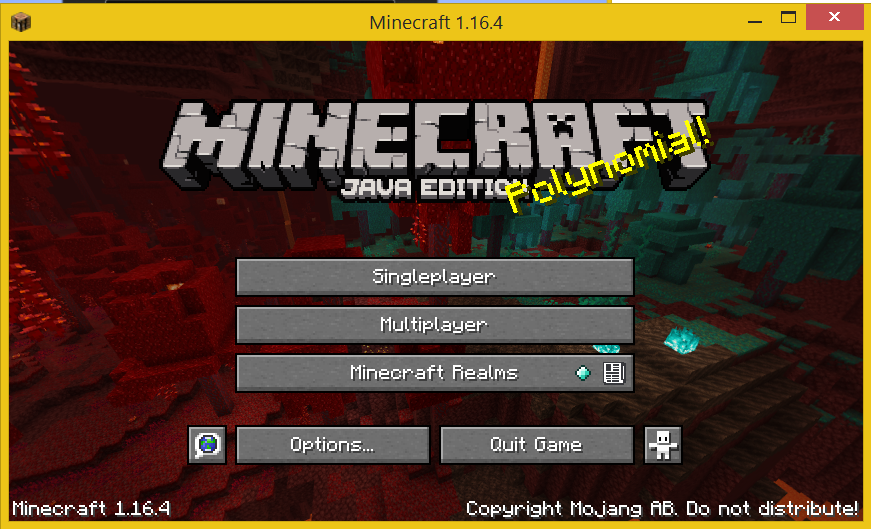
On launching Minecraft, you will be presented with a login screen:

After you log in, you will see an overview screen, with a play button.

After the download is finished, the main game screen will show up:
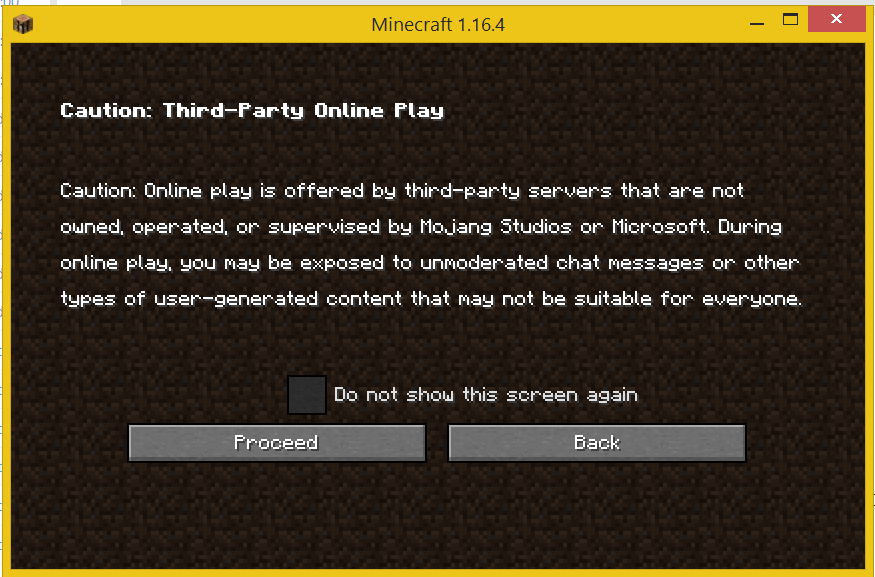
Click on Multiplayer here. You will get a warning about third-party online play, click on proceed here (optional: you can also tick the box do not show this screen again).
Now you’ll get a Windows (if you’re playing on Windows) security prompt:
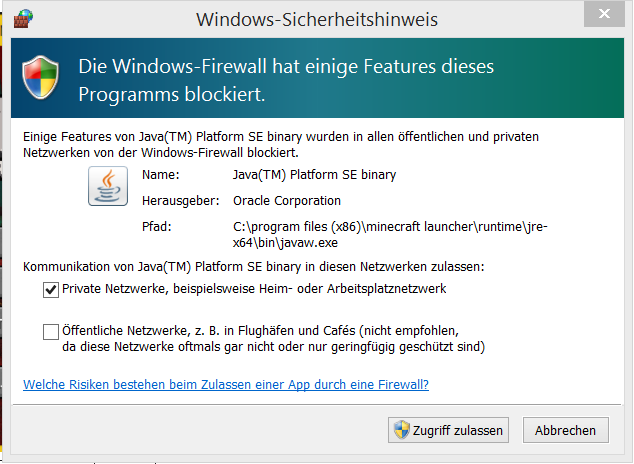
Click on Allow access here (“Zugriff zulassen” in German).
You will now see the following screen:
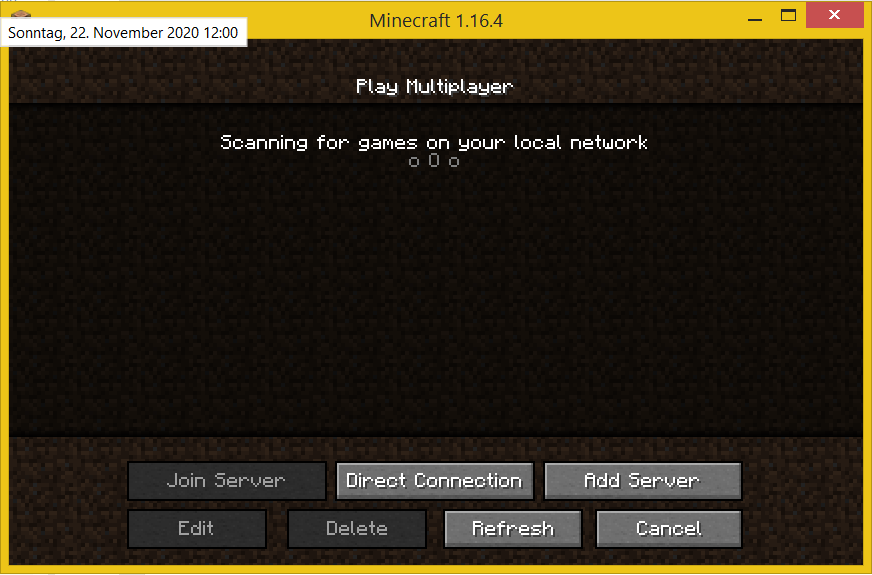
To get started quickly, click on Direct Connection, and enter your server’s IP address here (see above for how to find out what it is):
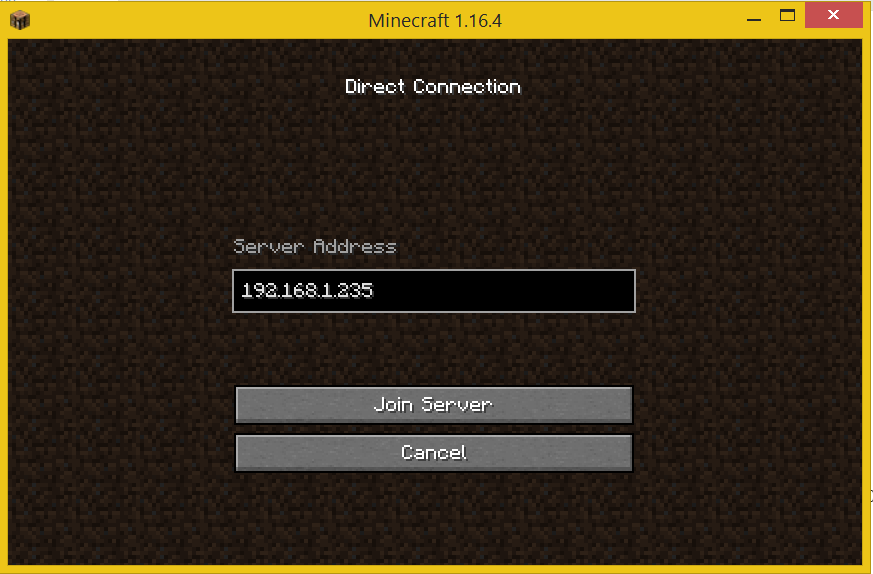
Minecraft will remember the IP address for the next session, and suggest it to you automatically
Click on Join Server. It will connect, and briefly show a loading screen:
ip -4 addr showFinally, you’ll see the Game Menu:
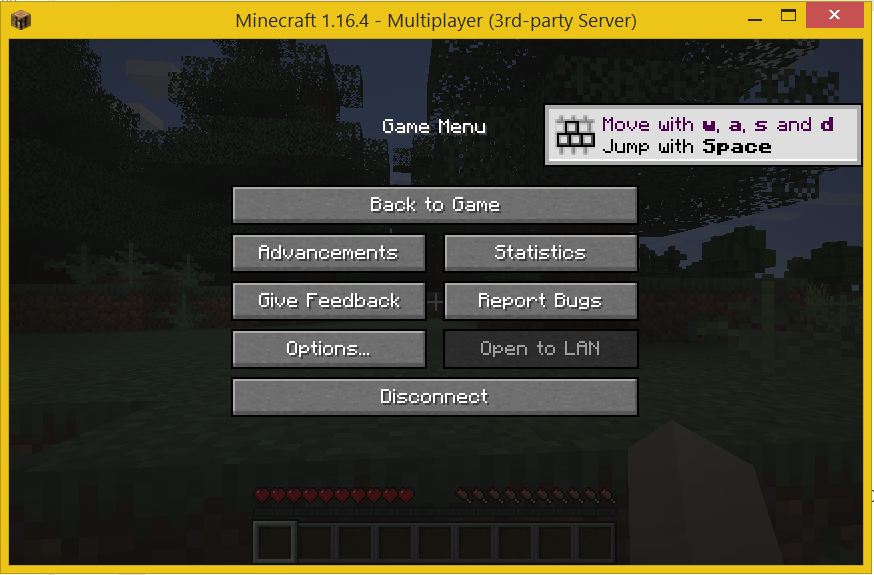
Click “Back to Game” to start playing on your new Minecraft server!
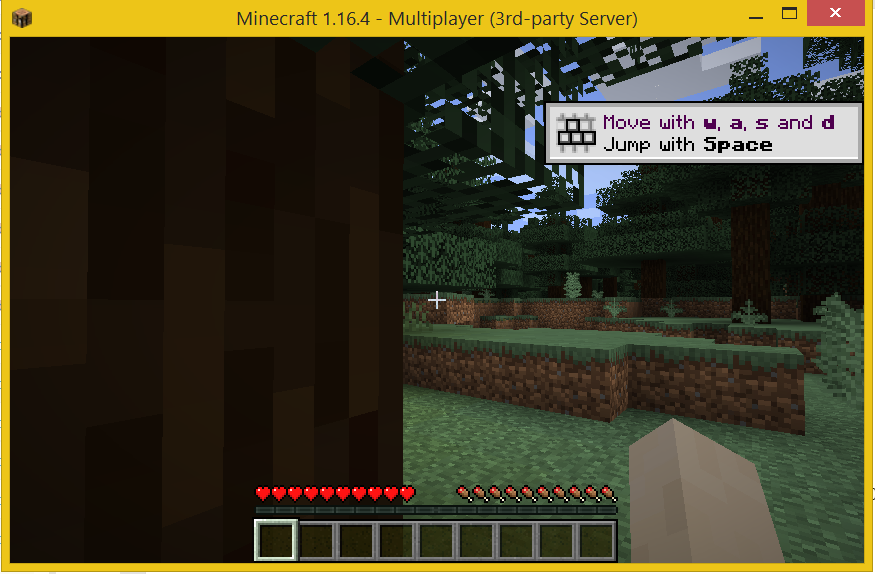
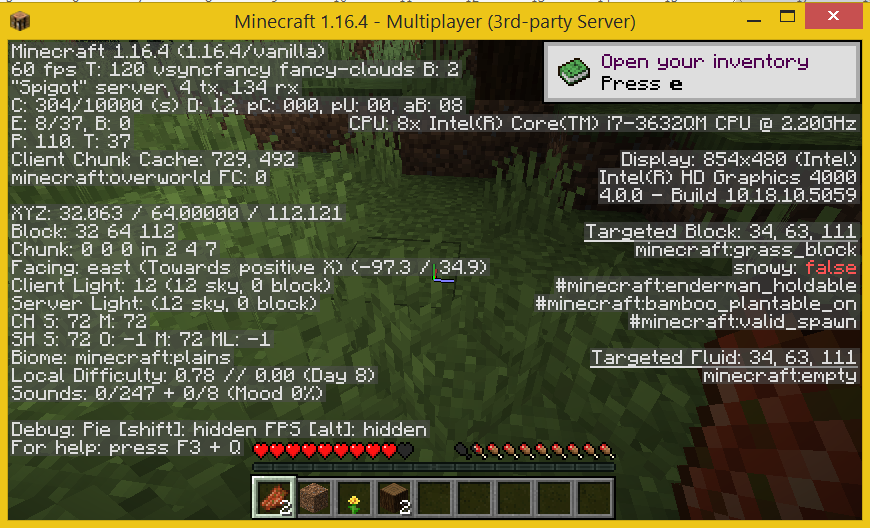
You can press F3 while playing, to show an overlay with information, where you can see that you are indeed connected to a Spigot server, and check the Minecraft version:
Output on your Raspberry Pi Minecraft server
Once you have connected, there is some additional output on your Minecraft server:
[15:53:32] [User Authenticator #1/INFO]: UUID of player buyzero is e76a3199-3ed0-4064-8086-d9f565235f71
[15:53:33] [Server thread/INFO]: buyzero[/192.168.1.202:51388] logged in with entity id 435 at ([world]25.5, 64.0, 137.5)
The command list now shows you that one user is logged in:
[15:57:05] [Server thread/INFO]: There are 1 of a max of 20 players online: buyzero
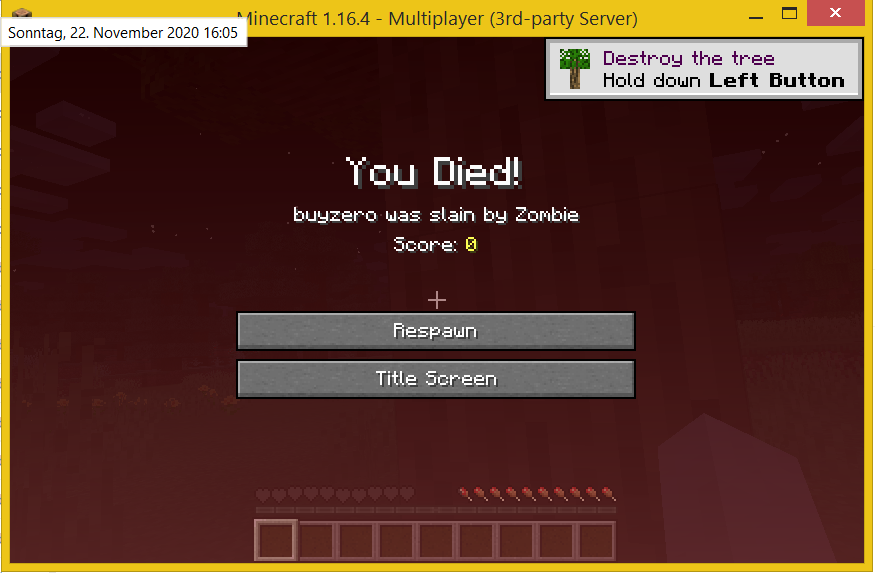
Also, events pertaining to your players will be shown:
[16:04:24] [Server thread/INFO]: buyzero was slain by Zombie
Using the command op buyzero you can make the user buyzero a server operator (replace your user name as appropriate):
op buyzero
[08:09:18] [Server thread/INFO]: Made buyzero a server operator
Stopping the spigot Minecraft server
If you are at the prompt of your Minecraft server, type stop followed by Enter. This will stop the server, save the world, and return you to the command line prompt:
stop
[08:36:57] [Server thread/INFO]: Stopping the server
[08:36:57] [Server thread/INFO]: Stopping server
[08:36:57] [Server thread/INFO]: Saving players
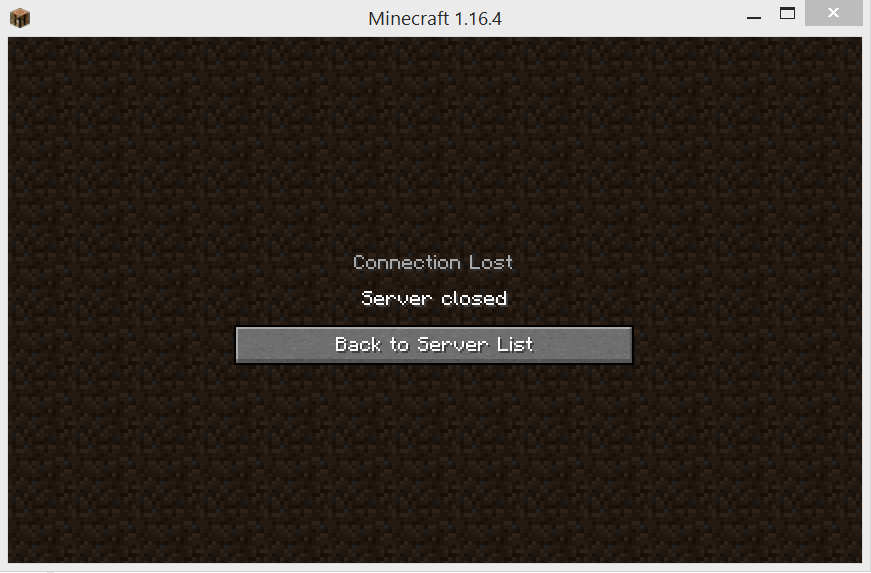
[08:36:57] [Server thread/INFO]: buyzero lost connection: Server closed
[08:36:57] [Server thread/INFO]: buyzero left the game
[08:36:57] [Server thread/INFO]: Saving worlds
[08:36:57] [Server thread/INFO]: Saving chunks for level ‘ServerLevel[world]’/minecraft:overworld
[08:37:02] [Server thread/INFO]: ThreadedAnvilChunkStorage (world): All chunks are saved
[08:37:02] [Server thread/INFO]: Saving chunks for level ‘ServerLevel[world_nether]’/minecraft:the_nether
[08:37:05] [Server thread/INFO]: ThreadedAnvilChunkStorage (DIM-1): All chunks are saved
[08:37:05] [Server thread/INFO]: Saving chunks for level ‘ServerLevel[world_the_end]’/minecraft:the_end
[08:37:10] [Server thread/INFO]: ThreadedAnvilChunkStorage (DIM1): All chunks are saved
[08:37:10] [Server thread/INFO]: ThreadedAnvilChunkStorage (world): All chunks are saved
[08:37:10] [Server thread/INFO]: ThreadedAnvilChunkStorage (DIM-1): All chunks are saved
[08:37:10] [Server thread/INFO]: ThreadedAnvilChunkStorage (DIM1): All chunks are saved
Your users will see the following screen:
Creating a systemd service
https://github.com/sindastra/systemd-minecraft
Error handling
insufficient memory
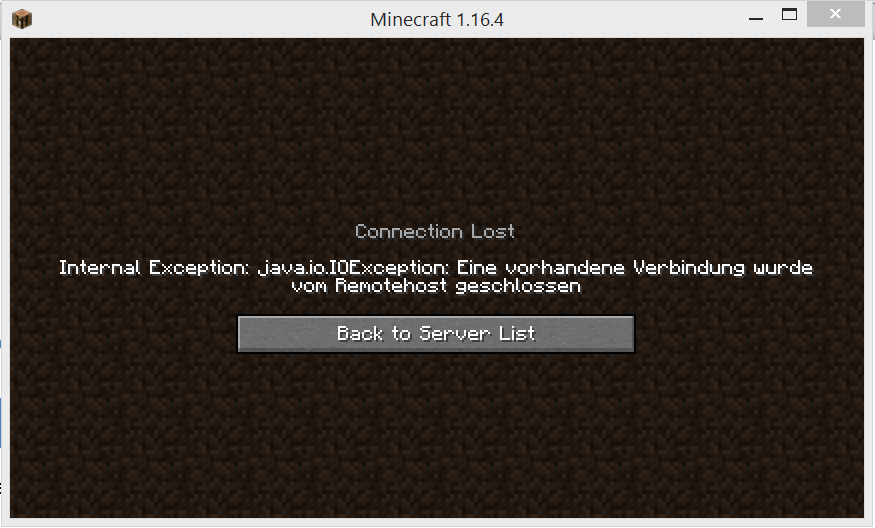
The screenshot above shows the error message the players connecting to your server will see, while on the server side, you’ll see the following log output:
There is insufficient memory for the Java Runtime Environment to continue.
Native memory allocation (malloc) failed to allocate 1438248 bytes for Chunk::new
An error report file with more information is saved as:
/opt/spigot/hs_err_pid1531.log
Compiler replay data is saved as:
/opt/spigot/replay_pid1531.log
In this case you need to tweak your memory settings. As per this article’s recommendation, it should be about 1000 MB to 1500 MB lower than the system memory available on your Raspberry Pi. Consider, that for a 32bit OS the process can only address a bit less than 4 GB of RAM in total, so even with a 32bit Raspberry Pi, the total you give to your Minecraft server should be less than 2500 MB – 2000 MB to be on the safe side (2GB).
Conclusion
Following this guide, you’ll be able to run your own Raspberry Pi Minecraft servers and play together with your friends.
References / Further reading
- A little history of Minecraft Servers (mostly Bukkit / Spigot / Bedrock) (sindastra.de)
- Bitloco.org (Minecraft Java Edition server community)
- Spigot Installation guide (Spigotmc.org)
[…] you can use a Raspberry Pi as a web server, a file server, a print server, a media server, a Minecraft server, and an IoT […]