Paragon Project: The Ultimate Sound Box
Do you have trouble sleeping? You have to build a sound box with a Raspberry Pi.
Have you thought about a white noise box? You have to build a sound box with a Raspberry Pi.
How about a box that can play pink noise, brown noise, and ocean sounds along with anything else you might want? You have to build a sound box with a Raspberry Pi.
And one that you can build yourself? You have to build a sound box with a Raspberry Pi!
Well, luckily, Alan Boris has not only built one, but also kindly uploaded the instructions up to hackster.io.
Alan listed this as an intermediate project.
Importantly, Alan set this up with a extremely creative use of hardware. But there are surely thousands of ways of putting this together (and much simpler ones at that).
Hardware
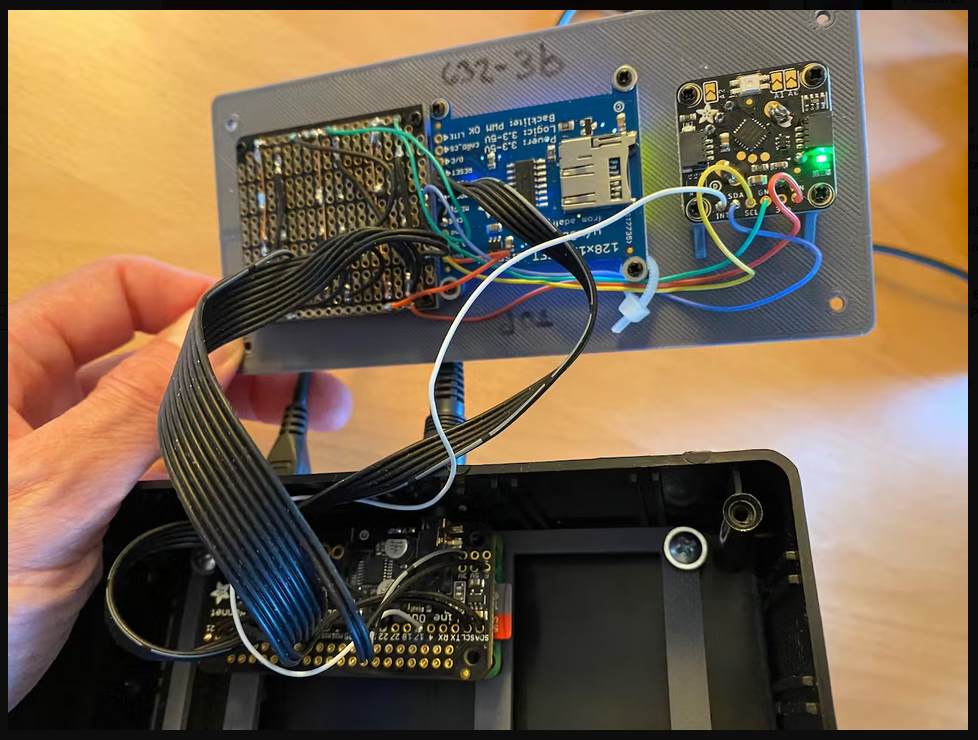
According to the post on hackster, Alan went with a Raspberry Pi 3 A+, an Adafruit I2S Audio Bonnet for the Raspberry Pi, an Adafruit Rotary Encoder, an Adafruit I2C Stemma QT Rotary Encoder Breakout, an Adafruit Momentary SPST Pushbutton, and an Adafruit scrubber knob for the Rotary Encoder.
This is what the Adafruit I2C Stemma QT Rotary Encoder Breakout looks like:
According to Alan, the inspiration behind the project was to create a noise box that would put out solid, high-quality audio with seamless loops.
And, in the hackster article, Alan notes that anyone “can build this project in many different form factors, such as in a small case, large case, inside an old radio, or with an integrated amplifier and speakers.” For this project, though, Alan went with a 3D-printed plate attached to a case.
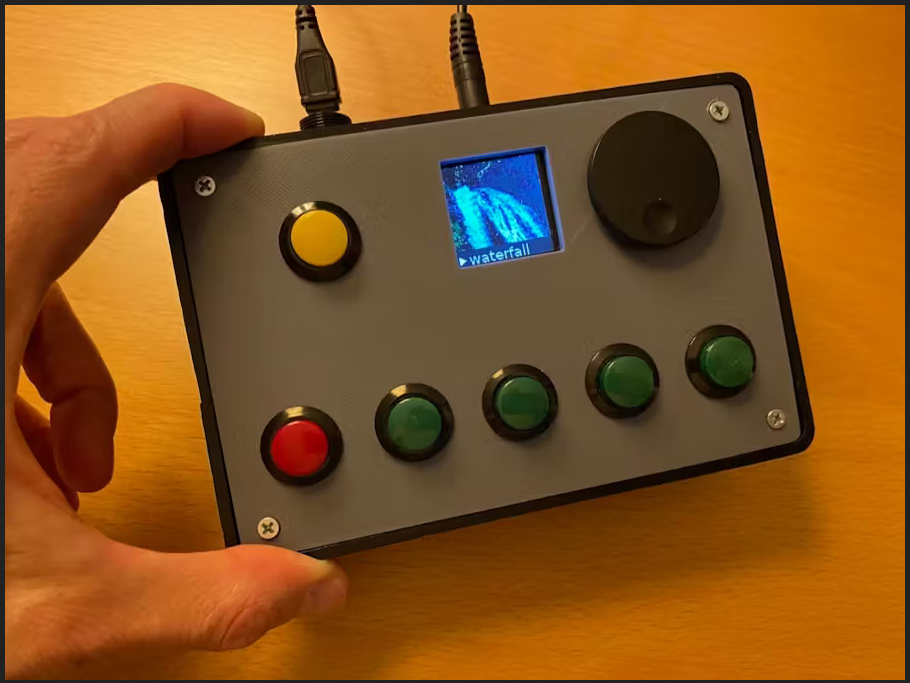
Putting everything together is probably the biggest challenge with a project like this. You’ve got to connect the buttons and an LCD to the bonnet.
Alan’s final product looks like this:
Software
For the software, Alan turned to balena.io to manage containers on the Raspberry Pi.
Setting up the hardware with balena is relatively straightforward. And all that’s left to do is hook up the output – speakers or headphones.
If you’re interested in other projects that use the Raspberry Pi to produce sound, check out some of our other articles:
As is always the case when playing around with audio, be sure to start off with volume set to low.
You’re trying to get a nice noise box, not give yourself tinnitus!
Finally, if you’re interested in more details in order to set this up yourself, you can go over to the hackster page, or check out Alan’s GitHub here.
You can see more Paragon Projects that we’ve featured in this series by clicking here.
If you have any questions or if you’d like to suggest a project for this series, comment below!
What noises would you put on your sound box?