9 Tricks with the Python REPL

Of course, the Pi in Raspberry Pi comes from Python, one of the most popular programming languages in the world and especially popular among tinkerers and makers. In this post, I want to give you 9 tricks and tips with the Python REPL – but don’t worry if you’re not super familiar with Python or the REPL.
This post is aimed and both beginners and intermediate Python programmers.
What is the REPL?
The REPL, or Read-Evaluate-Print Loop, is a way to directly interact with the Python interpreter. It’s called a REPL, because it reads, evaluates, and prints the input and then loops back to the beginning, allowing you to enter another command.
It provides a interface through a Python Shell to input code and immediately receive an output. This makes it possible to check code, debug in real-time, and produce interactive tests. Typically, you’ll know you’re dealing with a Python REPL once you see these three arrows:
>>>This is where you can place you input.
It’s worth mentioning that
The terms “Python Shell” and “Python Interpreter” are sometimes used interchangeably, but there is a subtle difference between them. The Python Interpreter refers to the actual program or software that executes Python code. The Python Shell, however, is the interface that allows you to interact with the interpreter in real-time.
Aside from the standard Python and Python3 Shells, many people also use IPython and bpython, which are command line programs that offer unique features, such as syntax highlighting.

You can see that IPython and bpython are prettier by default (below we’ll see how to make the standard REPL prettier as well).
It’s also worth noting that IPython’s REPL numbers input lines “In [1]”, “In [2]”, etc.
In contrast to IPython, bpython maintains the >>> layout.
The REPL can also provide features like command history, tab completion, and the ability to access previously defined variables and functions, making it a convenient tool for interactive Python programming and exploration.
This makes the REPL an invaluable tool for anyone who is looking to mess around with their Raspberry Pi.
Now that you’re up to speed on what the REPL is, let’s explore some tricks for using it:
Trick 1: Find Documentation
You can find the documentation for any Python object or module directly from the REPL by using the help() function.
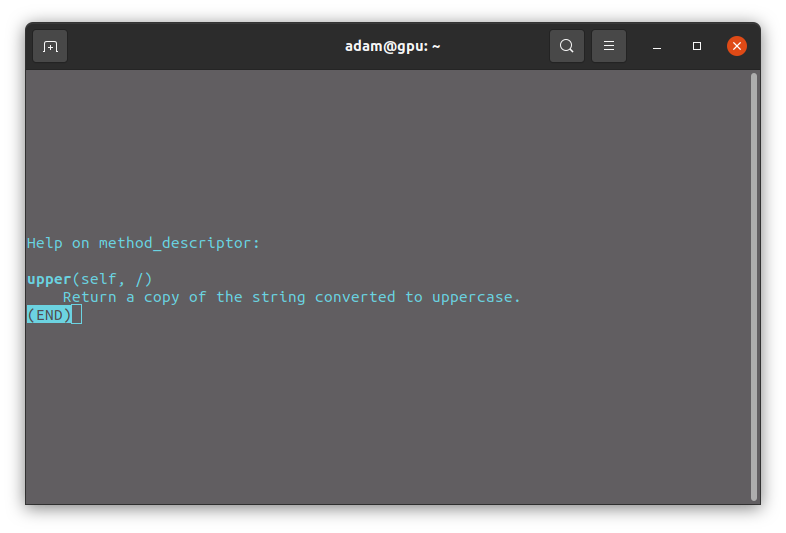
For example, typing help(str) will display the documentation for the string object. You can also append a specific method or function name to get detailed information, such as
help(str.upper)If you type this in, you’ll see the following:
Trick 2: Utilize Tab Completion
Depending on which program you’re using, the Python REPL supports tab completion, which can save you time and prevent typos. Pressing the Tab key after typing a partial name or object will display available options.
For example, if you type int. and then press Tab, you’ll see a list of methods to run with integers.

Trick 3: Create Multi-Line Statements
Furthermore, the REPL will allow you to write multi-line statements using line continuation.
If you want to break a statement into multiple lines for readability, you can use the backslash character (\) at the end of each line to continue it onto the next line (see example 1 below).
You can also put the statement in parentheses or brackets to continue it onto the next line (see example 2 below).
# example 1: using backslash for a multi-line statement

name = 'Fatima'
age = 46
country = 'Germany'

message = 'Hi, ' + \
          name + \
          '! You are ' + \
          str(age) + \
          ' years old and from ' + \
          country + '.'

print(message)

# the message will be 'Hi, Fatima! You are 46 years old and from Germany.'

# example 2: using parentheses for a multi-line statement

total = (1 + 2 + 3 +
         4 + 5 + 6 +
         7 + 8 + 9)

print("The total is:", total)

# the message will be 'The total is: 45'
Trick 4: Access Previously-Typed Code
You can access previously typed code in the REPL using the up and down arrow keys, just like you would in the terminal.
Pressing the up arrow key will cycle through your command history, allowing you to quickly recall and modify previous commands. Check it out for yourself!
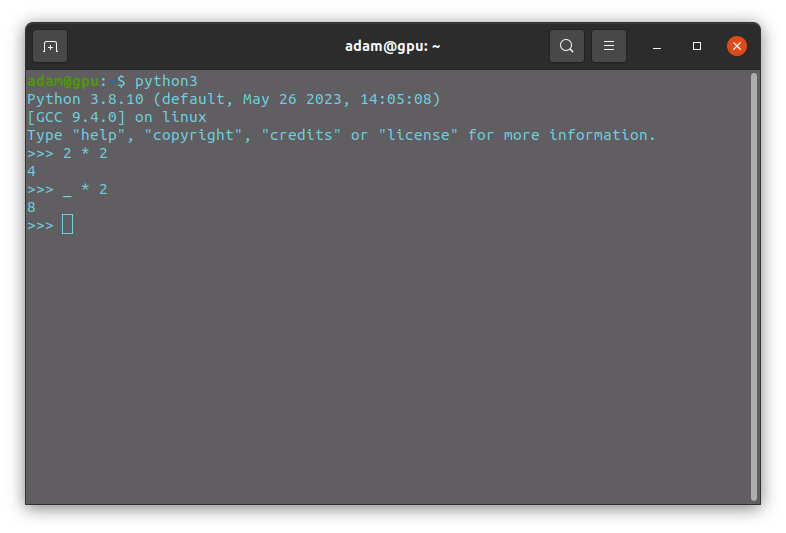
Trick 5: Make Use of the Underscore Variable
The underscore variable (_) holds the result of the last expression evaluated in the REPL.
It can come in handy when you need to reuse the result in subsequent operations without having to reevaluate the entire expression. So if you need to do some quick calculations or if you want to retrieve data super fast – you can just type in the underscore as a standard variable of the previous result.
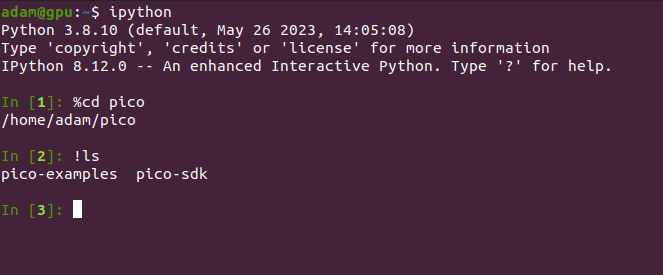
Trick 6: Execute System Commands & Magic Commands (IPython)
In IPython (short for “Interactive Python”), you can execute system commands directly by prefixing a line of code with an exclamation mark (!).
Together with IPython’s magic commands, like %cd to change directory, you’re able to use the Python REPL for seamless integration!
For example, !ls on Unix-based systems or !dir on Windows will list the contents of the current directory.
Trick 7: Experiment with Imports
In the Python REPL, you can experiment with imports without the need to create separate Python files. This feature allows you to import modules, try out their functions, and explore their contents interactively, making it convenient for quick experimentation and exploration of different modules and their capabilities.
Here’s how you can use the Python REPL to experiment with imports:
>>> import math
>>> math.sqrt(16)
4.0
In this example, we use the sqrt() function from the math module to calculate the square root of 16.
By using the Python REPL to experiment with imports, you can quickly test and explore the functionality of various modules without the need to create separate Python files.
This interactive and iterative process allows you to gain a better understanding of how different modules work, try out different functions, and examine their results in real-time.
Trick 8: Customize the REPL Prompt
Don’t like the >>> as your primary prompt and … as your secondary prompt?
You’re in luck, because you can customize the prompt displayed by the Python REPL.
By modifying the sys.ps1 and sys.ps2 variables, you can change the primary and secondary prompts, respectively.
Just run:
import sys

sys.ps1 = 'primary'
sys.ps2 = 'secondary'
Now, the primary prompt will be “primary” and the secondary prompt will read “secondary”. Feel free to change it up to whatever you like! Try it out with symbols or emojis, for instance!
Doing it this way will only affect the current REPL session. If you want to make things a little more permanent, then you’re going to need to find the “.pyrc” file and edit the prompts there.
Remember my boring, ugly prompters in my REPLs above? Let’s change the color.
If you’re using Linux, then you can plug in the following into your terminal:
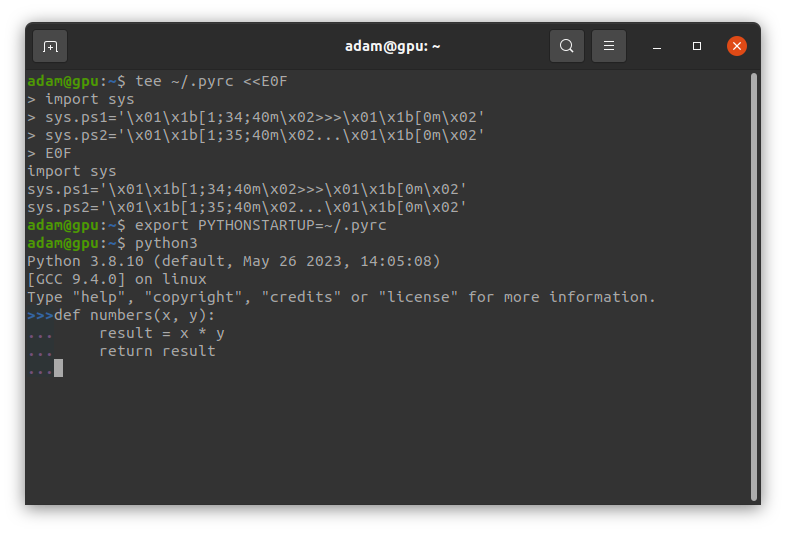
tee ~/.pyrc <<E0F
import sys
sys.ps1='\x01\x1b[1;34;40m\x02>>>\x01\x1b[0m\x02'
sys.ps2='\x01\x1b[1;35;40m\x02...\x01\x1b[0m\x02'
E0F
This will change the color of the primary prompt to a blue on grey and the secondary prompt to a purple on grey, if you’re looking for that. Feel free to experiment with all the ANSI color sequences to find a prompter color you’re happy with.
Once you’ve done that, make sure to export this:
export PYTHONSTARTUP=~/.pyrcNow you’re prompts should look like this:
Again, this is only temporary. If you want to permanently change things, you’re going to have to change the configuration file. But it gives you a taste of the fun to be had!
Trick 9: Explore Modules & Objects
If you’re looking to complement finding documentation and utilizing tab completion, then this is the trick that completes the package!
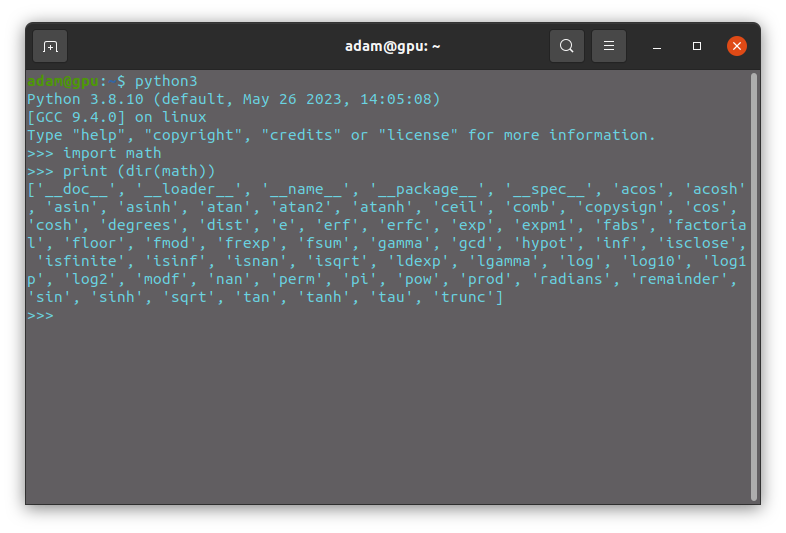
You can explore the contents of a module (or an object) by using the dir() function.
By passing a module or object as an argument, it returns a list of names within that module or object, allowing you to explore its available attributes, methods, and functions.
For example:
import math
print (dir(math))
This will display a list of the available attributes, methods, and functions within the math module.
It’s tricks like this can be instrumental in making your workflow seamless.
Once you’ve got these 9 tricks down, you’ll be able to use the REPL more effectively.
This will make debugging and testing your code go much smoother.
Let us know what REPL tricks you’ve got in the comments below!