Gaming on the Raspberry Pi Pico
In this post, I want to talk about gaming on the Raspberry Pi Pico.
I remember my first dumbphone, which was called a “phone” back then. It could play simple games like Snake. That was bleeding edge.
Prior to that, you’d have to carry a separate handheld that played Tetris or a more dynamic gaming system like a Gameboy.
The Raspberry Pi Pico is a pretty powerful microcontroller compared to what handhelds ran on in the 90s. Naturally, it offers us the ability to play games from that era.
How powerful is the Raspberry Pi Pico
Compared to a ‘80s console, the Raspberry Pi Pico is extremely powerful.
If you program a game that’s similar to the resource requirements of a game from the 1980s, the Raspberry Pi Pico will probably breeze through it.
It’s the ‘90s where it starts becoming a bit more difficult to state such a clear-cut conclusion.
On the one hand, if you think of it as a device capable of playing games that are similar to what you’d find on a Gameboy or a mobile phone, you will probably be pleased.
However, games in the late ‘90s became much more taxing. You won’t be playing Quake 3 (a 1999 game) on the Pico, for example.
In fact, while the Raspberry Pi Pico will play Doom (1993), it was a six-month endeavour for the person who coded it because it was quite a difficult task to compress the game into the 2MB storage that the Raspberry Pi Pico has.
So, while the Pico has two 133MHz processors, it has limited RAM and storage, making it difficult.
Let’s see how it compares to a Gameboy:
| Spec | Raspberry Pi Pico | Gameboy (1989) | Gameboy Color (1998) |
| Display | Colour LCD or e-ink ,it’s up to your imagination | 4 shades greyscale | 10, 32, 56 colours |
| Resolution | Depends on your display, but limited by Pico’s resources. | 160x144px | 160×144 px |
| CPU | 133MHz dual core | 4MHz | 4MHz/8MHz |
| RAM | 264KB | 8KB | 32KB RAM, 16KB VRAM |
| Storage | 2MB | Game Pak cartridge: 8MB ROM, 128KB RAM | Game Pak cartridge: 8MB ROM, 128KB RAM |
Why play games on the Pico and not the Zero/Pi 4?
Good question.
As you know, the Raspberry Pi Pico is a microcontroller while the Raspberry Pi Zero or Pi 4 are microcomputers.
Both can play games, but the Raspberry Pi Pico is much more limited.
That said, if you wanted to build an emulator or gaming system from the Raspberry Pi Zero or Pi 4s today (in 2022), you’d better have one already or else your biggest bottleneck is stock.
It’s very difficult to get a Pi Zero and quite challenging to get a Pi 4.
On the other hand, the Pico is plentiful. It also boots up almost immediately, whereas the microcomputer Pis have to go through a lengthy boot-up process.
The Pico also lasts much longer. If you want a mobile setup that will run for hours and is portable, you’ll do a lot better with the Pico.
Finally, besides stock, the Pico is also plentiful in stock.
To be fair to the Pi Zero and Pi 4, you can definitely play better games and have better emulation results with those microcomputers. As you will see in the next section, the Pico does struggle to play games that the Zero or Pi 4 will breeze through.
What games can the Raspberry Pi Pico play?
We’ll start by seeing what the tinkering community has been able to play on the Raspberry Pi Pico.
RP2040 Doom is the answer to “will it Doom?”
Yes! The Raspberry Pi Pico can play Doom.
A guy named Graham Sanderson from Austin, Texas, managed to port Doom onto the Raspberry Pi Pico.
His magic formula?
while (!convice_myself_its_probably_impossible()) {
    do_some_more();
}
He explained in his documentation of the process that he faced multiple restrictions from the hardware specifications that the Raspberry Pi Pico had. After all, it’s not a device intended for gaming.
Nonetheless, Graham also decided to make the porting of Doom even harder. He wanted the authentic experience of Doom, which meant having 320×200 (colour) resolution, stereo sound, OPL2 music, saving and loading, network multiplayer and other features that are available in the original name.
To pack so much game onto the Raspberry Pi Pico meant challenges with memory. Both RAM and storage were key issues.
Firstly, the Raspberry Pi Pico only has 2MB of storage, but the shareware version of Doom is twice that size. While other developers might decide to cut certain features like splash screens and downsampling of textures, Graham didn’t want to do that.
RAM was also another issue, with the Chocolate Doom source code requiring around 1MB of RAM whereas the Pico only has around 264KB. Memory is tight because rendering the graphics takes up a huge chunk of the RAM’s space, but RAM is also very important for the smooth running of the game. In order to manage both aspects, Graham had to do what he called “liposuction”.
You can read more by going to the documentation, watching his YouTube playlist or reviewing the code.
NES emulator
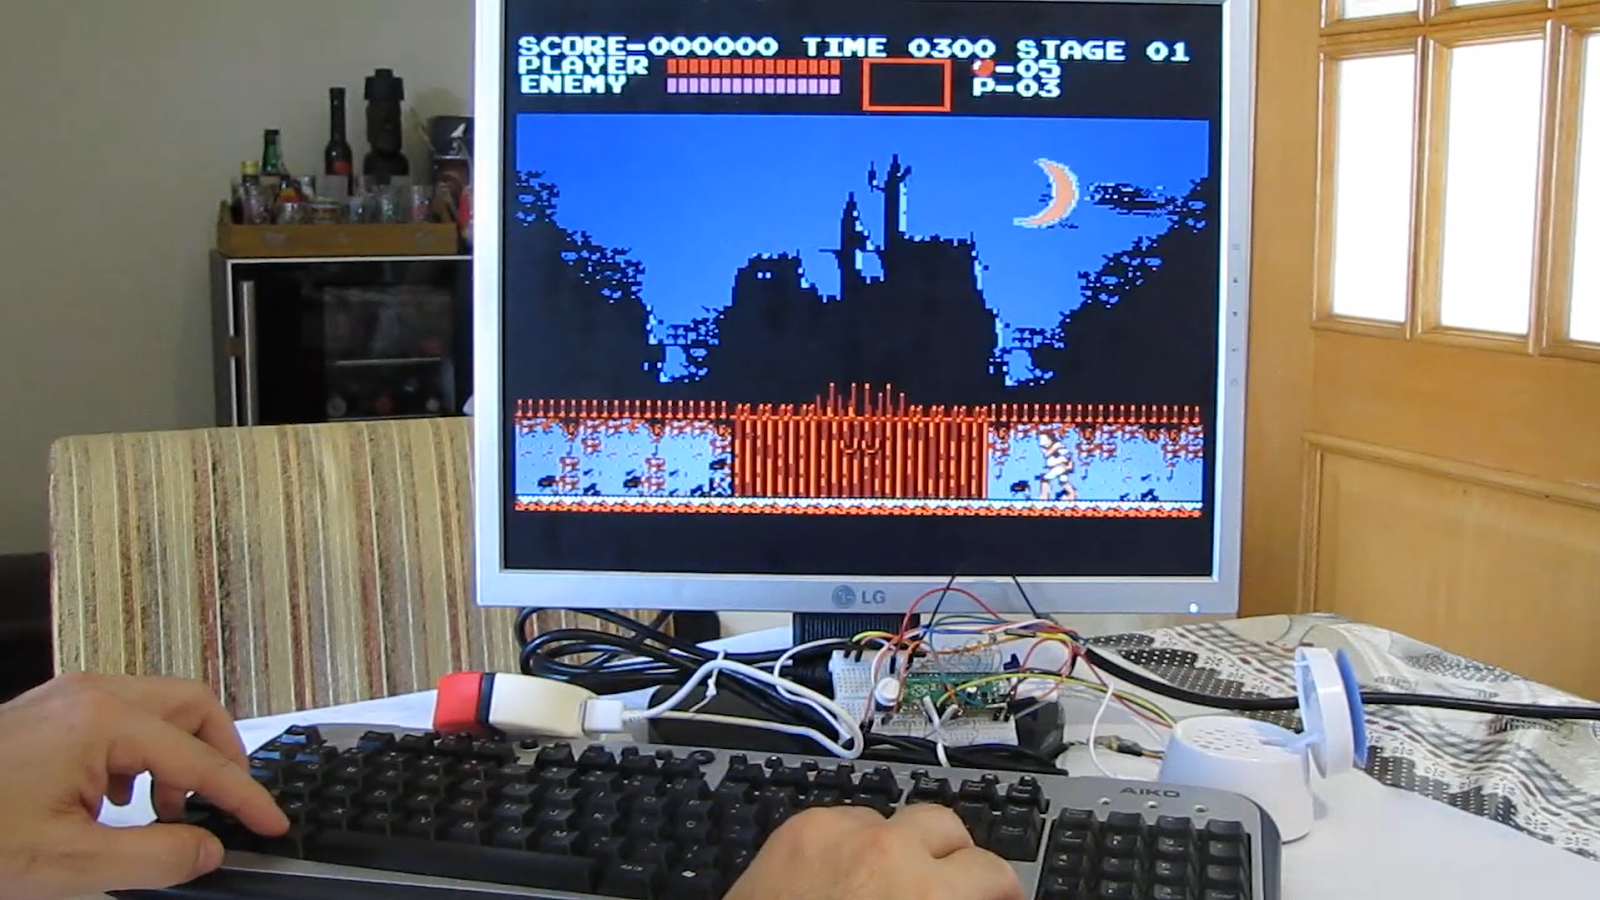
The Raspberry Pi Pico has been successfully made into an NES emulator.
In an Emulator Zone Forum thread, user ropgar said that the Raspberry Pi Pico has the power to emulate a NES and it can do 60 frames per second and can emulate APU and PPP perfectly.
Ropgar uses a PS/2 keyboard as a controller, but you can also use the original NES controller.
Sound is good and there are no glitches on video and background game music.
The Pico has about 1.5MB of flash space left for different games, which can be chosen by pressing Caps Lock to switch between games.
The games ropgar managed to load onto his demo are Pacman, Arkanoids, DK, DK Jr, BubbleBobble, Galaga, and many others.
The one downside is that there’s no public source code or tutorial on how to do this.
Gameboy emulator for the Raspberry Pi Pico
You can make your own Gameboy case and then use the Raspberry Pi Pico to emulate the Gameboy.
The tricky part here is that it’s actually not something that has seen a great amount of success. In other words, what you build might work, but not always.
Let’s take a look at the options out there.
Rust Gameboy emulator (OxidGB Pico Port)
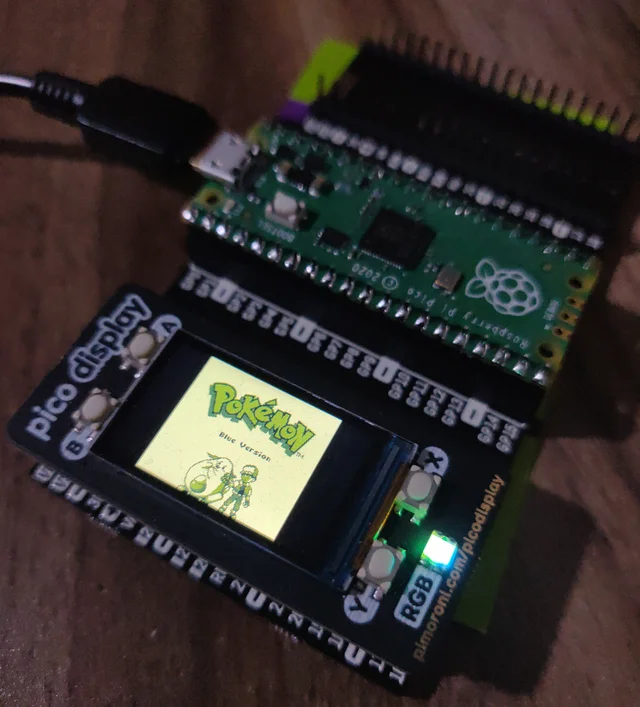
Upon seeing the Pokemon image on the screen, I was immediately excited.
However, James Selby actually wrote about the challenges and shortcomings of his Gameboy emulator, written in Rust, named OxidGB Pico Port.
“This has been a ride – a frustrating ride, but a ride I’ve thoroughly enjoyed nonetheless from an educational perspective,” Selby said.
Problems and wins
Here’s the main challenge: The Rust Gameboy emulator “isn’t exactly playable in its current state unfortunately.”
Selby said games only get about 10 FPS because the emulator’s code is a bottleneck as well as the slow SPI interface to the display.
It’s possible to speed things up but that would require time to plan and implement.
Input hasn’t been configured, since the games weren’t playable.
Testing the OxidGB Pico Port
If you’d like to give it a try, you can follow Selby’s instructions on his Github repo for the OxidGB Pico Port.
RP2040_GB emulator
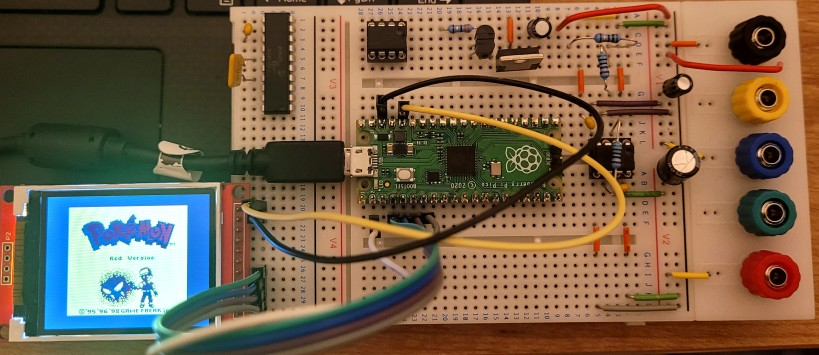
Another emulator you can try is the RP2040_GB, which is based on the Peanut-GB emulator.
Performance on the RP2040_GB is decent, with Koshkouei saying that his setup “runs at more than 70 fps without audio emulation. With frame skip and interlacing, can run at up to 120 fps.”
As you can see, the RP2040_GB is playing Pokemon. The steps to getting a ROM onto the RP2040 are as such:
- You must have the Pico SDK
- Convert .gb or .gbc ROM to a C header file using the xxd program
- Modify the converted file by adding two lines of code (in the Github readme)
- Copy ROM to the src folder and compile.
There are some limitations of this emulator:
- “This emulator is inaccurate and is very much a work in progress … some games may run incorrectly or not run at all.”
- Gameboy Color games will throw an error
- Not optimized for microcontroller: Koshkouei suggested that, “Using an APU that is optimised for space and speed” can help.
See the RP2040_GB’s Github repo here.
Mega Games Compilation with Raspberry Pi Pico
The best part about this project is that it’s simple and the instructions are adequate for you to get started on a Raspberry Pi Pico gaming console quickly.
Roger Bühler has parts, instructions and demos included on his Github.
The Mega Games Compilation comes with the following games:
- Tiny Gilbert
- Tiny Trick
- Tiny Invaders v3.1
- Tiny Pinball v2
- Tiny Pacman v1.2
- Tiny Bomber v1.3
- Tiny Bike v1.2
- Tiny Bert 1.1
- Tiny Arkanoid v2
- Tiny Tris v2.1e
- Tiny Plaque
- Tiny DDug
- Tiny Missile v1.1
- Tiny Lander v1.0 ( by Roger Buehler )
- Tiny Morpion
- Tiny Pipe
The parts you’ll need are as follows:
- Raspberry Pi Pico
- SSD1309 128x64px SPI OLED display (2.42” display at 2:1 ratio)
- Piezo buzzer
- Five buttons
- Breadboard
- Jumper cables
- Optional: 10 ohm resistors, electrolytic condenser rated for at least 10V and 220uF
You will also need Adafruit’s SSD1306 library.
Here’s how to connect the display:
- GND –> Display GND
- 3V3(OUT) -> Display VCC
- GP16 -> Display DC (Data Command)
- GP17 -> Display CS (Channel Select)
- GP18 -> Display SCL (Clock)
- GP19 -> Display SDA (MOSI)
- GP20 -> Display RES (Reset)
And to connect the buttons:
- GP15 -> button UP
- GP14 -> button DOWN
- GP13 -> button LEFT
- GP12 -> button RIGHT
- GP11 -> button FIRE (all buttons to GND)
And to connect the piezo buzzer:
- GP10 -> Buzzer(+)
- GND -> Buzzer(-)
Software installation:
In order to install the software, you need to use the Arduino IDE.
Tamagotchi-like game on the Raspberry Pi Pico (Pico-Tamachibi)
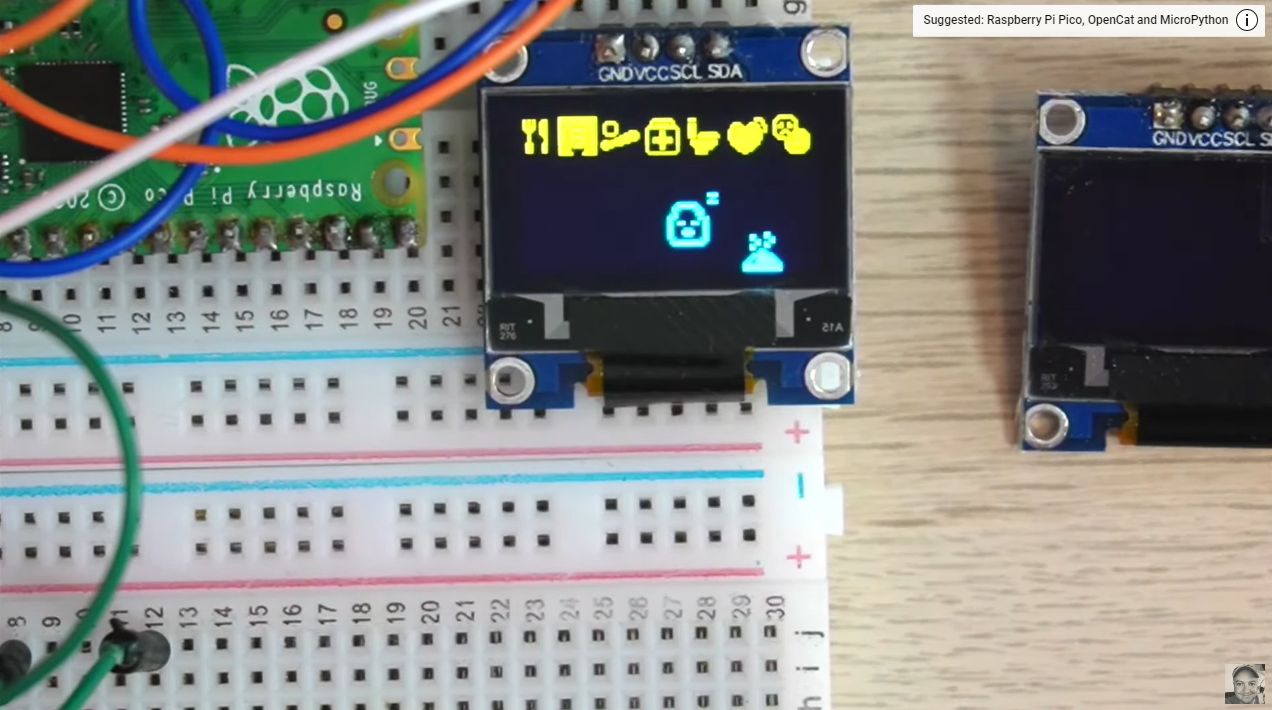
Why is it called Pico-Tamachibi?
According to Kevin McAleer, the creator of this device, “tama” means “egg” and “chibi” refers to graphics where the character has a big head.
Creating the Tamachibi is easy because Kevin goes through every step of the way in his 90 minute tutorial.
Build your own gaming machine
If you want to make your own Raspberry Pi Pico gaming machine, there are two general ways you can do that: buy a ready-made kit or build one yourself.
Ready-made kit vs DIY Raspberry Pi Pico gaming hardware
While it’s possible to start from scratch, you might want to skip the hassle of building your own system and just buy a ready-made package.
There are a few RP2040-based kits that allow you to jump straight into playing or developing your own games.
Let’s look at the Pimoroni Picosystem and then compare it to the process of building something similar using individual parts.
Pimoroni Picosystem
Let’s take a look at the Pimoroni Picosystem.
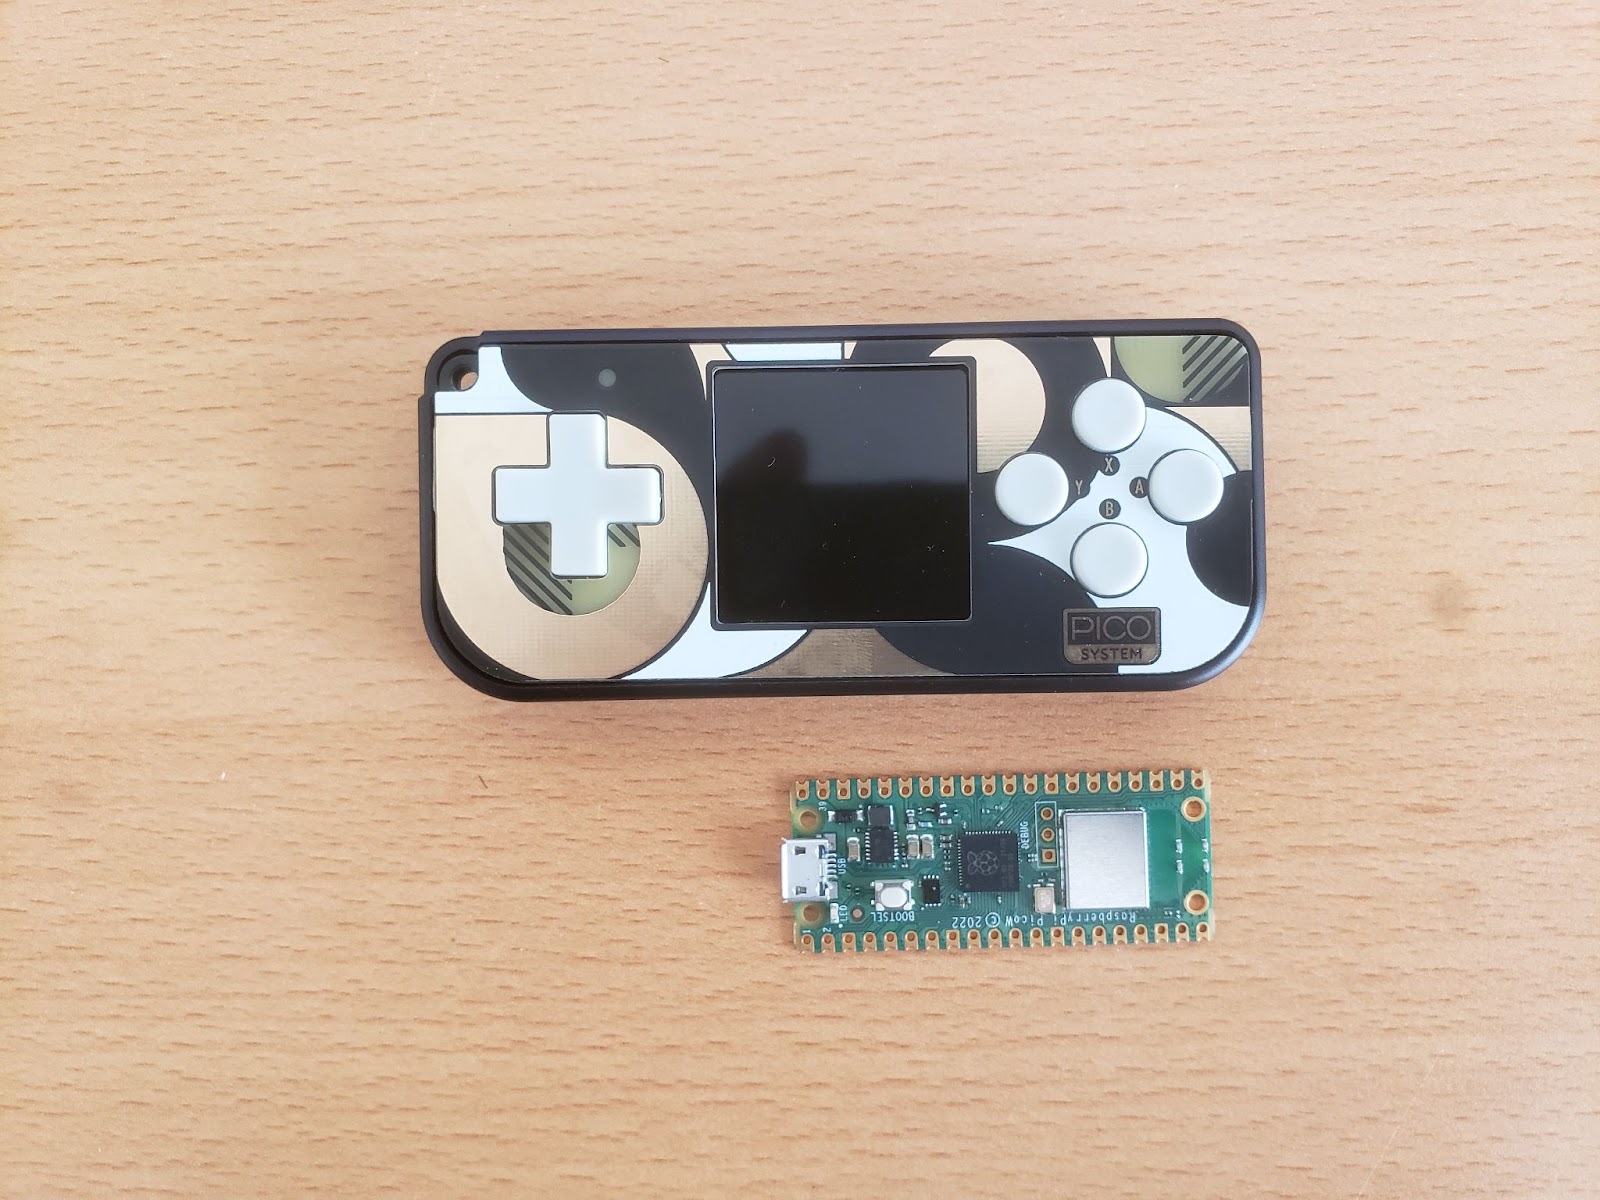
As you can see, it’s much bigger than the Raspberry Pi Pico W, but that’s also because it has a four-way D-pad, four buttons, LCD screen, a lithium-ion battery, piezo speaker and a USB-C port, among other additions.
It has the same processor and RAM, as both the Picosystem and the Pico use the RP2040 chip. Here’s the full specs:
- Powered by RP2040 (Dual Arm Cortex M0+ with 264kB of SRAM)
- 16MB of QSPI flash supporting XiP
- 1.54″ colour SPI IPS LCD (240×240 and 120×120 modes)
- D-pad and buttons
- 525mAh LiPo battery (6hrs+)
- Piezo buzzer/speaker
- On/off power button
- RGB LED
- Programmable and rechargeable via USB-C (cable not included)
Graphics modes
PicoSystem supports two graphics modes.
- 240×240: the native resolution of the LCD
- 120×120: pixel doubled mode (saves RAM)
What does gaming on the Picosystem look like?
Gaming on the Picosystem is easy. Just press the power button and you are treated to the preloaded game called Super Square Bros.
The game is a simple platformer much like Mario.
Pimoroni has also included other games:
- Super Square Bros. by Scorpion Games – A bouncy quadrilateral platformer (preloaded game)
- Dots – Dot popping puzzler. Create chains of two or more and race to get the biggest score.
- Rocks and Diamonds – Classic game of dodging rocks and grabbing diamonds.
- Geometry – Smash up space boulders with lasers to make smaller space boulders!
- Rainbow Ascent – The Dark Souls of procedurally generated vertical jumping puzzles. Good luck.
- Super Blit Kart by Daft_Freak – A “Mode7”-based racing game.
In order to install these games, do the following:
- Download the file.
- Plug your Picosystem to the PC
- Press and hold the X button and the press power button.
- The Picosystem should be mounted as a drive called RPI-RP2
- Copy the downloaded .uf2 file onto the drive. It will automatically load.
For some reason, my USB-C to USB-C cable didn’t work, but the USB-A to USB-C cable worked with the Picosystem. If you do not see the red LED light up, then try another cable.
Program your own games
The best part about the Picosystem is that it provides a system for you to create your own games.
Rather than coding from scratch, PicoSystem comes with a special API that can help you create your games.
It also takes away a lot of the tedious work required to buy individual parts like an LCD screen, buttons, jumper wires, breadboard and then figuring out the libraries and packages required to get all of these working.
The PicoSystem’s API has functions for drawing stuff on the screen, to output audio, hardware functions and other utility functions. This makes it easier for you to build your game.
Just like the Raspberry Pi Pico, the PicoSystem can be coded in C++ or MicroPython.
Is it easy to program a game with the Picosystem?
I’d recommend that you have some time and patience in order to build your own game with the Picosystem.
The documentation offers the basics in order to get you started but it’ll be best if you had some prior knowledge of game programming.
The biggest challenge for beginners is that there aren’t many resources out there that teach you how to code sample projects. However, here’s a list of reference that will help you:
Picosystem MicroPython guide (in readme)
Picosystem MicroPython examples
Picosystem API cheatsheet, plus image, font converter (on sidebar)
DIY system: Creating the hardware
YouMakeTech’s guide walks the reader through how to make a complete gaming console with a case, sound system and permanent soldering.
For our comparison, let’s see how much it would cost to build a DIY unit versus the Picosystem, which is a complete kit.
| YMT’s gaming system | Pimoroni Picosystem | |
| Case | Optional, 3D printed ($4.47 for STL blueprints, plus filament and 3D-printer rental/operation costs) | Included |
| Raspberry Pi Pico | $5 for Pico H because you will need the headers. | Included |
| OLED display | $15 (0.96 inch display) | Included |
| Buttons | Negligible | Included |
| Breadboard | $15 (breadboard kit) | Included |
| Jumper wires | Included in breadboard kit | Included |
| Screws | Up to $1 | Included |
| Piezo | Negligible | Included |
| Total cost | $40.47, excluding 3D printing costs | $70 |
So let’s see the final costs for different tiers of DIY setups:
| Setup | Costs |
| No battery | $40.47 excluding 3D printing costs |
| Lipo battery | $8 |
| Pimoroni Pico Lipo | $16.39 – $4 (since we’re using the Pimoroni Pico replacement, we can deduct the cost of the Raspberry Pi Pico) |
| Total for a battery-powered kit | $60.86 excl. 3D printing costs |
Just a caveat – YouMakeTech says that you can build this for less than $20. In my research, however, the costs for a DIY set up that matches the Picosystem don’t really differ that much, especially when you consider the software and convenience.

That said, the DIY route is a great learning opportunity. One thing that challenged me was the screen. While YouMakeTech’s example uses an I2C connection, the screen that I had used a 4-pin SPI interface. That either requires a change in coding or a modification to the hardware in order to proceed. If you like challenges, the DIY route is for you.
So, what are the advantages by doing it DIY versus the Picosystem?
| Pros/Cons | DIY | Picosystem |
| Hardware assembly | You DIY everything | You DIY nothing |
| Software | Not much help here. You DIY everything yourself and learn how to operate each component. | You have to learn the Picosystem’s API |
| Learning opportunity | Larger learning opportunity because you are piecing together disparate parts | Smaller. It’s ready made and software will be the biggest learning opportunity here |
| Extendibility | Since you built it, you can change the LCD screen, add more buttons, add LEDs, etc. | Not much unless you want to rip a complete system apart. |
Creating the Pong-like game on the Picosystem vs DIY system

A curious experiment of mine involves understanding how much effort it’ll take to develop a game using the Picosystem versus doing it from scratch.
In order to compare the two systems, I will be building a one-player Pong-like game on both YouMakeTech’s DIY system and the Picosystem.
The game’s premise is simple. It’s a one-player Pong-like game that gives you 10 points every time your ball bounces off the paddle. If it falls to the bottom of the screen, you get a “Game Over” message.
Creating the game on both systems follows a simple workflow that all leads to Thonny.
You’d need to flash MicroPython onto the Pico and then you will use Thonny to code your program.
The MicroPython that you’d flash on the Picosystem is different from the official MicroPython UF2 file, so make sure you’re flashing the right one because the Picosystem will run on the official MicroPython release. It just won’t work as intended.
Now, let’s look at some fundamental differences between the two. I am excluding game logic here and only comparing differences in hardware-software interaction and programming patterns.
You can see YouMakeTech’s code here.
First difference: hardware code
Things are very “raw” with the DIY route. Here’s some code to initialize the display, GPIO and buttons that you won’t need to do with the Picosystem:
from machine import Pin, PWM, I2C,
from ssd1306 import SSD1306_I2C
…
# Buttons
up = Pin(2, Pin.IN, Pin.PULL_UP)
down = Pin(3, Pin.IN, Pin.PULL_UP)
left = Pin(4, Pin.IN, Pin.PULL_UP)
right = Pin(5, Pin.IN, Pin.PULL_UP)
button1 = Pin(6, Pin.IN, Pin.PULL_UP)
button2 = Pin(7, Pin.IN, Pin.PULL_UP)

# Buzzer connected to GP18
buzzer = PWM(Pin(18))

# OLED Screen connected to GP14 (SDA) and GP15 (SCL)
i2c = machine.I2C(1, sda = Pin(14), scl = Pin(15), freq = 400000)
oled = SSD1306_I2C(SCREEN_WIDTH, SCREEN_HEIGHT, i2c)
Second difference: Picosystem’s API
If you are writing code on the Picosystem, you’d have to write within its system.
In YouMakeTech’s example, all game logic is encapsulated within a while True loop. This includes button interaction, collision detection and drawing to the screen.
In the Picosystem, you are required to write within three functions – init(), update() and draw().
In my code, all the game’s logic is written in update() including collision handling and D-pad interaction.
In a simple Pong game, there are a few functions from the API that I used that made things a bit easier:
intersects(x1, y1, w1, h1, x2, y2, w2, h2) is probably the biggest help here. You’d pass the coordinates and sizes of the two squares and it will return true if there’s an intersection. In this case, the two rectangles are the ball and the bar (a.k.a. paddle). The shortcoming of the intersects() function is that it doesn’t detect which side the collision happened on, so I had to write extra code to deal with collisions on the side of the bar.
The Picosystem’s API will really shine as you develop more complicated games, given that it already has a method for framebuffers, audio output, blending, etc.
Code for Pimoroni Picosystem Pong-like game
#bar_pos_x = pixels from left, e.g. 0 from left
bar_pos_x = 50
#bar_pos_y = pixels from top, e.g. 100px from top
bar_pos_y = 100
BAR_WIDTH = 30

LENGTH_CONSTANT = 5

ball_speed = 1
ball_pos_x = 10
ball_pos_y = 10
ball_dx = 2
ball_dy = 2

score = 0
game_over = False

def update(tick):

    global bar_pos_x
    global bar_pos_y
    global ball_pos_x
    global ball_pos_y
    global ball_dx
    global ball_dy
    global ball_speed
    global score
    global game_over

    def reverse_ball_dx():
        global ball_dx
        ball_dx = ball_dx * -1

    def reverse_ball_dy():
        global ball_dy
        ball_dy = ball_dy * -1

    ball_pos_x += ball_dx
    ball_pos_y += ball_dy

    if button(LEFT) and bar_pos_x > 0:
        bar_pos_x -= 1

    if button(RIGHT) and bar_pos_x < 120 - BAR_WIDTH :
        bar_pos_x += 1

    if ball_pos_x <= 0 :
        ball_pos_x = 0
        reverse_ball_dx()

    if ball_pos_x >= 120 - LENGTH_CONSTANT :
        ball_pos_x = 120 - LENGTH_CONSTANT
        reverse_ball_dx()

    if ball_pos_y >= 120 - LENGTH_CONSTANT :
        game_over = True

    if ball_pos_y <= 0:
        ball_pos_y = 0
        reverse_ball_dy()

    if intersects(bar_pos_x,bar_pos_y,BAR_WIDTH,LENGTH_CONSTANT, ball_pos_x, ball_pos_y, LENGTH_CONSTANT,LENGTH_CONSTANT):

        reverse_ball_dy()
        score += 10

        #main intersection of ball and bar. if they intersect, check if they are intersecting on the sides.
        #if not on sides (i.e. on top) reverse Y direction. Or else, reverse X direction.
        if intersects(bar_pos_x,bar_pos_y,1,LENGTH_CONSTANT, ball_pos_x, ball_pos_y, LENGTH_CONSTANT,LENGTH_CONSTANT):

            #intersecting on left

            reverse_ball_dx()
            ball_pos_x -= 2

        if intersects(bar_pos_x + BAR_WIDTH,bar_pos_y,1,LENGTH_CONSTANT, ball_pos_x, ball_pos_y, LENGTH_CONSTANT,LENGTH_CONSTANT):

            #intersecting on right

            reverse_ball_dx()
            ball_pos_x += 2


def draw(tick):

    if game_over:
        pen(0,0,0)
        clear()
        pen(15,15,15)
        text("Game Over", 35, 60)


    else:
        pen(0, 0, 0)
        clear()
        pen(15,15,15)

        #draw bar (paddle)
        frect(bar_pos_x,bar_pos_y,BAR_WIDTH,LENGTH_CONSTANT)

        #draw the ball
        frect(ball_pos_x, ball_pos_y, LENGTH_CONSTANT,LENGTH_CONSTANT)
        text(str(score), 80, 20)

start()
Got a game to recommend?
If you have a game for the Raspberry Pi Pico, leave a comment below with a URL.
And if you want to check out our Paragon Projects series – go here.
does the pimoroni system have code to allow you to use an external accessory/device like a small fpga to enhance performance?