Progetti Raspberry Pi: Controllore di gioco Alpakka, registratore di blackout e misuratore di luce
Date un'occhiata a questi tre fantastici progetti Raspberry Pi!
Controllore Alpakka per Pico
Se avete sempre desiderato un controller, potete ovviamente andare a comprarlo.
Ma noi siamo appassionati di Raspberry Pi!
Faremo cose 100 volte più difficili perché sono 100 volte più divertenti!
Quindi, eliminate l'ordine del gamepad Logitech e costruite un controller Alpakka di Input Labs.
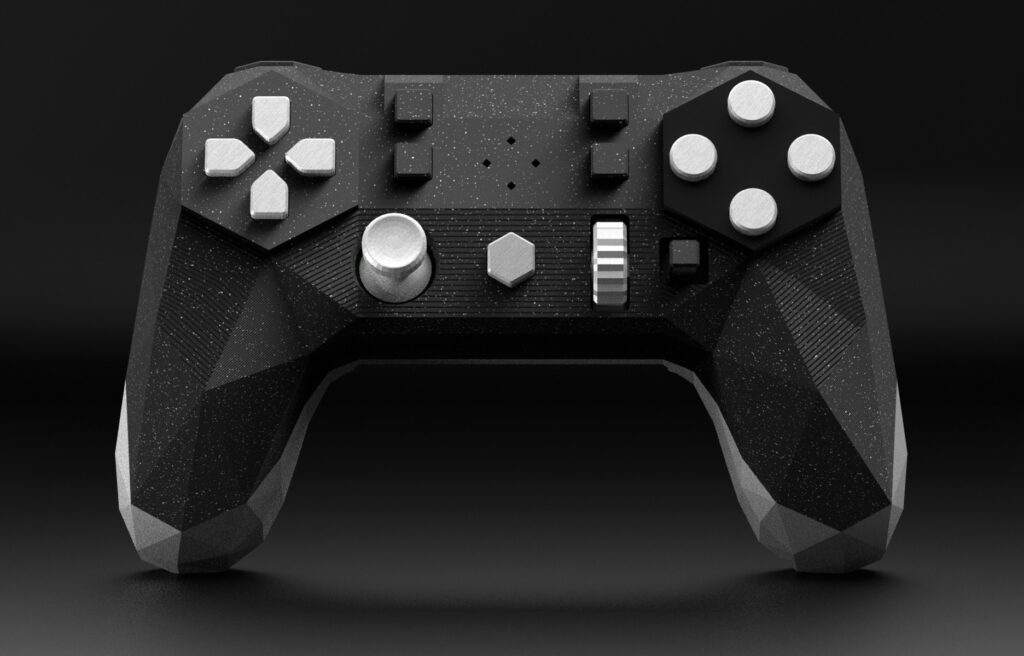
Alpakka offre effettivamente alcuni vantaggi rispetto a un normale controller standard.
Per esempio, l'Alpakka ha "controlli giroscopici avanzati, prestazioni competitive simili a quelle di un mouse e la potenza di una comunità open source che offre accessibilità e possibilità di personalizzazione illimitate".
Il giroscopio integrato promette di avvicinarsi all'efficacia dell'uso del mouse, tanto che si potrebbe persino essere in grado di giocare a sparatutto in prima persona. Nella pagina delle FAQ, Input Labs afferma che basta un minuto di apprendimento per utilizzare il giroscopio e ottenere risultati migliori rispetto a un gamepad tradizionale.
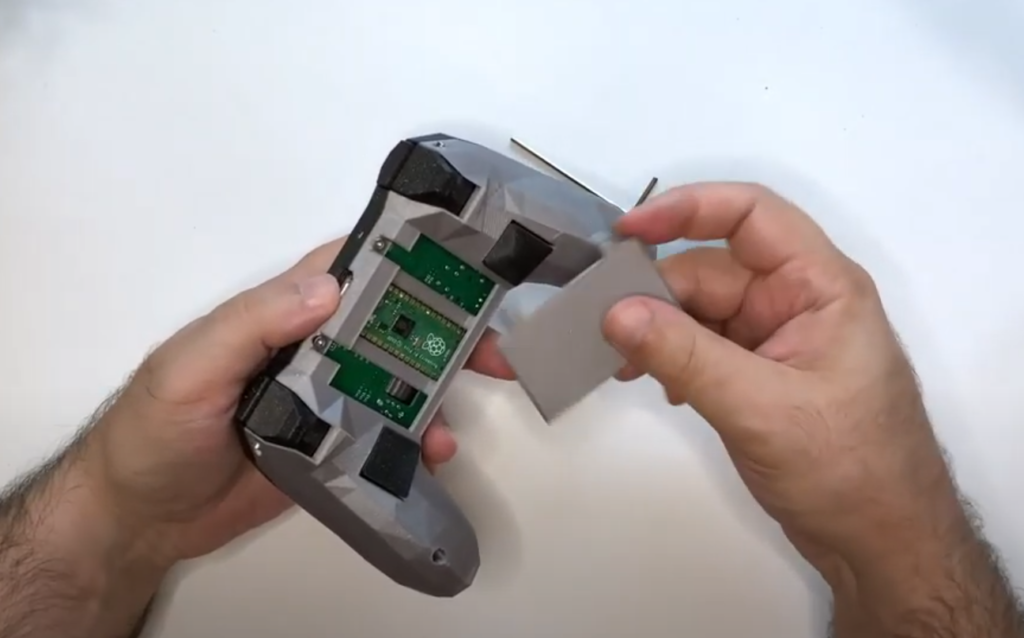
Input Labs ha creato una guida molto completa su come costruire il proprio controller di gioco acquistando un circuito stampato, ottenendo un case stampato in 3D e assemblando tutte queste parti con un Raspberry Pi Pico al centro.
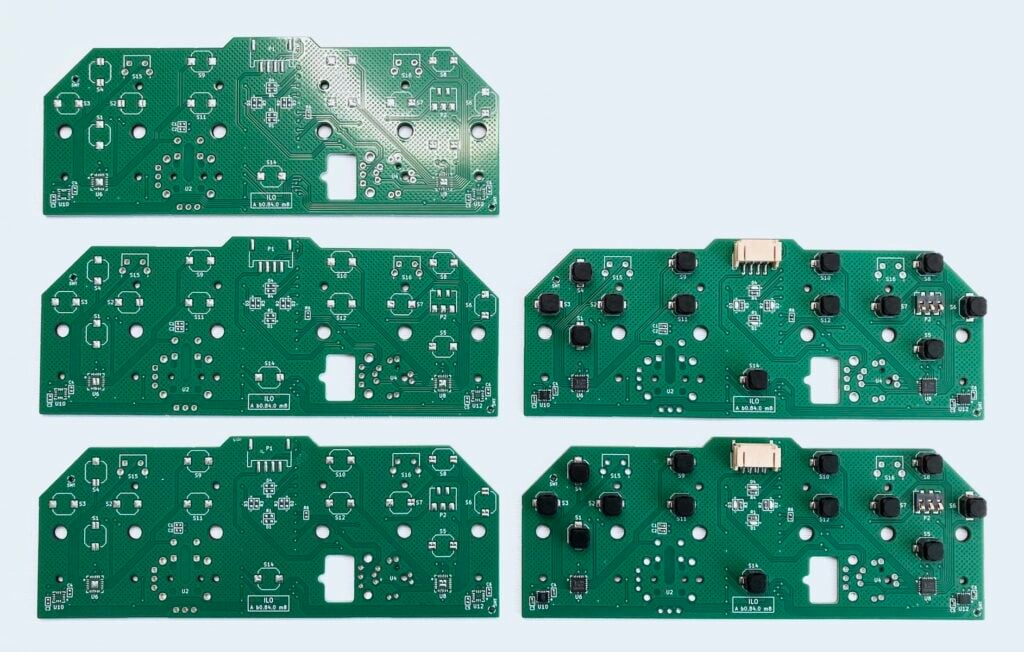
Input Labs ha dedicato molto impegno alla documentazione. È possibile guardare un video di nove minuti su YouTube che illustra i tre processi principali: PCB + saldatura, stampa 3D e assemblaggio.
In alternativa, è possibile consultare la documentazione sul loro sito web che entra nel vivo della creazione del controllore Alpakka.
Inseguitori di blackout elettrico

Non ho mai vissuto in un luogo dove i blackout sono regolari. Il peggiore che ho vissuto è stato durante la tempesta di ghiaccio del 2013, che ha bloccato molte città intorno al lago Ontario.
Ma ci sono luoghi nel mondo in cui i blackout sono un evento regolare. India, Myanmar, Sudafrica e Ucraina, a causa della guerra.
Dmytro Panin vive a Kiev e ha creato un Blackout Logger.
Secondo lui, il governo ucraino ha introdotto i blackout per stabilizzare la rete circa un mese fa. Ha anche detto che,
"Quando torno a casa o mi sveglio e non c'è elettricità, non so per quanto tempo è mancata, quindi è difficile prevedere quando aspettarsela. Viceversa, quando c'è la corrente non so quando ci sarà l'interruzione se non seguo l'orario. Per poter fare dei piani a breve termine, ho ideato questo dispositivo. Tiene traccia dell'inizio e della fine del blackout e registra gli eventi precedenti".
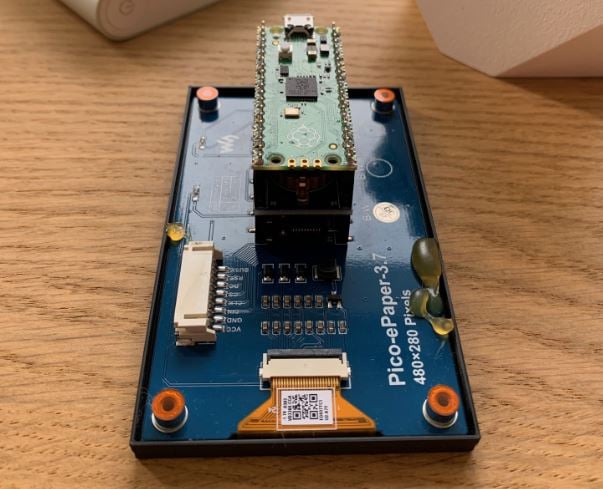
Il progetto richiede solo tre componenti
- Raspberry Pi Pico
- Modulo RTC di precisione (DS3231)
- Waveshare eink 3.7
Photon, il misuratore di luce di Raspberry Pi Pico
I misuratori di luce sono un oggetto piuttosto standard ai bei tempi della fotografia analogica, ma non al giorno d'oggi.
Se avete macchine fotografiche che non dispongono di un misuratore di luce, o se i misuratori di luce si sono guastati, forse è il momento di mettersi all'opera e costruirne uno!
VEEB Projects ne ha creato uno con sette componenti, tra cui un Raspberry Pi Pico, uno schermo OLED e il sensore di luce BH1745 di Pimoroni.
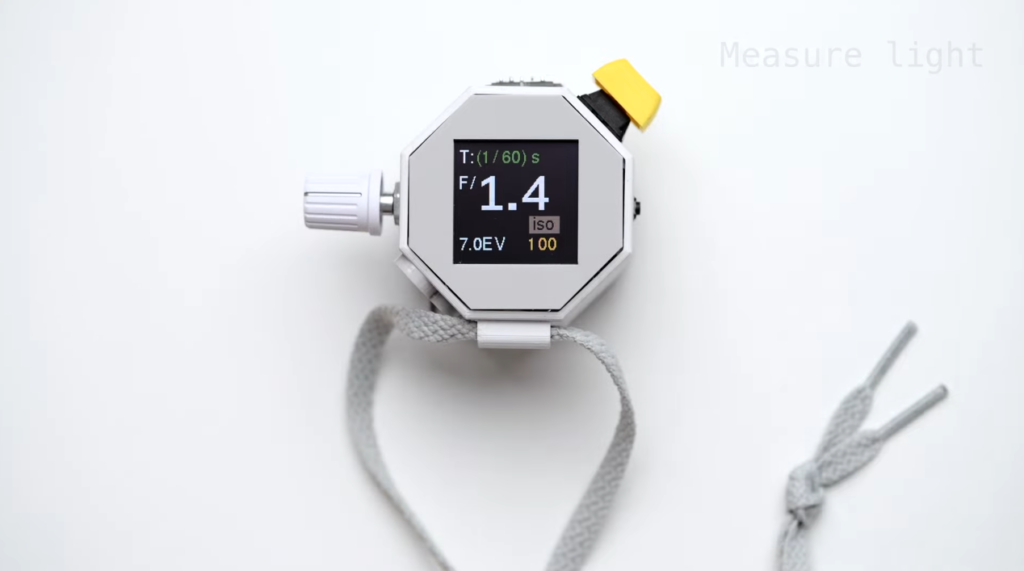
Questo progetto è perfetto se non si vogliono spendere centinaia di euro per acquistare un misuratore di luce commerciale.
Collegamento a Video introduttivo su YouTube
Ecco i nostri tre progetti Raspberry Pi della settimana.
Volete vedere altri progetti fantastici?
Potete vedere la nostra serie di progetti Paragon facendo clic su qui.
E, come sempre, se avete domande o se volete suggerire un progetto per questa serie, commentate qui sotto!