How to Build a Security Camera with a Raspberry Pi

Security cameras are important for many businesses. In this article, I will go over how to build a Raspberry Pi security camera to keep your business safe.
At the end, you will have a camera with a feed that you can access from anywhere in the world, provided you have an internet connection.

And setting up a project like this only takes about 20 minutes.
Why a Raspberry Pi Security Camera?
There are countless security cameras on the market that are available for purchase. However, with a Raspberry Pi camera, you have far greater control over the hardware and therefore over the security.
As Forbes reported last year, smart security cameras are “a hacker’s dream” and put your business at risk.
In the same article, there are three recommendations to manage the cybersecurity of the security cameras:
- Be aware of all the cameras on the network
- Give strong passwords and regularly change them
- Update the firmware regularly
Now, it’s possible to do this with many of the smart security cameras available, but it’s undoubtedly easier with a Raspberry Pi. Using a Raspberry Pi can ensure that you are up-to-date on all of these points, because you have direct access to both the hardware and the software.
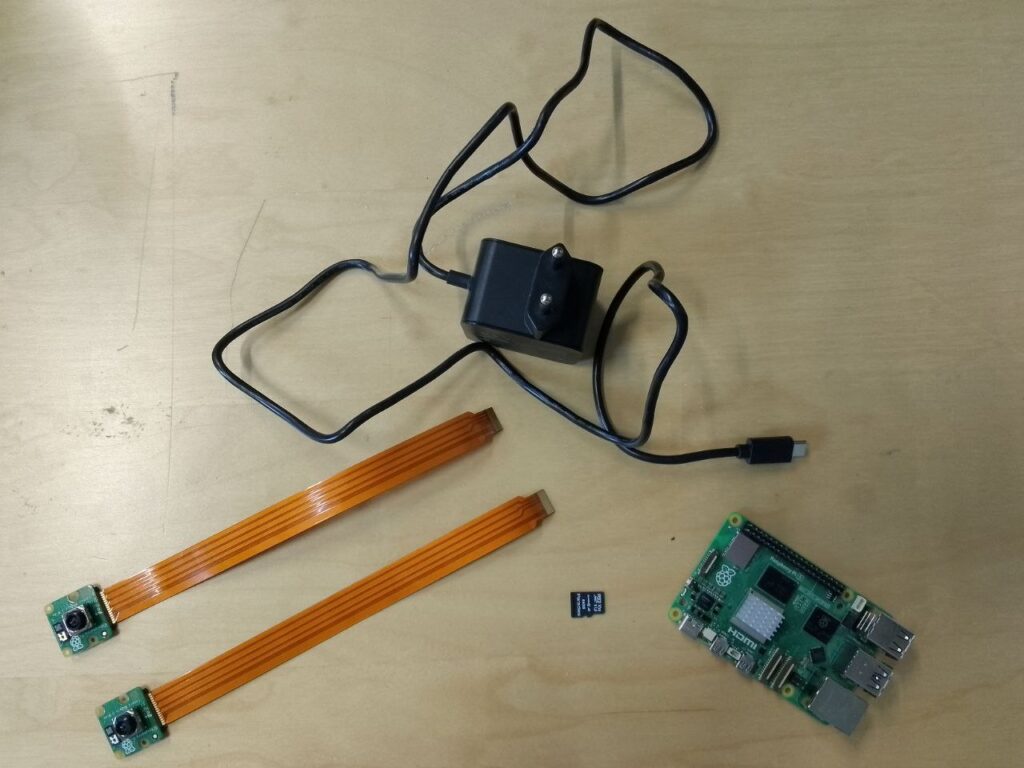
What you need
So, for this project, the basics items you’ll need are a:
- Raspberry Pi
- Raspberry Pi Power Adapter
- micro SD Card
- micro SD Card Reader (USB)
- Camera
In addition to that, you might want to set up a camera case that can protect the Raspberry Pi and camera, especially if you plan on setting this up outside.
You could use many different Raspberry Pi models for a project like this – a Pi 3B+ or a Pi 4B, for instance.
You could also use many different cameras, like the Raspberry Pi NoIR Camera or a USB camera that you plug into one of the USB ports.
For my project, I’m using a Raspberry Pi 5 and two Raspberry Pi v3 MIPI cameras (with the Raspberry Pi 5 adapter cables).
Depending on your energy considerations, it may be a better bet to go with a slightly less high-end Raspberry Pi model, but a Raspberry Pi 5 can support two cameras and process the video extremely quickly and efficiently.
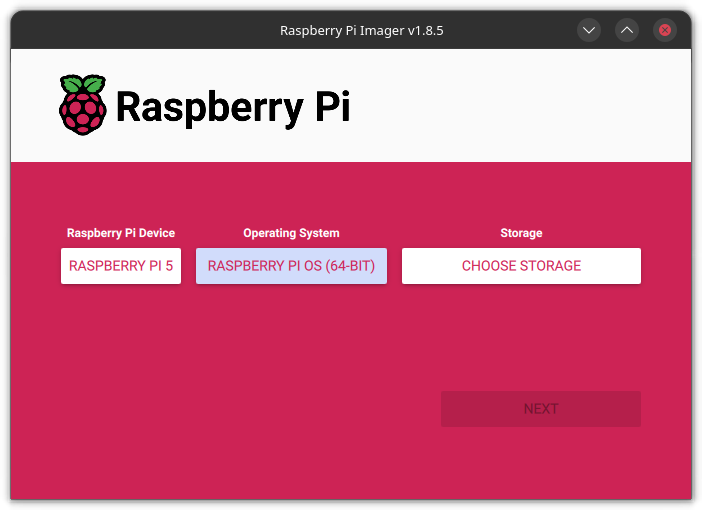
Flash the SD card
I’m going to start off by flashing a fresh micro SD card with Raspberry Pi OS.
So you’ll need to download the Raspberry Pi imager.
Then you plug your micro SD card into the micro SD card reader and plug that into your computer.
Open up the imager, follow the instructions, and flash the micro SD card with Raspberry Pi OS. We recommend using the newest release – Bookworm.
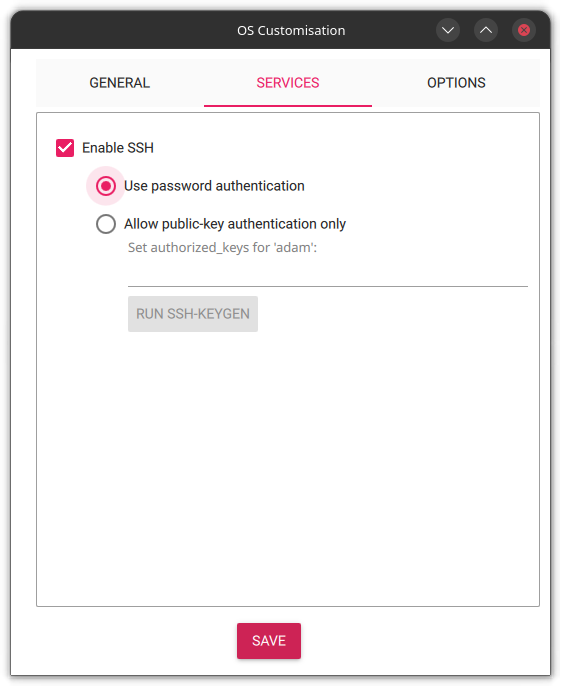
When it asks you about customizing your operating system, be sure to enable SSH. That’s important for the software:
After you’ve flashed the micro SD card, you’ll need to insert the SD card into the Raspberry Pi.
Attach the cameras
Before turning on your Raspberry Pi, you’ll need to lift up the holder on the port carefully. Then, ensuring that the cable is facing the correct side, you’ll need to attach it flush with the port.
Attaching the cameras the first time can be tricky and requires a bit of coordination.
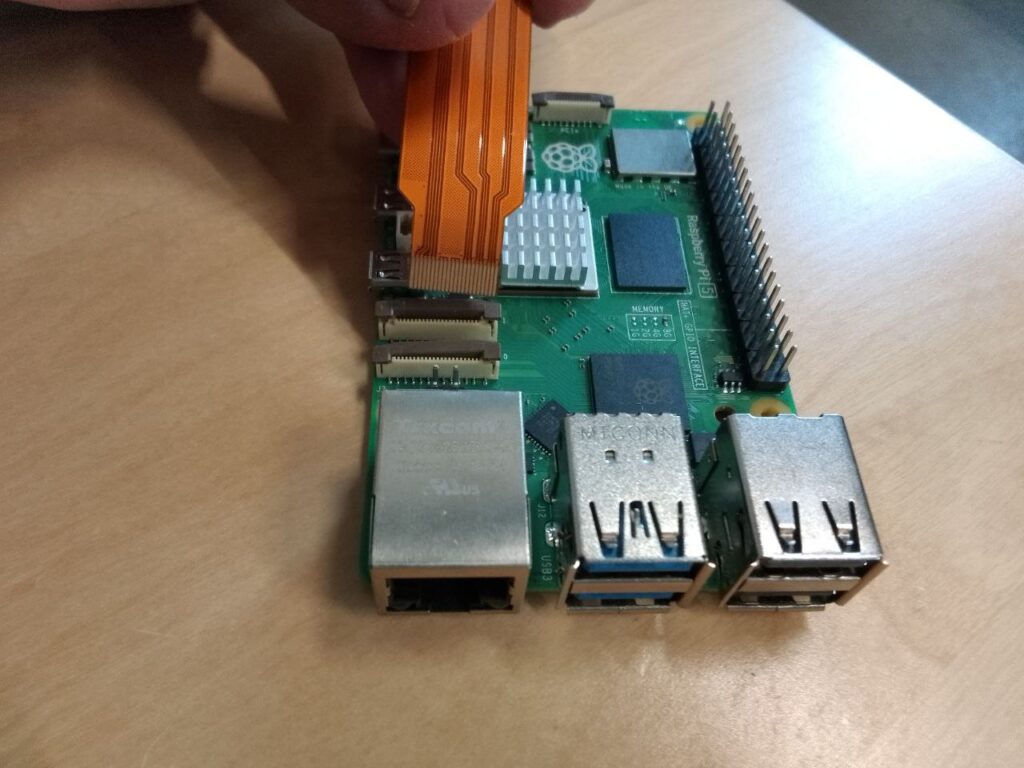
After setting up both cameras, I’m ready to go.
Install PiCockpit
Once you’ve got all your hardware set up, all that’s left to do is plug in your Raspberry Pi.
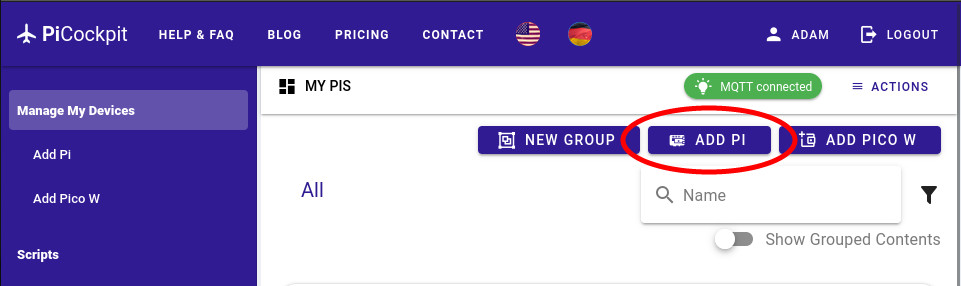
And for the software here, we’re going to be installing PiCockpit. PiCockpit is ideal for this project, because it’s secure and because it’s super easy to set up. You don’t need to do any port forwarding or any complicated networking.
All you need to do is sign up for PiCockpit. Then click on the button that says “ADD PI”.
From there, you will be able to download the PiCockpit setup script.
Now open a terminal and change to your Downloads directory. And from here, you’re going to run Secure Copy Protocol to copy the setup script over to your Raspberry Pi.
scp picockpit-addrpi-v2.5.0.sh <username>@<RPi name>.local:/home/<username>/In case it isn’t clear, you need to replace <RPi name> with your Raspberry Pi’s name as well as both instances of <username> in the command above.
That sends the file over to your Raspberry Pi and now all we need to do is run it.
So first, you’ll need to SSH into your Raspberry Pi.
ssh <username>@<RPi name>.localIt will ask you for the password.
Then you need to make the script executable.
chmod +x picockpit-addrpi-v2.5.0.shThen you need to run the script.
./picockpit-addrpi-v2.5.0.shYou have now successfully installed PiCockpit on your Raspberry Pi.
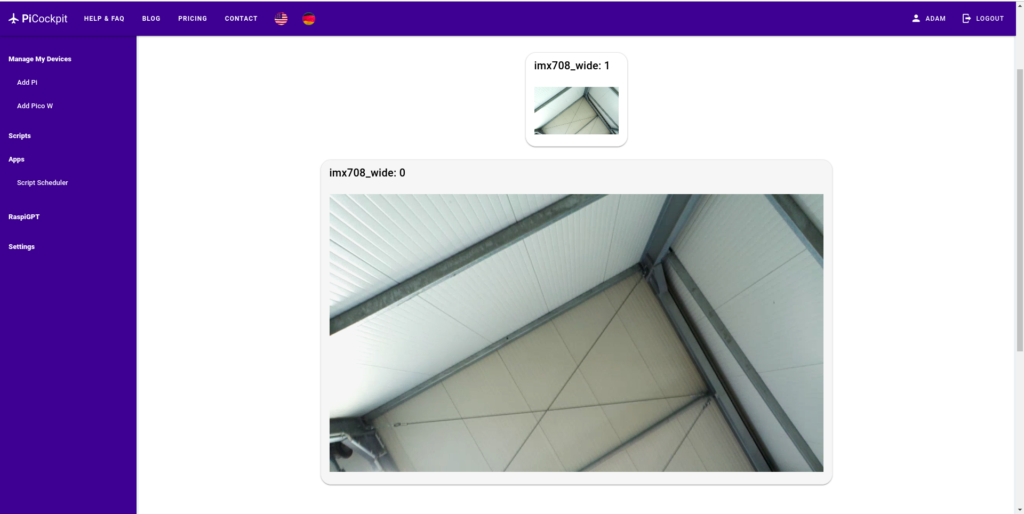
Now that you have PiCockpit installed on your Raspberry Pi, all that’s left to do is to go to the web interface on PiCockpit to view your camera feed.
With the Free Plan, you’ll receive 30 minutes across all cameras. With the Pro Plan, however, you’ll receive unlimited streaming across unlimited cameras.
Conclusion
Now you can access the security camera from anywhere. All you need is an internet connection.
If you have any questions, feel free to leave a comment below!
Excellent! Installing this week.
Let us know how it goes!
¿Cuántas cámaras como máximo se pueden instalar?
Kan dit ook met een Pi Zero met >180 graden groothoeklens?
Wat zijn de kosten?