Paragon Project: A Plant Moisture Meter
Looking for a quick and painless solution to keeping your plants hydrated? Then you’re going to want to check out this Plant Moisture Meter developed by Timothy Mwala over at hackster.io.
In many ways, a plant moisture meter is the perfect companion to the plant texting program that we’ve covered on this blog before.
This is a fantastic project for beginners, as the project doesn’t require any coding.
Hardware
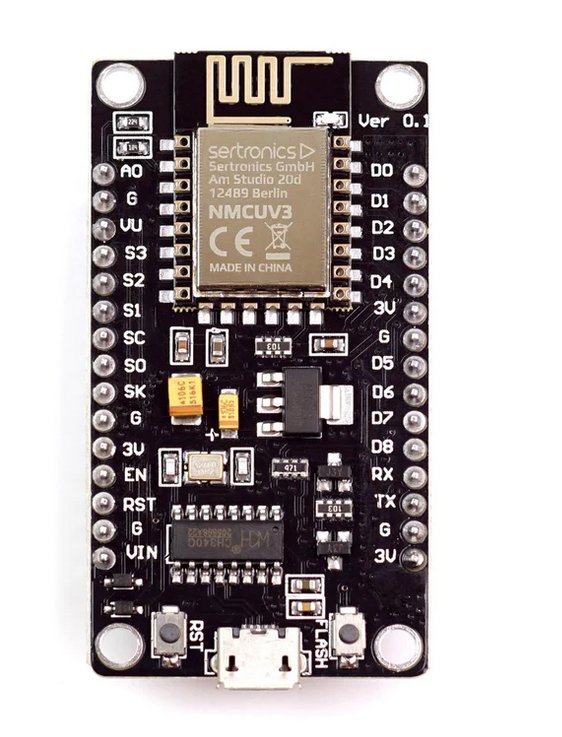
All you need for this project is a moisture sensor, an ESP8266, and an OLED display. So not only is this a super easy and accessible project – but it’s also pretty cheap!
If you’ve never used a moisture sensor before, these are fascinating little devices that check the electrical conductivity of the soil itself. When the soil is dry, it’s got a higher electrical resistance. And when it’s low, its electrical resistance decreases.
The manager of the operation is the ESP8266, which is a super popular microcontroller that is cheap and easy to use. It’s the main connection between the moisture sensor and the OLED display and it holds the code to make the entire project run.
You may also be wondering what an OLED is and how it differs from an LED. First of all, let me say that an LED display would be equally useful in this project – really any display would work. But an organic light emitting diode (as opposed to just a regular light emitting diode) has better contrast, better quality, and is more energy efficient than LED. That makes it perfect for a fun little project like this.
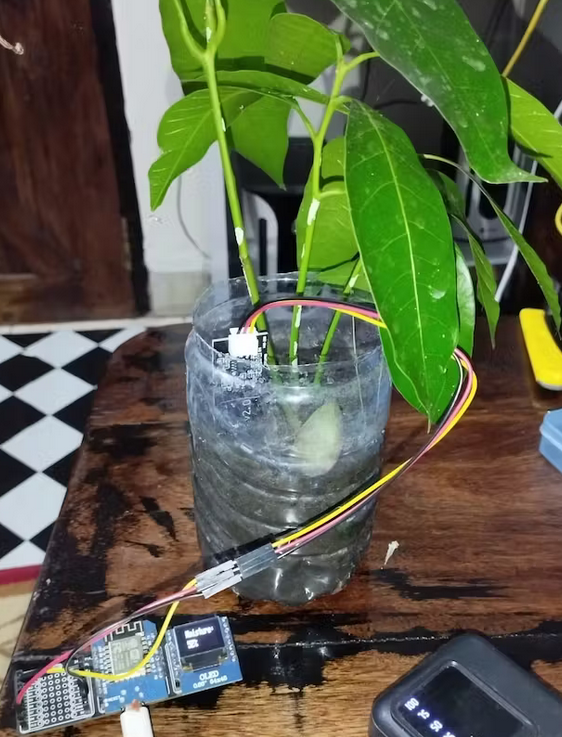
Timothy suggests using a triple adapter, because then you’ll only need one power source. But if you don’t have one, you’d also be able to just power the components separately.
A bit of assembly is required, but it’s also straightforward. You connect the GND to the G pin on the ESP8266, the VCC to the 3V3 on the ESP8266, and the AUOT to the A0 pin on the ESP8266 – you can plug these directly into the board, or you can use the triple adapter if you’ve got one.
Software
Instead of writing the code and configuring everything yourself, Timothy has kindly uploaded a flash file, which you can install after you’ve plugged in the ESP8266 into your computer with a USB cable. You’ll need Chrome to install the file.
Just click here and then scroll down until you find “Moisture Sensor: Capacitive Soil Moisture Sensor (ChipGlobe)” and hit “Install”. It’ll ask you to select the port and all you’ll need to do is select your ESP8266 and you’re good to go!
Once you’ve got it all hooked up and powered on, the OLED display should immediately turn on and start giving you all the information you need regarding the moisture levels.
With this project up and running, you’ll never have to wonder whether or not you need to water your plants again. The display will straight-up tell you!
If you’d like more details on this project or on other hackster.io projects – you can click here.
If you’d like to see more Paragon Projects that we’ve featured in this series – you can click here.
And if you’ve got any questions or if you’d like to suggest a project for this series, please comment below!
Wie wurde das Problem des Eindringens der Feuchtigkeit in die Feuchtigkeits-Sensoren über die Schnittkanten der Platinen gelöst. Diese Sensoren werden zwar damit beworben, unempfindlich gegen Feuchtigkeit zu sein, da keine Leiterbahnen direkt mit der Feuchtigkeit in Kontakt kommen. Jedoch hat bei mir keines dieser und ähnlicher Projekte länger als 3 Monate funktioniert, da die von den Schnittkanten her eindringende Feuchtigkeit die Leiterbahnen von innen heraus zerstören und die Messwerte extrem beeinflussen. Eine Lackierung der Sensoren mit z.Bsp. Nagellack hat dabei auch nicht wirklich gut geholfen.