Paragon Project: DOOM on an Arduino Nano ESP32

There’s a classic question in the universe of computer games – but can it run Crysis? However, in the world of microcomputer games and microcontrollers, we have a slightly different question – but can it run DOOM?
Well we finally have the answer for the Arduino Nano. And the answer is: yes!
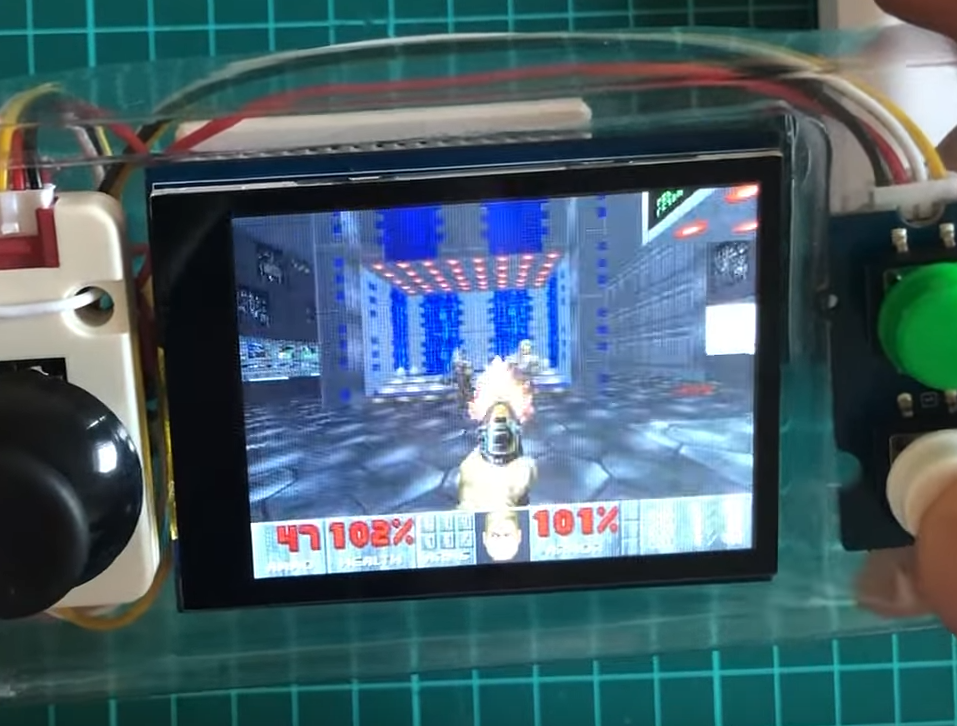
You can indeed play DOOM on an Arduino Nano ESP32, albeit with some necessary adjustments.
But by the end of this little project, you’ll have a fully portable DOOM console.
Huge shout out to Naveen, who created this and then uploaded the details to hackster.io to show you how you can put it together yourself!

And really, this is unbelievably straightforward. All you need to do is wire the components together and then configure and flash the firmware in order to get DOOM running.
On the hacker.io page, the estimation that this project will take you 5 hours. But I’d say you could probably get it done a lot faster than that with Naveen’s fantastic instructions.
Hardware
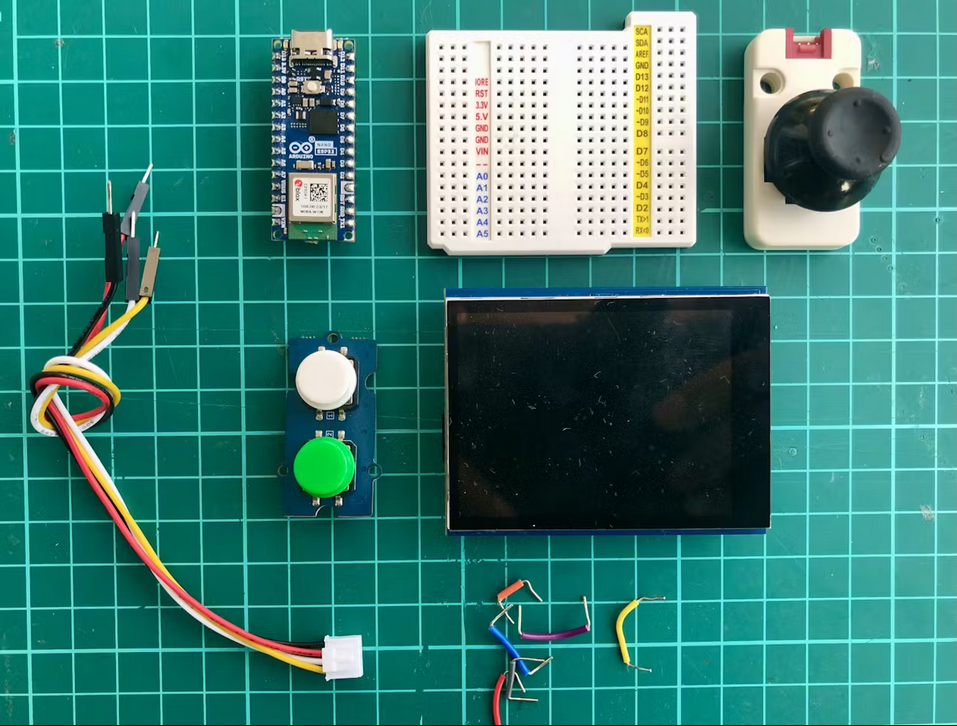
So, as already mentioned, this project revolves around an Arduino Nano ESP32. Naveen’s gone with an Adafruit 2.8″ TFT capacitive touchscreen as the display, but if you’ve got another display lying around, that’ll surely do.
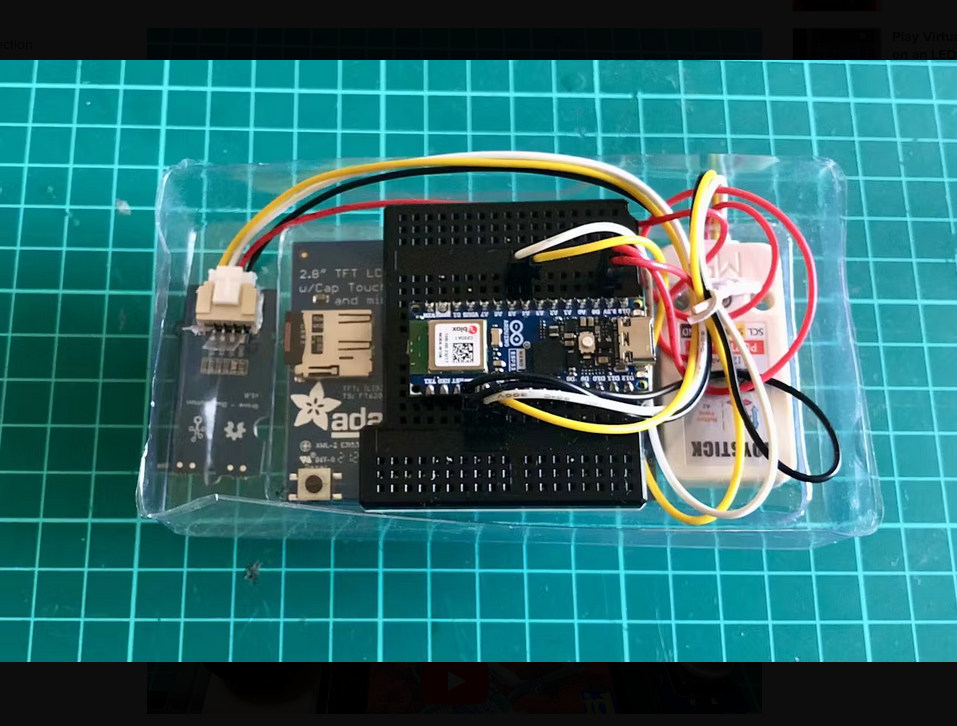
Additionally, Naveen has gone with a breadboard to hold everything together. For the proof of concept, as you might have notice, this console is also made with some leftover plastic. Of course, something like will only serve as a temporary solution.
If you’re looking to hook this up permanently, you might have to get creative with a 3D-printed case and a soldering iron.
Anyway, aside from that, if you look at the picture below, you’ll see that Naveen has also utilized an M5Stack Joystick and a Seeed Studio Grove dual button. Again, if you’ve got another joystick or other buttons lying around, those will suffice.

Finally, of course, you’ll need some jumper wires to hook up everything together through the breadboard.
As Naveen explains, the connection between the Nano and the TFT display is based on the Serial Peripheral Interface (SPI). Meanwhile, the joystick and buttons are connected via the Inter-Integrated Circuit Bus (I2C).
Software
Naveen clarifies that in order to port DOOM, the game requires some modification, because the original game demands more RAM and disk space than the Arduino Nano offers.
Therefore, the setup is based on Ducalex’s very cool Retro-Go repository on GitHub, which is firmware that modifies classic games for ESP32 devices.
For this project specifically, Naveen has configured it to work with the joysticks, buttons, and display. aking a DOOM configuration that you’re sure to appreciate.
Then you just need to flash the firmware. And then you need a configuration file to enable WiFi automatically on the ESP32.
Put that on the SD card and then insert that into your Arduino Nano.

The game has an average frame rate of 34 FPS with a resolution of 320×240 pixels.
Now you can have DOOM on the go with an Arduino Nano!
Conclusion
You can find the full schematics, code, and more details over on the hacker.io page.
You can also check out more Paragon Projects that we’ve featured by clicking here.
We’ve covered one of Naveen’s projects before, the Microcontroller Computer.
Let me end this with a confession. To be honest, I’ve never actually completed the classic, full DOOM – have you?
это ложь в некоторой степени. представленная ссылка ведёт на Ардуино нано с атмега 128, а на картинках esp32. это небо и земля
Да, ссылка была неверной – спасибо за комментарий!
that’s not an Arduino nano with an atmega 328 (like the one you linked).
it’s an Arduino nano-stm32. which isn’t that shocking to run doom on. significantly more powerful than say: an Amiga 500, which people have gotten doom running on.
Yes, the link was listed incorrectly. Sorry for the mistake!
that’s a nano-esp32 version. I thought for a
moment you had this running on an AVR nano.
No, sorry. I didn’t make the ESP32 part clear enough! I’ve corrected the text.
Es ist ein “minimaler” Unterschied zwischen einem Arduino Nano (8 MHz, 2kB RAM) und einem ESP32 (240MHz, viel mehr RAM)! Das ist komplett irreführend formuliert.
Du hast voll recht! Ich habe den Text korrigiert. Danke für den Kommentar!
Aber Du sprichst sehr gut Deutsch. Wo kommst Du her?
это не просто Arduino Nano, а ардуино с контроллером esp32. А ссылка отправляет нас в магазин где просто arduino nano, а не esp32
Да, ссылка была неверной – спасибо за комментарий!
Что бы писать такие статьи, нужно хоть немного разбираться в этом. Создатель молодец, а автор статьи написал полную ахинею.
Хаха извини за ахинею!
просьба поменять заголовок, так как используется Arduino Nano ESP32
Все в порядке?
to nie jest Arduino nano !
nano jest na atmedze a nie na esp
Masz rację, przepraszam za pomyłkę! To jest Arduino Nano ESP32
wifi na karcie SD ???
Myślę, że w tłumaczeniu brakowało jednego słowa. Teraz lepiej?
pretty stuck in the esp idf progress. (code is not the same as in your documents) a pre compiled version available that only needs uploading?
that would be nice 😀
Seems like my last comment didnt make it trough haha
Im pretty stuck at the esp-idf progress. the code seem the have changed over time.
wanted to build one for my kids this christmas haha
any option to get a pre-compiled bin to upload to the esp32?
With kind regards and many thanks
Robbert