Paragon Project: Raspberry Pi Pico Keyboard
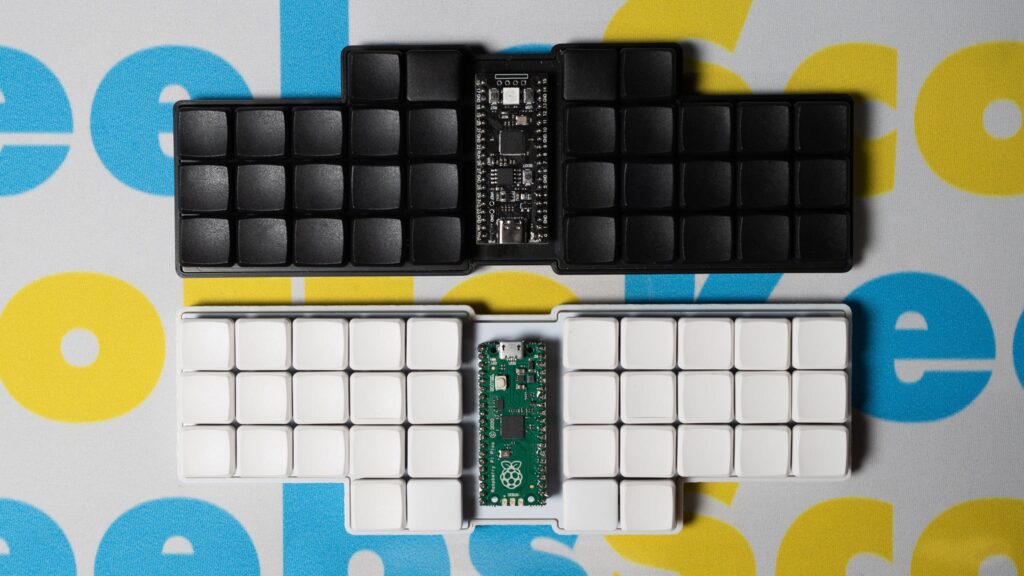
One of the most useful things you can do with a Pico is upgrade your peripherals – and there’s no better place to start than with your keyboard. And there’s no keyboard maker like Joe Scotto, who built the Scotto34 (PCB Edition) keyboard with a Raspberry Pi Pico, Choc switches, and a PCB kit.
Furthermore, Joe has been kind enough to share many of the details on how to build one over one his website, scottokeebs.com.
Hardware
The hardware components you’ll need for this are a Raspberry Pi Pico (of course), the Scotto34 PCB kit, a 1-pin socket header set, 34 Choc switches, and 34 1u keycaps.
To make this keyboard, Joe first solders the diodes on, then he solders the sockets on, and finally he mounts the Raspberry Pi Pico.
With a little flux and a little solder, this project requires more patience than anything else! It’s a fairly straightforward build, but soldering on that many diodes and sockets is a little time-consuming.
Once you’ve got that done though, it’s just a matter of hooking up the switches and keycaps and then mounting the Pico.
You will need to flash the necessary firmware, but once you’ve done that, you’re pretty much ready to go!
Software
As usual, Joe’s been kind enough to pre-compile all the firmware so that you can flash it directly. Moreover, there are three options – the default QMK map in QWERTY, the default QMK map in QWERY with Vial, and Joe’s personal QMK map in Colemak.
As someone who’s considering making the switch from QWERTY to Colemak, I find this a very enticing option.
One more thing that I forgot to mention above is that Joe includes an optional 3D-printed case (which he sells here) as a way of completing the board’s look. However, I personally like the low-profile keyboard setup directly on the PCB board alone.
Joe’s made a really great video on the keyboard if you want to see how it looks and sounds:
If you want more details on the Scotto34, you can head over to Joe Scotto’s website here.
You can also check out more Paragon Projects that we’ve featured by clicking here.
If you have any questions or if you’d like to suggest a project for this series, comment below!