Raspberry Pi Pico and MicroPython on Windows
This article answers the question: How do I use the Raspberry Pi Pico with MicroPython on Windows? We also show how to install the right driver for “Board CDC” (which the Pico will show up as once MicroPython is installed) on Windows 8.1. (We will also discuss the differences between MicroPython and CircuitPython where applicable – where the board will be called “CircuitPython CDC Control”.)
Finally, we’ll show how to connect to the Pico using PuTTY, and a more comfortable option using Thonny (which is a Python IDE, integrated with the Pico!)
Introduction: What is the Pico & what is MicroPython?
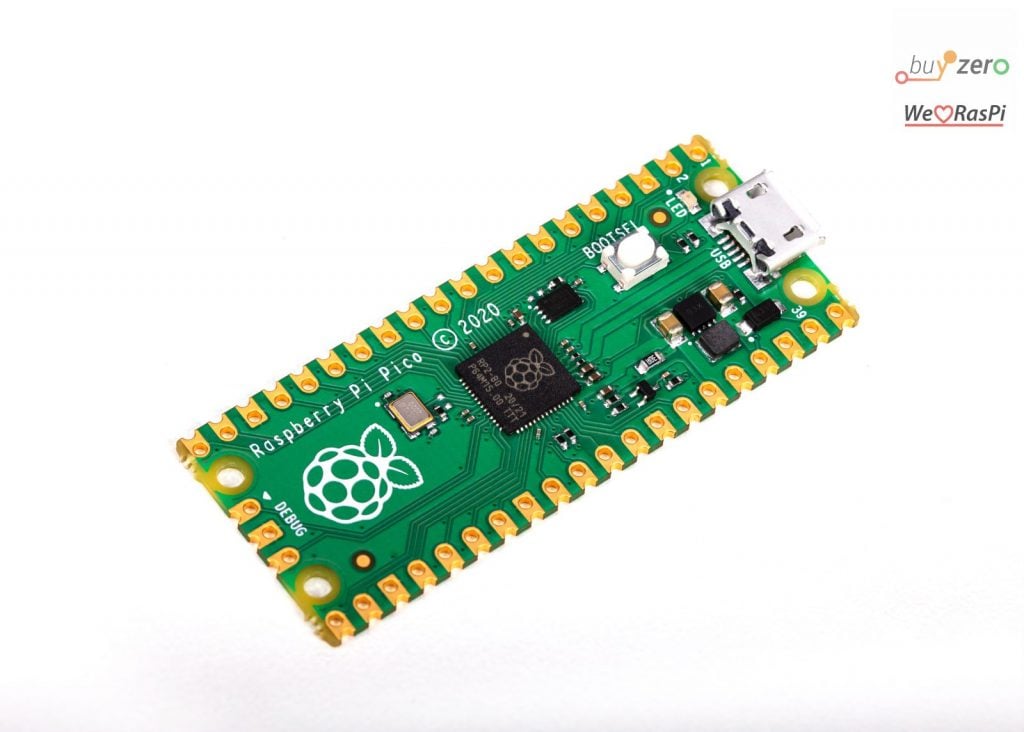
The Raspberry Pi Pico is a new microcontroller board from Raspberry Pi, sporting the in-house developed RP2040 microcontroller chip.
Raspberry Pi have designed lots of cool features into the RP2040 (my favorite is PIO – programmable IO, where you can emulate lots of hardware interfaces which require precise timing, etc. – I’ll go into it in another article in the future), and the Pico is a really nice reference platform on which the RP2040 is implemented.
How is a Raspberry Pi Pico different from a Raspberry Pi Zero W?
The difference between a microcontroller (like the Pico) and a single-board computer (let’s say Pi Zero W) is roughly this: you program the Pico directly (e.g., in C), without an operating system, whereas the Pi Zero W will usually run Linux.
This has advantages, like real-time, but also disadvantages – you need to know more about the hardware you are using, and need to implement a lot of functionality which you would take for granted on a modern operating system (e.g. file access).
The Pico has fewer resources compared to the Pi Zero W (e.g. significantly less RAM, no VideoCore GPU, etc.) – but it draws less power, and has additional features, like the aforementioned PIO, and analog inputs (ADC).
The Pico is a good choice for projects which do not necessarily require network connectivity, HDMI output, camera input and processing. In other words, if you want to interface with hardware, have a long battery life, etc – then the Pico is for you.
What software already exists for the Pico?
The Pico can be flashed using different software, which is provided in UF2 files (see Pico getting started guide). Raspberry Pi provides several UF2 files to get you started:
- MicroPython (which will be the focus of this article) and a close cousin, CircuitPython
- Blink an LED (Blink UF2)
- Hello world (will say “Hello world” if you connect through a terminal)
- Picoprobe (use one Pico to debug another Pico)
- Reset flash memory (will set the Flash memory to empty)
There is lots more of examples to be found here (C code).
Note: I’m linking to the newest UF2 files as of 30.01.2021 – specifically MicroPython might be updated, so be sure to check the Raspberry Pi Pico getting started page.
MicroPython
If the prospect of going full-in and programming in C seems a little bit daunting to you, you can get started in MicroPython. In this case, some software is pre-installed to the Raspberry Pi Pico (the MicroPython UF2 file), which will run a small Python interpreter.
It’s called MicroPython because it doesn’t support the full Python 3 standard library. MicroPython is intended for constrained environments, like the Pico. The Pico has a total of 2 MB RAM – this will not fit everything Python 3 brings along with it. Check this Github page for differences of CPython to MicroPython. Also, here’s the official MicroPython homepage, and the official MicroPython documentation.
CircuitPython
Note: most of the instructions also apply to CircuitPython RP2040 based boards on Windows, e.g. the Adafruit Feather RP2040, but you will need to follow a bit different steps – I will point out the differences in this article.
CircuitPython is basically a variant of MicroPython which is being developed by Adafruit.
The board itself will be called differently in your device manager after flashing (CircuitPython CDC Control) – and you will need different software of course. Here’s what you need, to start:
- Adafruit Feather RP2040 Download page (CircuitPython 7.0.0 UF2 file)
In this article, we will also show you how to install CircuitPython libraries on RP2040 based devices on Windows, and how to run and stop programs using Thonny.
What will you get with the MicroPython UF2?
Once MicroPython is installed on the Pico, you’ll be able to connect to the Pico using the serial console (we will show how in this article), and start writing Python code on the Pico.
Installing MicroPython on the Pico
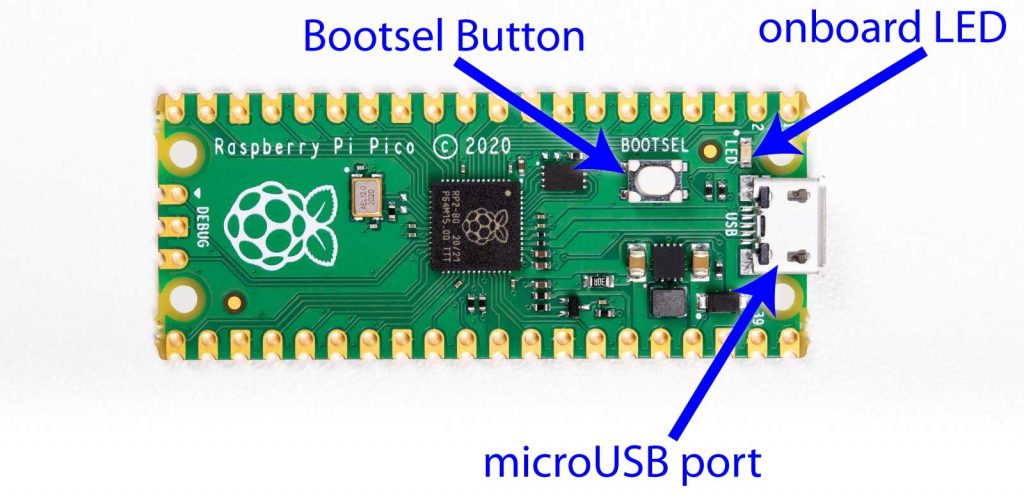
- Remove power from the Pico
- Press the BOOTSEL button and keep it pressed
- plug in the Pico to your PC using a microUSB to USB cable
- now you can release the BOOTSEL button
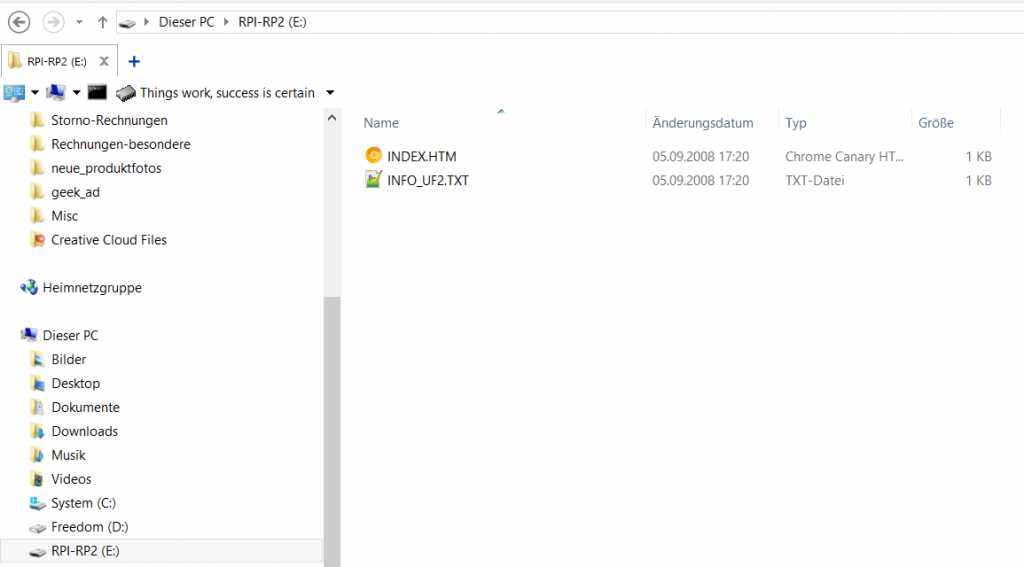
The Pico should be visible in your filesystem now, as RPI-RP2:
(Sidenote: I wonder what RPI-RP1 was?)
The Pico emulates a FAT32 flash drive, which has two files in it: INDEX.HTM and INFO_UF2.TXT.
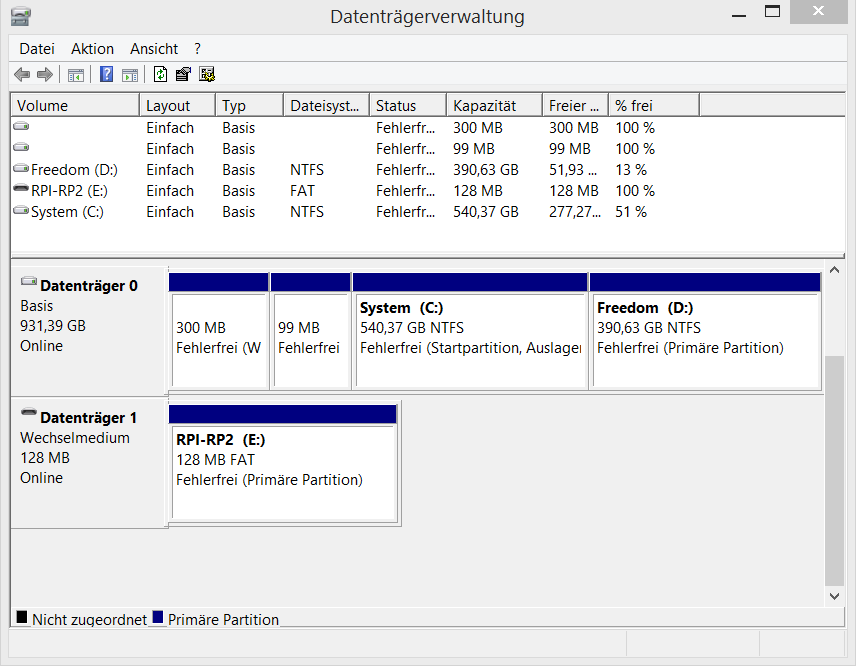
In fact, Windows Drive Manager shows Pico to be a 128 MB FAT flash drive.
Don’t make the mistake of trying to store any files on the Pico this way: they will be silently dropped. Even if it looks like they’re written, that’s just Windows caching the operations – your files will be gone! Did I mention already that the Pico actually has only 2MB Flash? It’s shamelessly lying about the 128MB here (the RP2040 is supposed to support up to 16MB flash by the way, AFAIK).
Sidenote: This reminds me a bit of my trip to India, where I bought thumb drives with 128 GB capacity – which would write your data to Nirvana. When I tried to return the drive and get my money back, the vendor was gone… the adventures to be had 🙂
However, if you copy the right kind of file – the UF2 file – to this drive, it will be recognized and written.
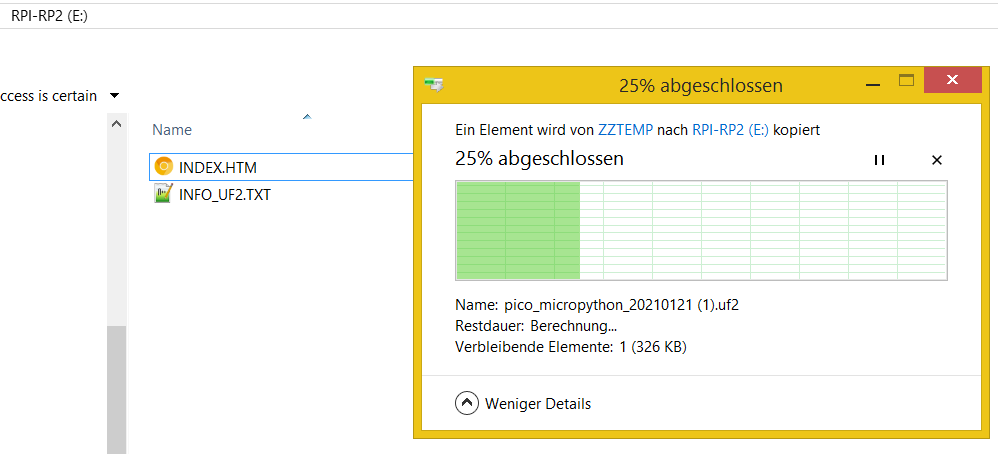
You can drag & drop it from your browser, after having downloaded it, or copy & paste it. Once it’s completed copying, the Pico will reboot automatically, and you won’t see a flash drive anymore.
Note: If you want to use CircuitPython, of course use the CircuitPython UF2 file instead in this step.

The Pico now (after the reboot) runs MicroPython, which provides a serial port (COM-port) via USB. (In technical terms, this is USB device class 02 = Communications and CDC Control and USB device SubClass 02).
Connecting to the Pico, Windows 10
Windows 10 makes it easy for us to connect to the Pico, as the necessary COM-Port driver (usbser.inf) will be automatically installed and activated for you.
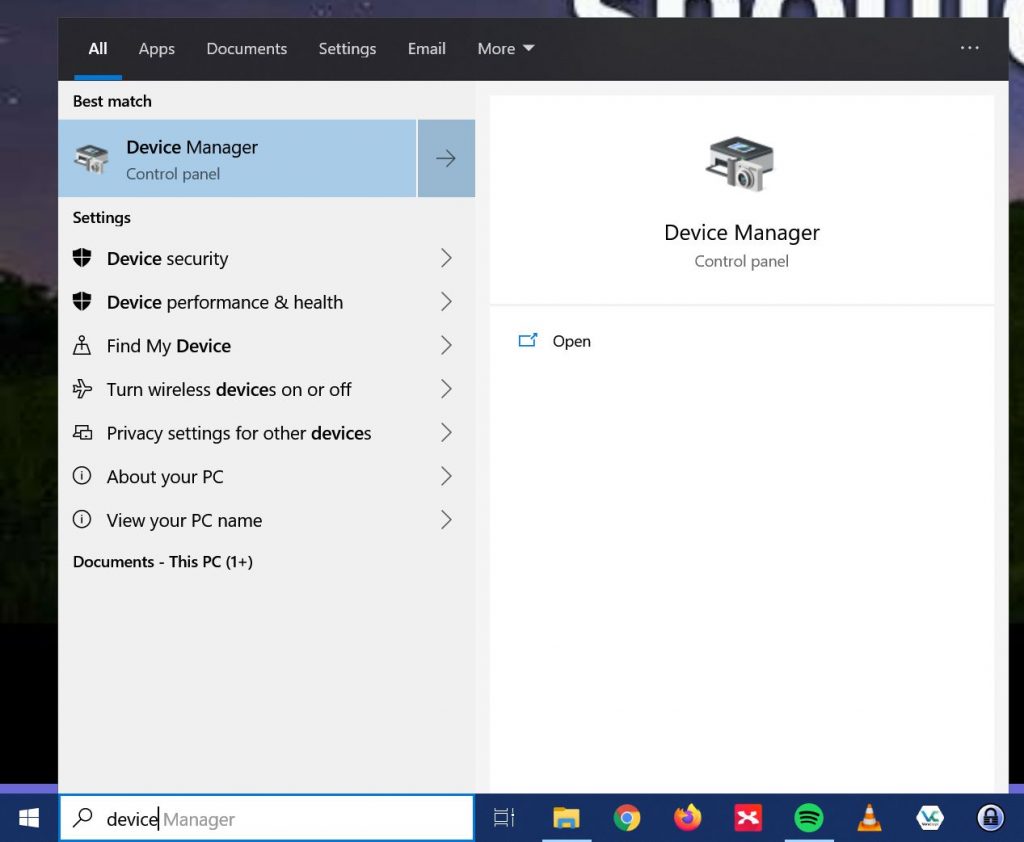
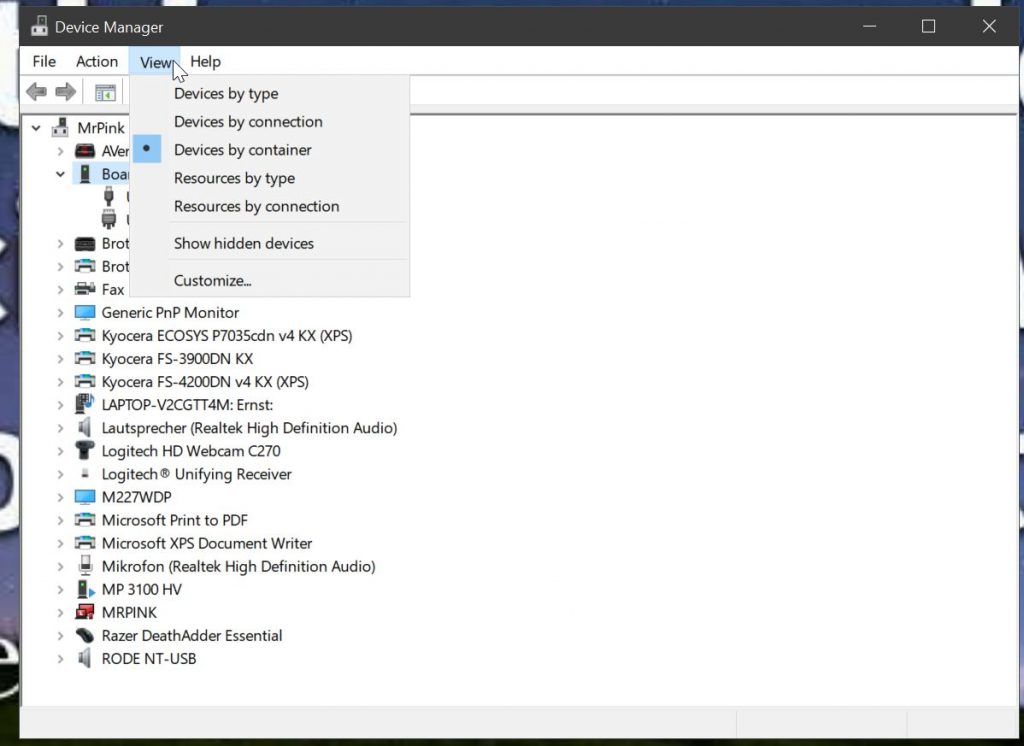
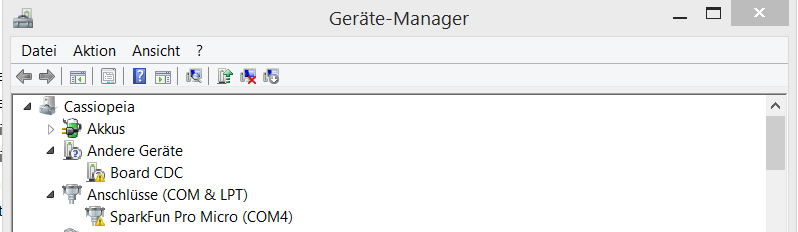
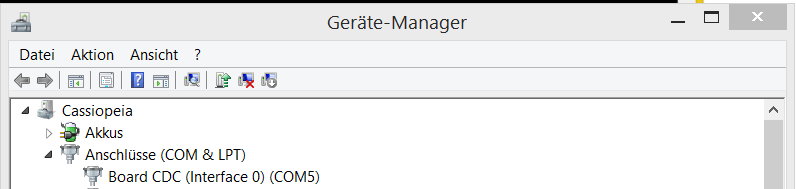
To check which COM Port it’s on, open your device manager:
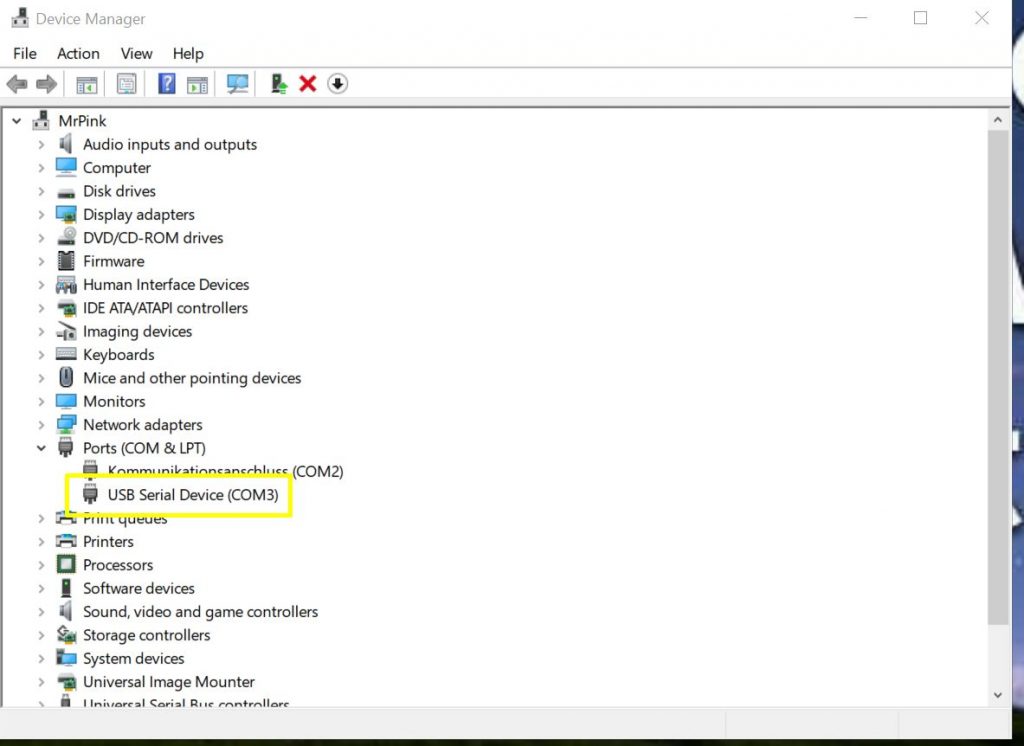
Here, you’ll be able to see the new USB Serial Device, with the COM port number (which you’ll need in a second to connect), under Ports (COM & LPT).
To double-check that this is indeed the Pico, running MicroPython, you can do the following:
Click on View, and select Devices by Container:
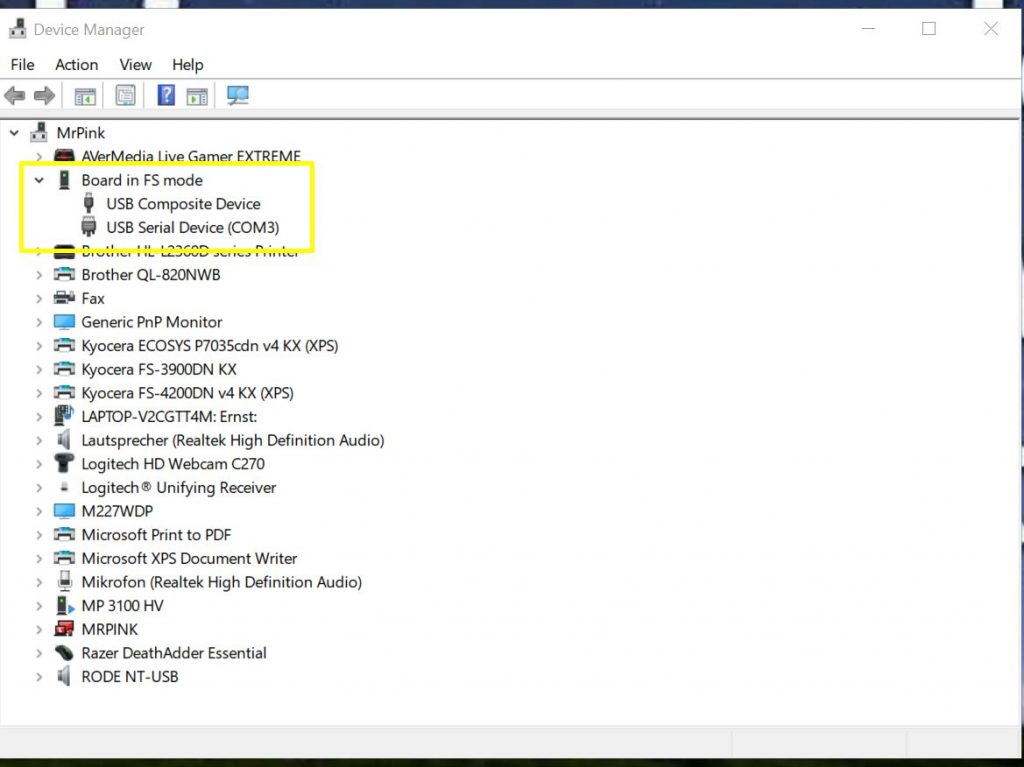
Here you’ll see an entry “Board in FS mode”, with the two nodes “USB Composite Device” and “USB Serial Device (COM3)”. The COM3 is important, you will need to use it for PuTTY (see below).
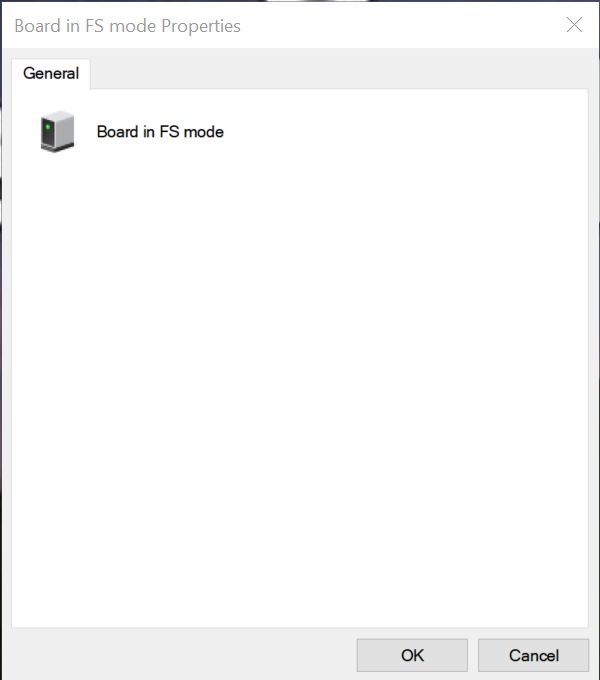
We can investigate the devices further by right-clicking on them, and selecting the appropriate properties entry from the context menu. The properties for Board in FS mode are empty:
The USB Composite Device shows “Board in FS mode” as it’s Bus reported device description:
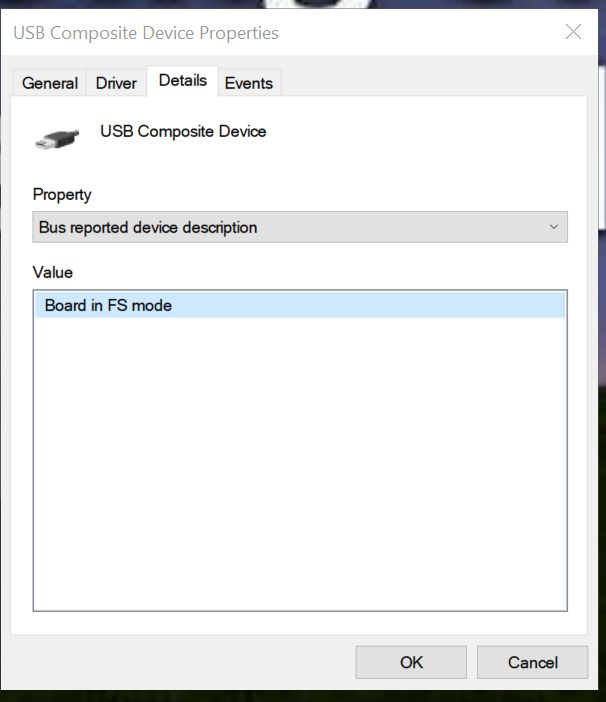
Note: this is the Pico running MicroPython. When you reflash it with different software, it will show different results here!
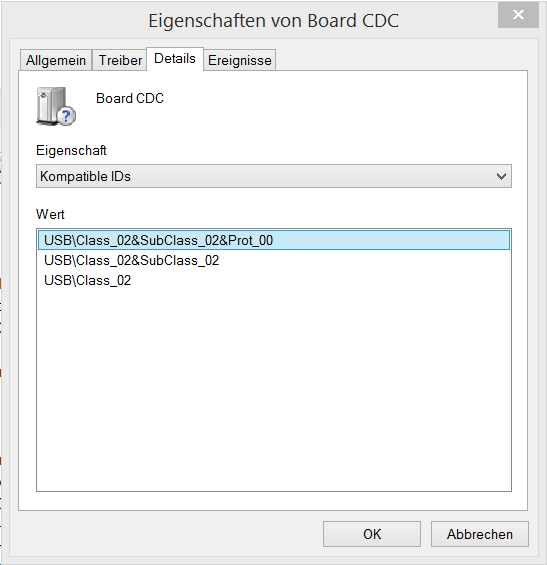
The USB serial device itself will show some interesting properties:
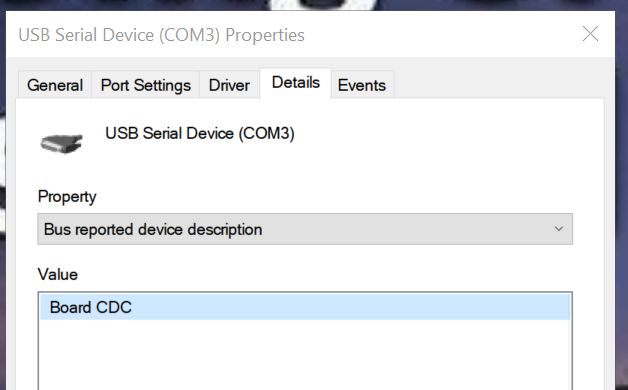
Note: the board device description will be “CircuitPython CDC Control” instead of “Board CDC” if you are using CircuitPython.
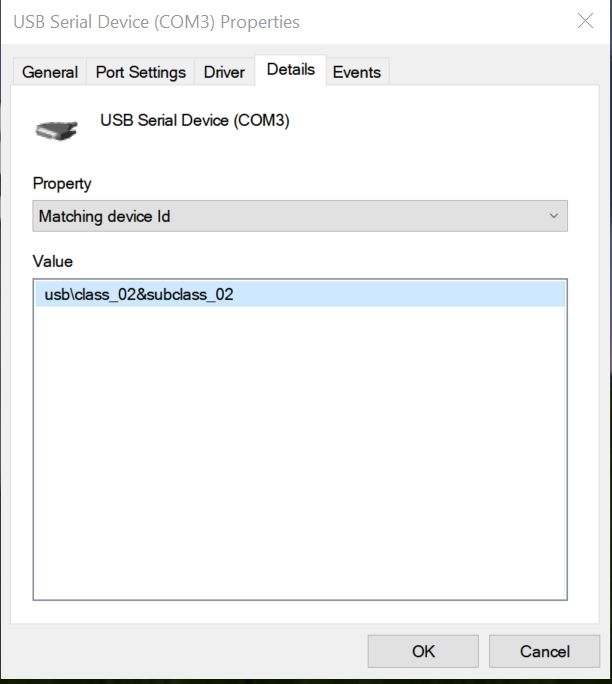
If you know what you are looking for, the Hardware IDs (VID = vendor id, and PID = product id) are useful:

VID_2E8A -> the vendor id is 2E8A (in hex) or 11914 (in decimal), which is Raspberry Pi
PID_0005 -> the product id is 5, which the board will show when running MicroPython (the default product id is 3)
Sidenote: Chrome Browser debug log
This information can also be obtained using the Chrome browser.
will allow you to see the currently attached Devices

Back to Windows 10:
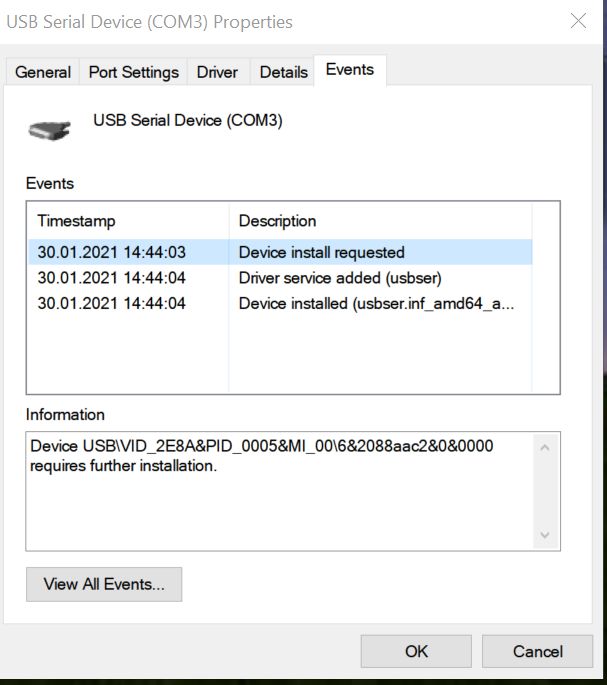
As you see in the screenshot above, Windows 10 automatically installed usbser (USB Serial Driver) for you – so you can get started with the Pico immediately.
PuTTY
PuTTY is a telnet / SSH client. You will use it to connect to the Pico, and talk to MicroPython’s REPL. Download PuTTY here. (You can go with the 64-bit MSI Windows Installer for most Windows 10 installations).
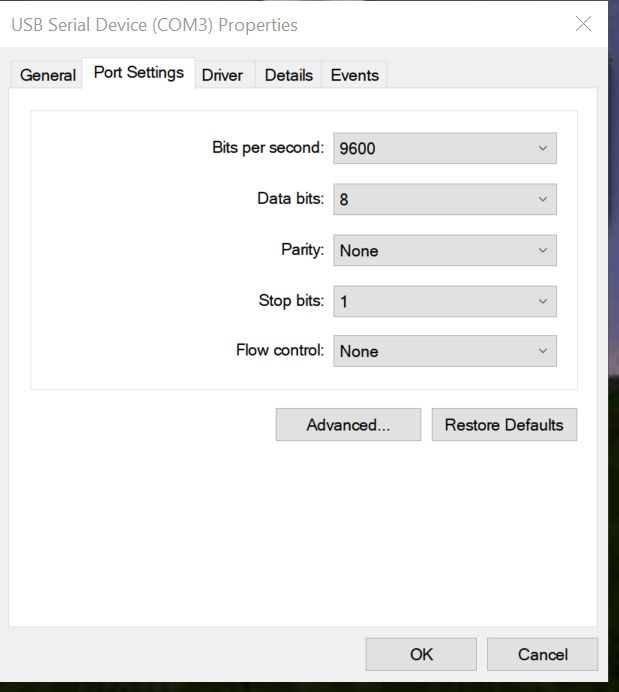
Open PuTTY. Enter the right settings:
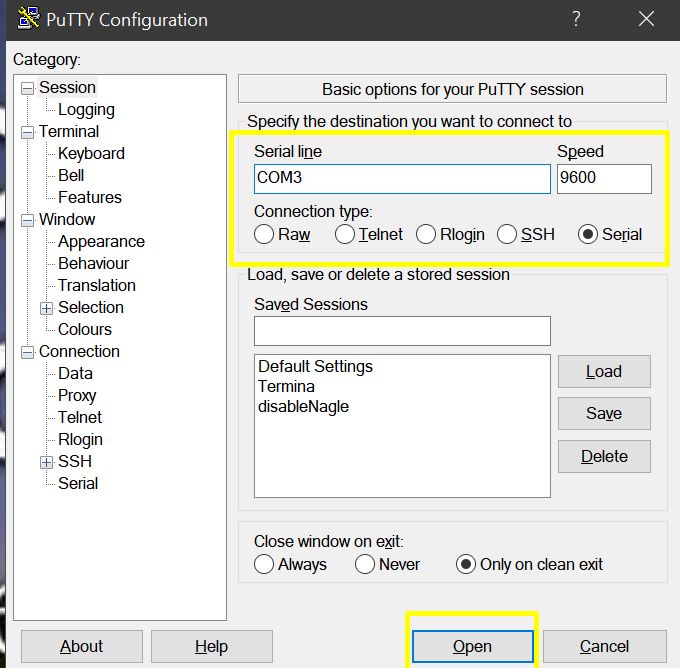
- Connection type needs to be set to Serial
- Serial Line needs to be set to whatever your investigation from above yielded. In my case, this is COM3. In your case it most likely will be something different!
- Speed can be left at 9600 for now
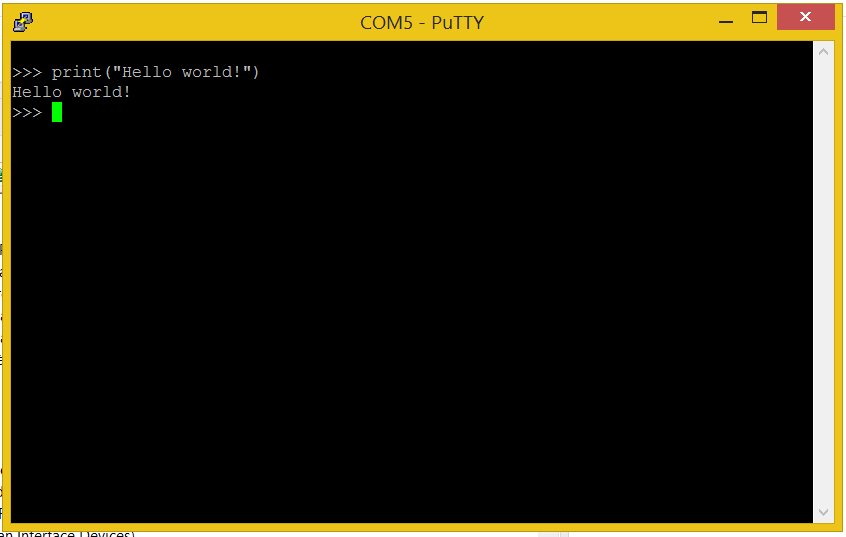
Click on Open, and a Terminal will open:
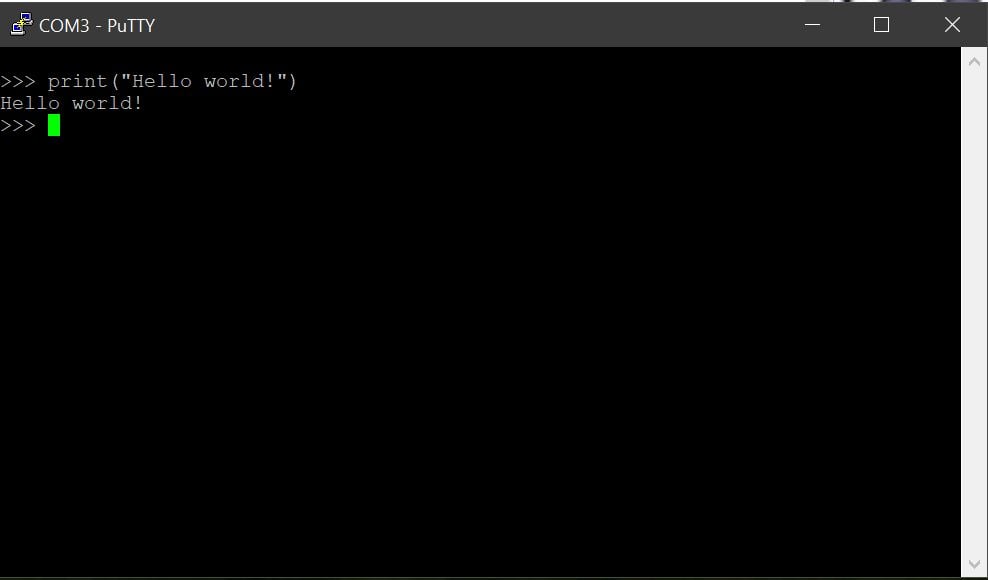
To get the initial prompt, press Enter once
Then you can start writing Python code after the prompt, which will be interpreted immediately. Try entering the classic “Hello world”:
print("Hello world!")MicroPython will reply with
Hello world!
as expected 🙂
Now that the initial contact is established, I wish you happy coding!
Thonny: a Python IDE, works with Pico!
Using PuTTY is not very comfortable for longer sessions, or when you want to load a lot of code into your Pico. Luckily, the open source application Thonny (which is installed by default on Raspberry Pi OS) is also available for Windows and integrates Pico (MicroPython and CircuitPython) support
Step One
Download Thonny here, and install it
Step Two
Connect your Pico, as described above – it now should have a COM-Number – if you wish, you can test using the PuTTY method described above, whether you can reach your Pico.
Step Three
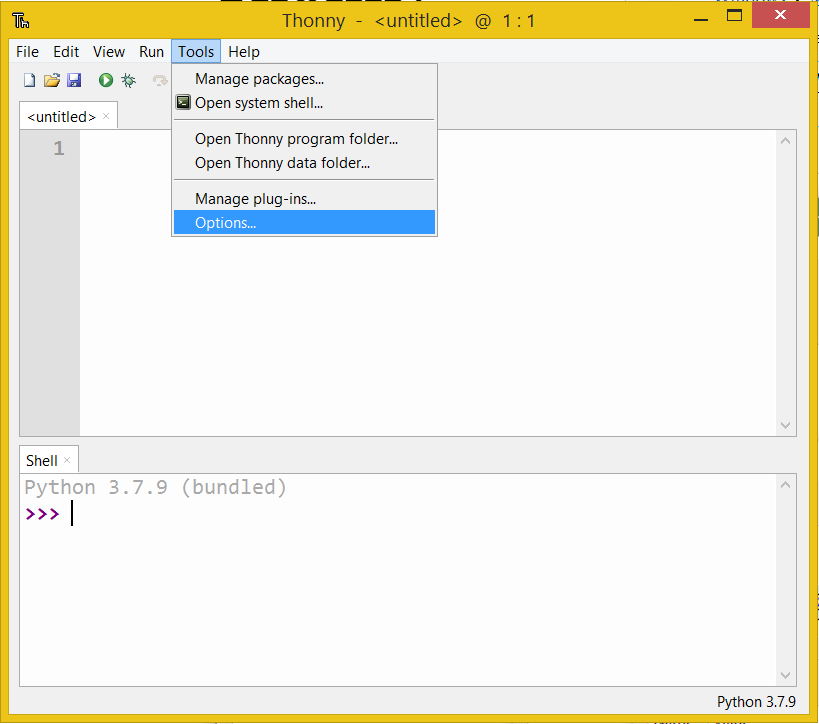
Start Thonny, and click on the Tools menu, choose Options
Step Four: set Pico as the interpreter
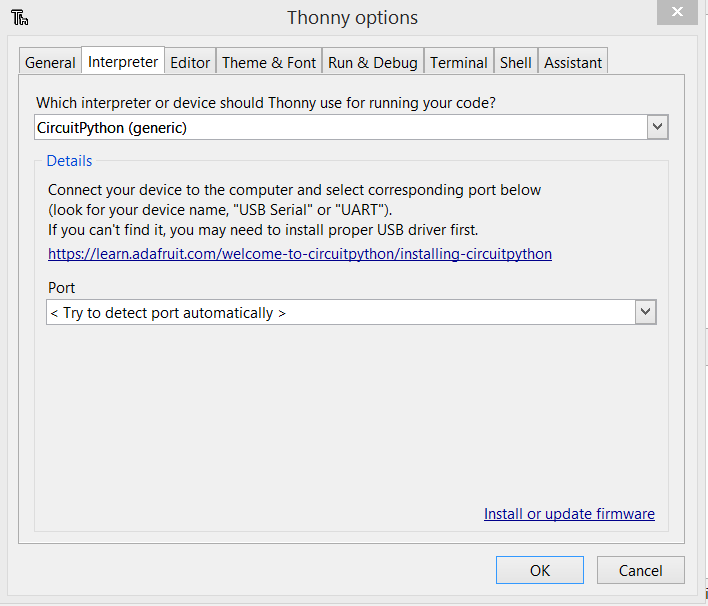
Click on the Interpreter tab. You will see this screen by default:
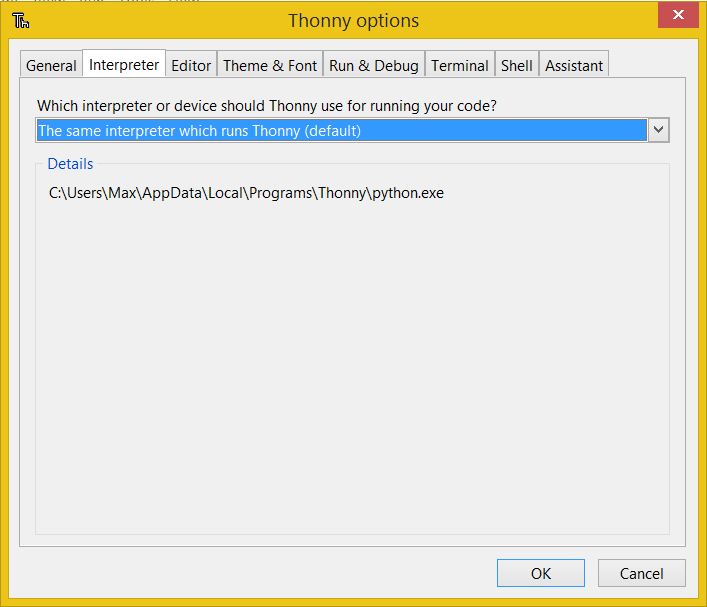
Click and select MicroPython (Raspberry Pi Pico)
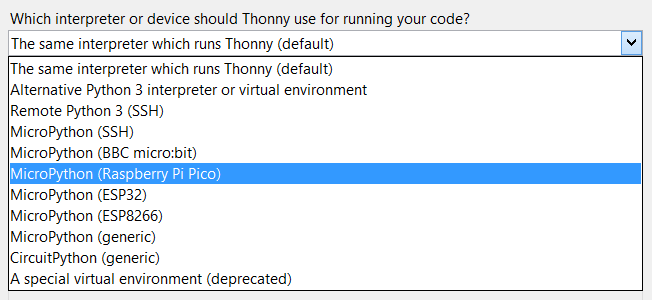
Note: if you are using CircuitPython, you instead need to select “CircuitPython (generic)” from this dropdown menu.
You can leave the port at “try to detect port automatically”, or set a specific port (we’ve seen above how the correct port number can be determined).
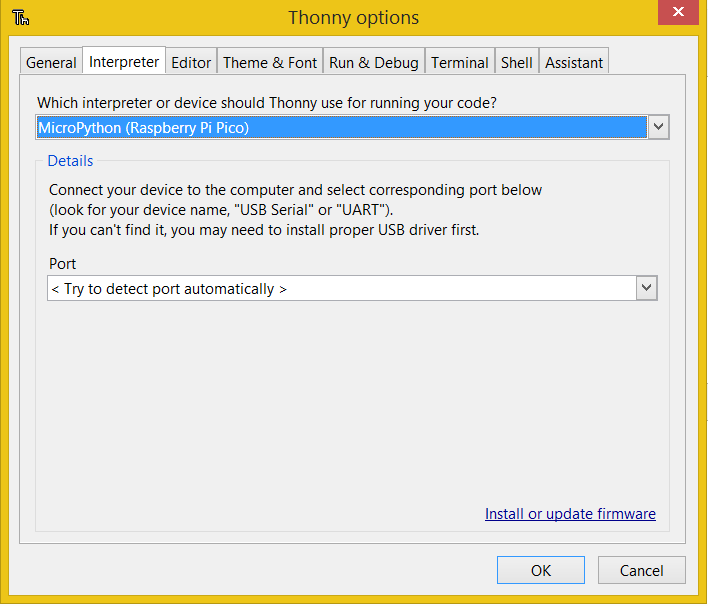
Note: the port should still show up in the drop down, so it might be a good idea to double-check it’s there:

I’m leaving it as “try to detect port automatically”. Click OK to save the setting.
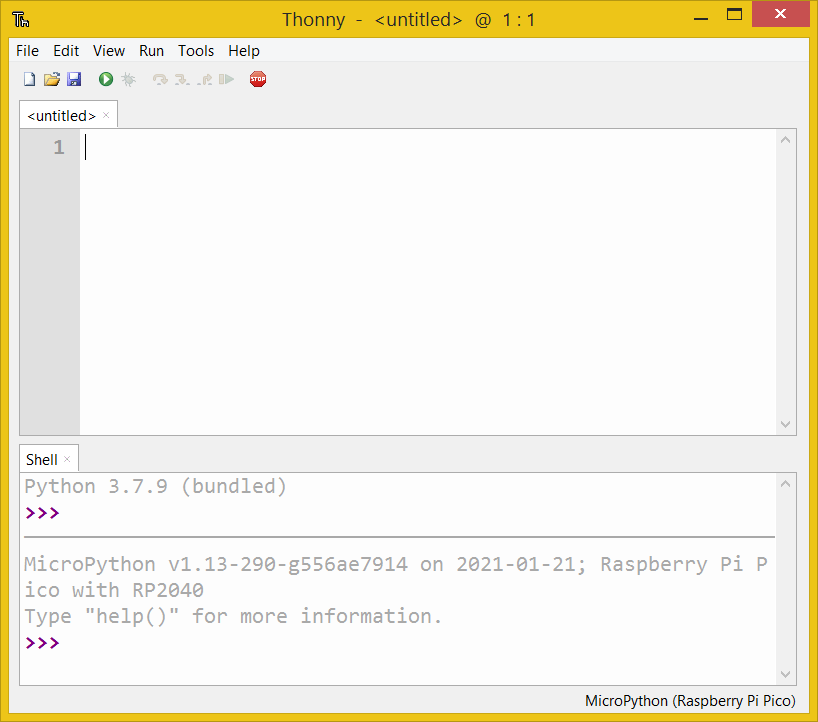
Your screen should now change to this:
Step five: test
Now you can test the communication with the Pico.
Type
print("Hello world")into the MicroPython prompt, and press enter
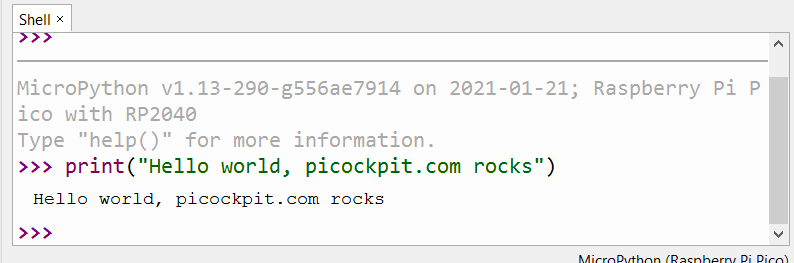
You’ll see the Pico responding to you.
Congratulations, you have successfully connected Thonny with the Pico on Windows!
More complex scripts: Blinking an LED with Thonny
The REPL (read evaluate print loop) you’ve just seen is nice, but for more complex projects, we’d like to enter the source first, or load it from a file.
This is what the top part of the Thonny window can be used for.
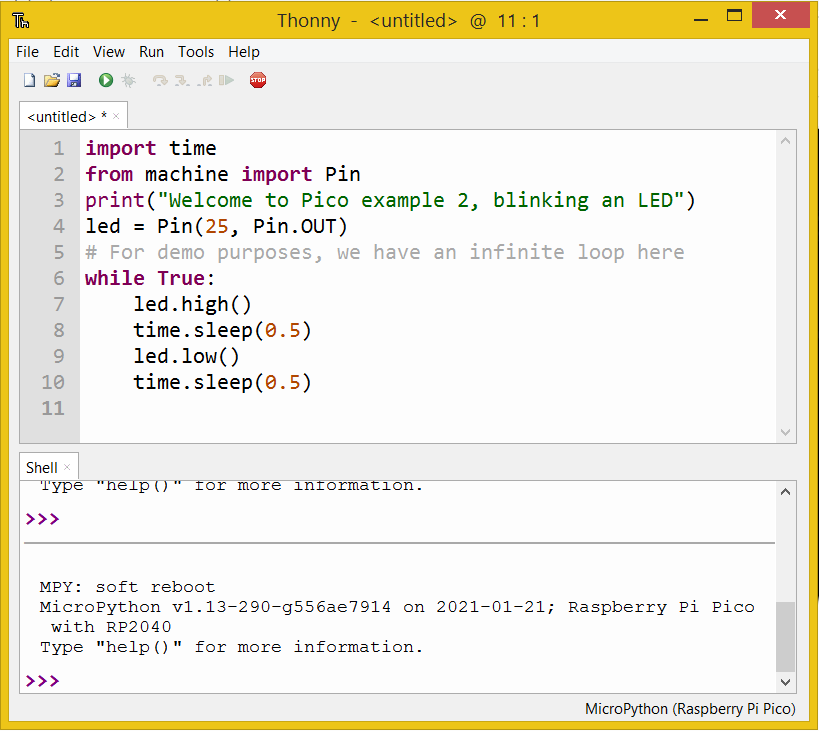
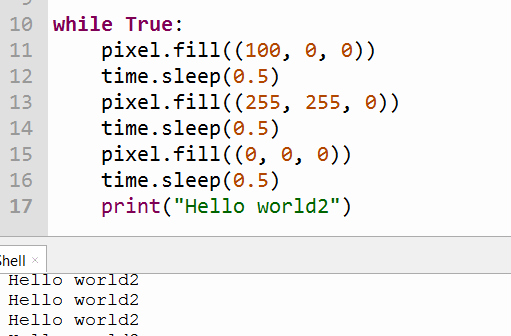
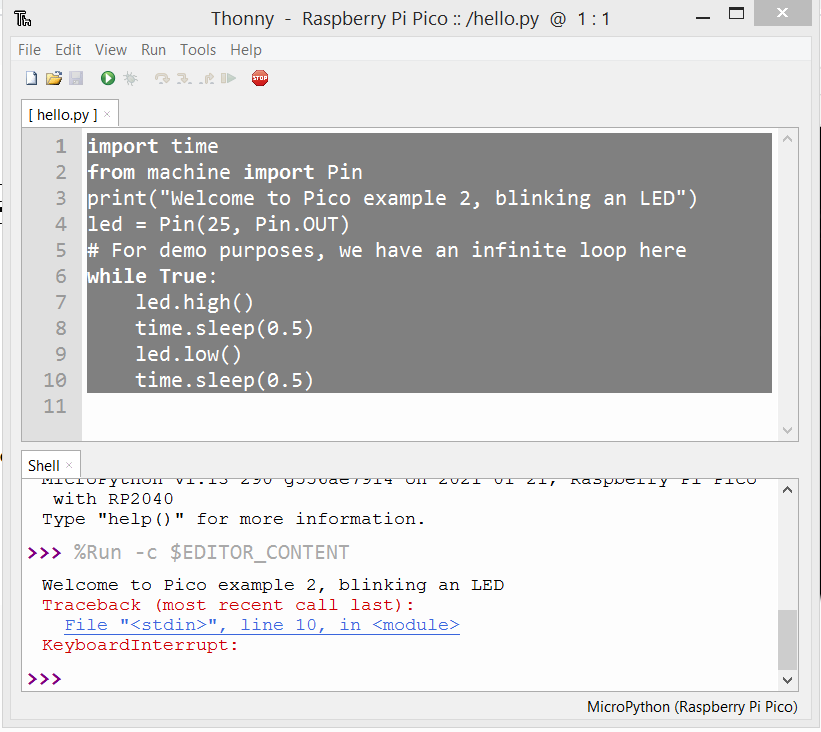
Enter your code. In my example, we’ll blink the onboard LED (which is the hardware hello world equivalent!), and loop forever.
import time
from machine import Pin
print("Welcome to Pico example 2, blinking an LED")
led = Pin(25, Pin.OUT)
# For demo purposes, we have an infinite loop here
while True:
    led.high()
    time.sleep(0.5)
    led.low()
    time.sleep(0.5)
Pay attention to proper indentation in Python (whitespace is used for control purposes in Python!)
Now click on the “run” button

Thonny will ask you where to save to
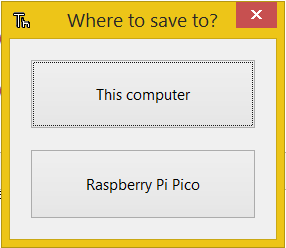
Select Raspberry Pi Pico:
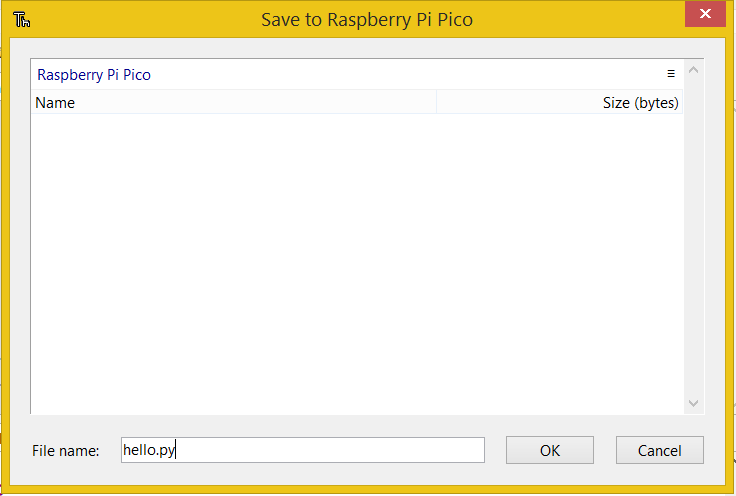
I’ve chosen to name the file hello.py – Click on OK to save it
Once the OK button is pressed, your code will start executing. The on-board LED of the Pico should start blinking, and you’ll see the output in the Shell:
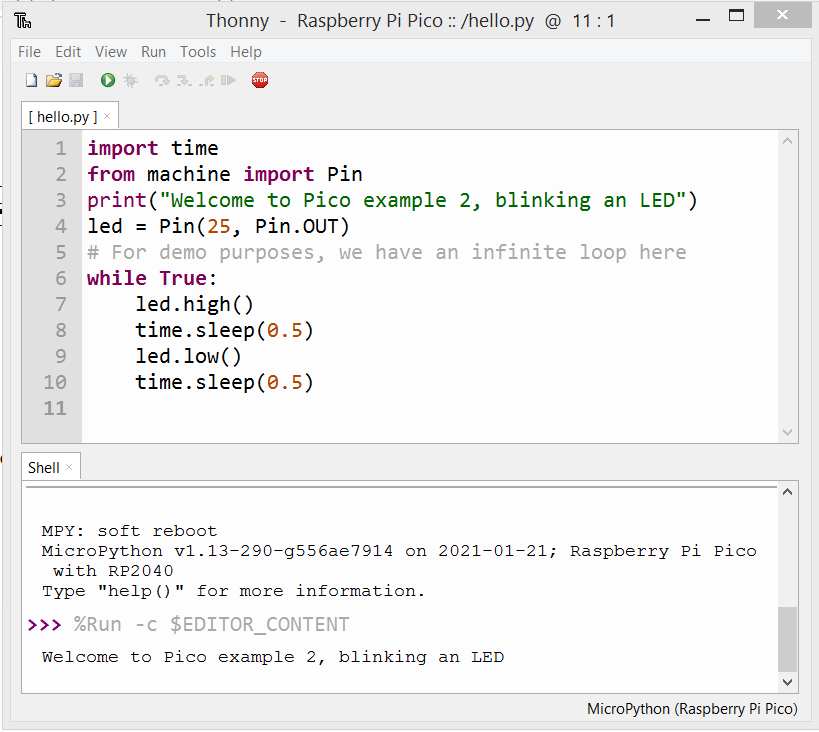
Note: I did not have to enter the %Run -c $EDITOR_CONTENT command, Thonny was doing it itself. The output below is from our code.
CircuitPython on Thonny on Windows
Follow the same steps, but select CircuitPython (generic) as interpreter.
The Thonny shell will show you a different confirmation:
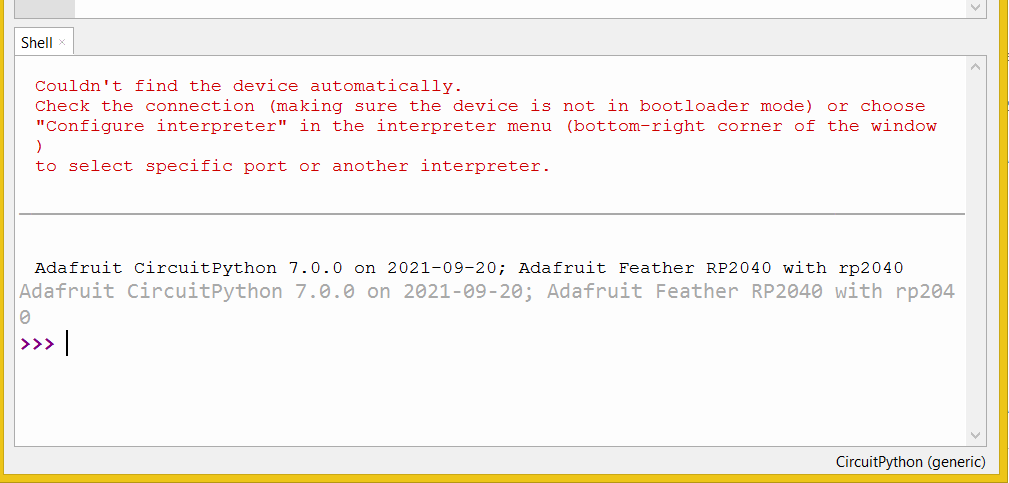
Adafruit CircuitPython 7.0.0 on 2021-09-20; Adafruit Feather RP2040 with rp2040
Windows 8.1
Windows 8.1 will NOT automatically load the serial driver, and show the device in an error state.
Note: with CircuitPython, the name of the device will be “CircuitPython CDC control” instead. Same procedure.
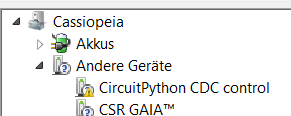
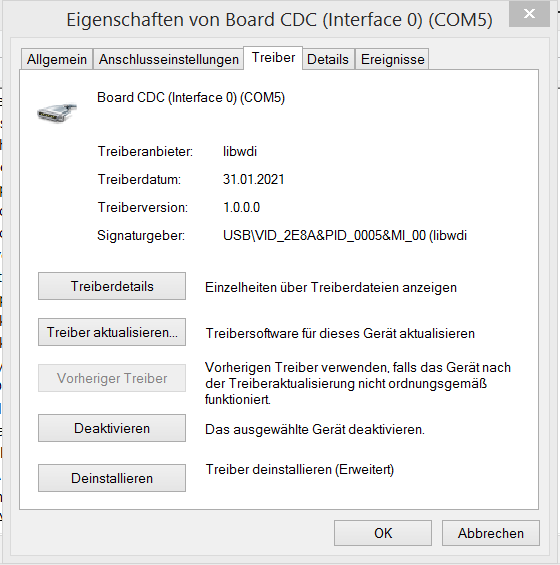
Here’s how the properties for Board CDC (the Pico running MicroPython) look like:
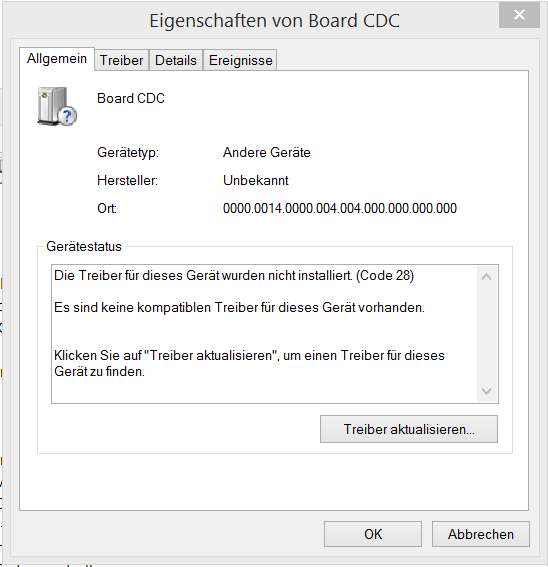
It says that the drivers for this device were not installed (Code 28).
A solution to solve this problem is the Zadig tool, which you can download for free:
Attention: A number of virus scanners seem to agree that the installer_x64.exe contained in Zadig 2.7 has “Trojan.Tedy”. Maybe this is a false alarm, however: I recommend to use Zadig-2.5.exe instead, which did not give me these warnings (just verified a second time). Better safe than sorry!
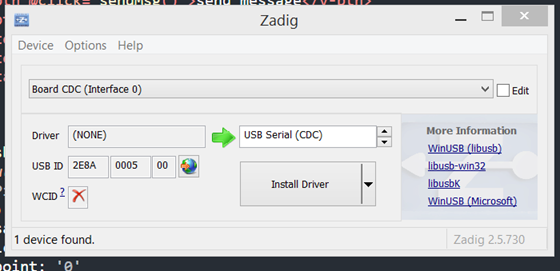
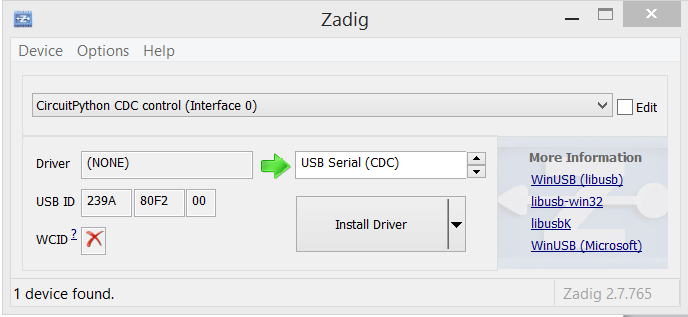
Zadig helps you to install generic USB drivers to help you access USB devices.
In our case we want the USB Serial (CDC) driver.
Select Board CDC (Interface 0) from the dropdown menu above, the USB Serial (CDC) in the other field. Click on Install Driver.
After the installation, you will see that the driver is now set to usbser (v1.0.0.0):
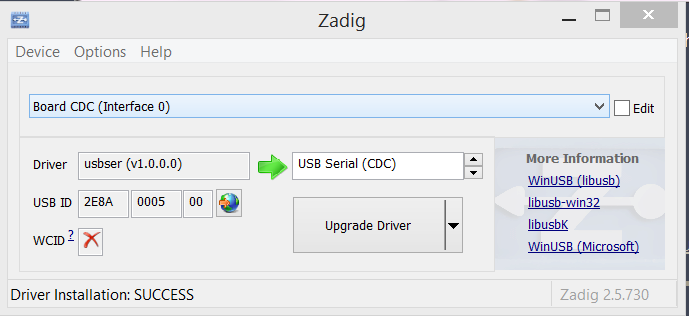
And you’ll be able to connect, as I’ve described in Windows 10, using the correct COM port number:
sidenote:
Pico/Serial Port on Windows 7
According to a customer, Zadig helped to install the serial port driver on Windows 7 as well, and the Pico was usable afterwards! Be sure to use Zadig 2.5, as the newer Zadig 2.7 was flagged by my Virus Scanner during driver installation. (Not sure why, but better safe than sorry – the old one works)
If you need a step-by-step guide, check out the guide for Windows 8.1 above – it should be pretty similar on a Windows 8.1 machine.
Installing libraries and programming a CircuitPython RP2040 board in Windows
If you are using for example an Adafruit Feather RP2040, you might want to use CircuitPython on it. Adafruit has a NeoPixel RGB on it, which needs libraries to be installed into the lib folder on the device.
(note: download the libraries here – click on the “Download Project Bundle” link).
When you extract the project bundle folder, you’ll see two different subfolders with CircuitPython 6.x and CircuitPython 7.x
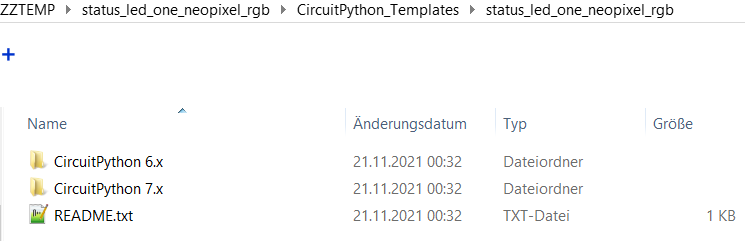
I’m using the CircuitPython 7.x version here, as I flashed the 7.0.0 CircuitPython version.
You will notice a drive called “CIRCUITPY” in your Explorer:
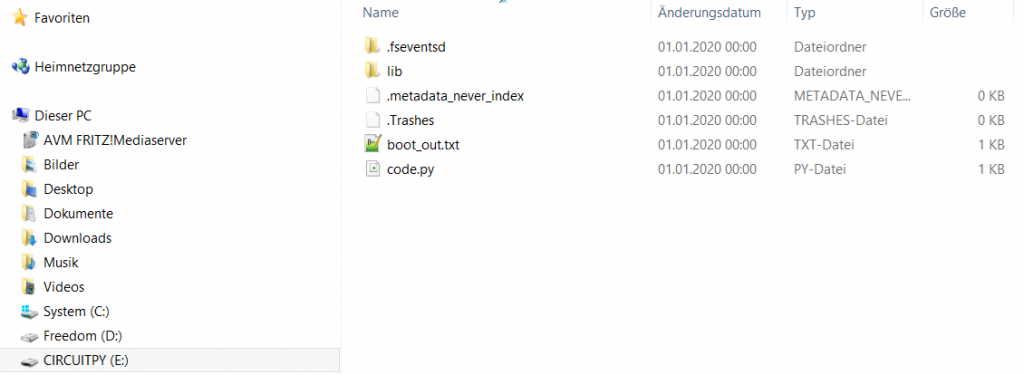
The lib folder is empty with a fresh installation of CircuitPython. Using the Windows Explorer we can simply copy & paste files in here.
Copy the required libraries from the downloaded lib folder into the CIRCUITPY lib folder:

Now we can also overwrite code.py:

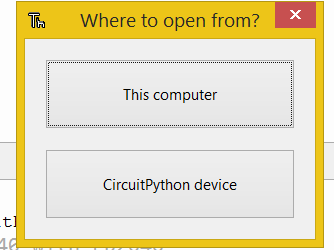
Using Thonny we can edit and run the code.py file. Click the open icon in Thonny, and select “CircuitPython device” in the “Where to open from” dialog:
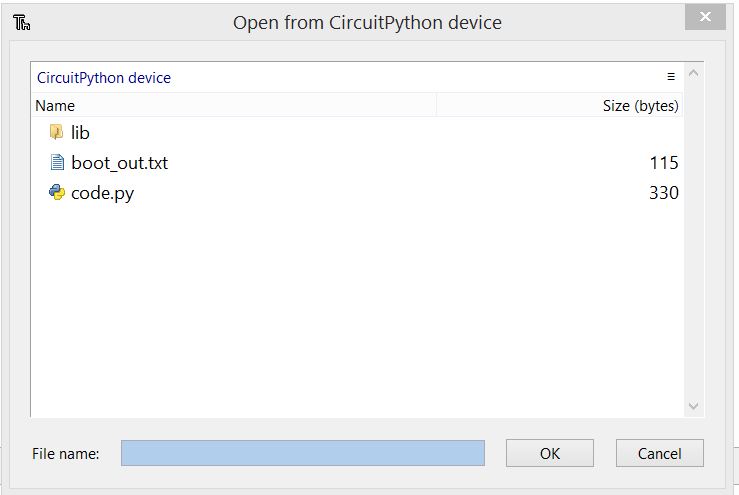
And here you can open code.py:
Now your Thonny window should look a bit like this:
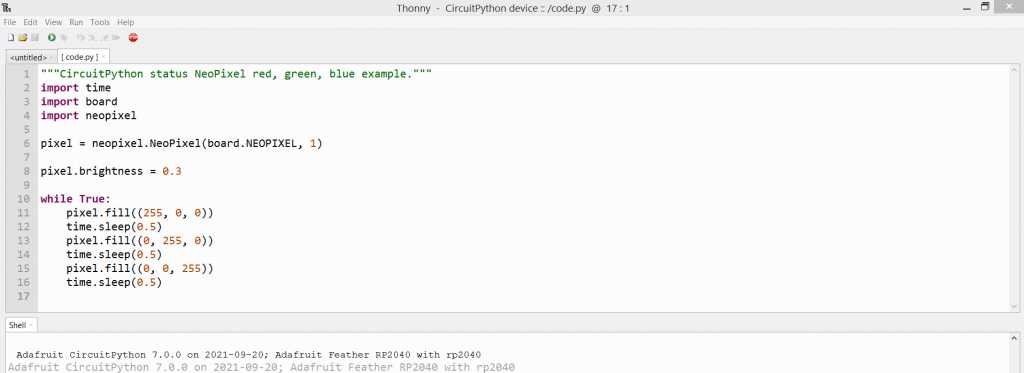
Press F5 on your keyboard, or click the run icon

If all went well, the NeoPixel RGB LED on your Adafruit Feather RP2040 should now start to flash in different colors. Congratulations 🙂
Now you can go ahead and play around with the script – possibly you could modify the colors, or the time between the color changes? Or add other functions.
In order to be able to run your modified script, press Ctrl + C in the Shell (or select Run > Interrupt Execution in the Thonny Menu). Now you can upload your script again.
A great thing for debugging is that you will get console output with Thonny, so you can use print statements to output information:
Adafruit CircuitPython Bundle
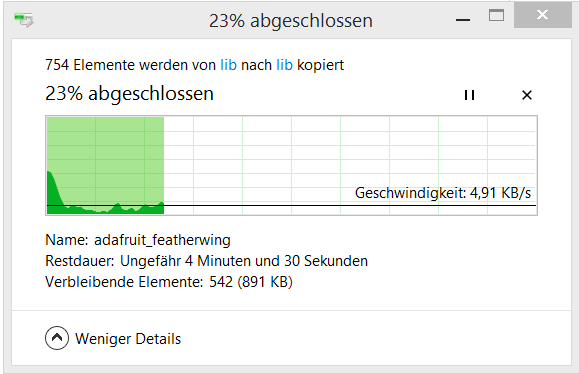
Adafruit provides a convenient download of multiple libraries in a ZIP. Download the corresponding adafruit-circuitpython-bundle-7.x.-mpy or -6.x. mpy here. You can install several or all of the libraries as discussed above simply using Windows Explorer. A complete upload of all libraries would be about 1.2 MB big, the Adafruit Feather RP2040 has enough space to allow this. Copying might take a couple of minutes.
Misc. notes
Can I use the procedures in this guide for CircuitPython, as well?
Absolutely, yes. For example you can use Zadig on Windows 8.1 (see the description above for details. Use version 2.5.730 of Zadig!). You will be looking for a “CircuitPython CDC control” device instead of the “Board CDC” device.
Driver installation fails with Zadig?
This might be due to Antivirus software. Maybe a false alarm, but I can’t be sure of that. My Virus scanner (Bitdefender) tells me the following:
“Die Datei C:\Users\Max\usb_driver\installer_x64.exe ist mit Gen:Variant.Tedy.11444 infiziert und wurde in die Quarantäne verschoben. Wir empfehlen die Durchführung eines System-Scans, um weitere Infektionen auszuschließen.”
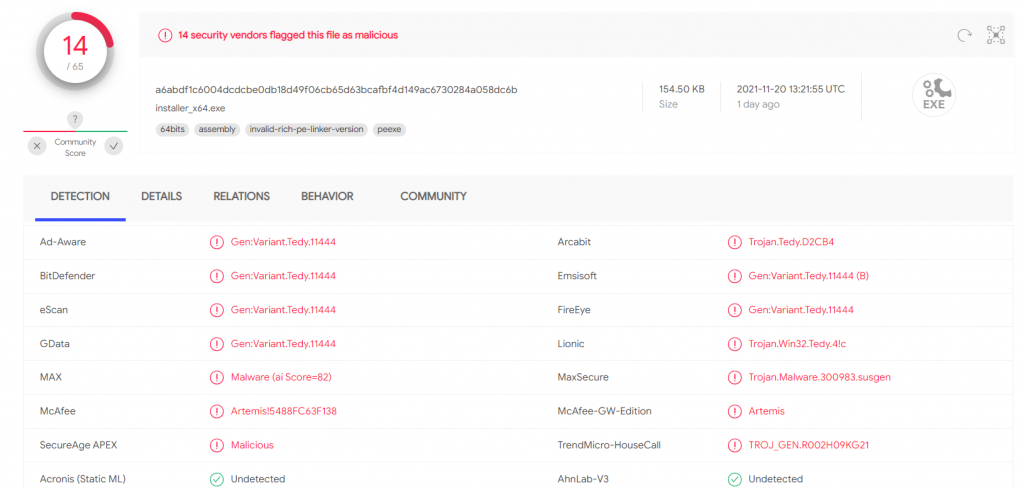
A number of virus scanners seem to agree that the installer_x64.exe (part of the USB driver) has “Trojan.Tedy”. I recommend to try using Zadig-2.5.exe instead. Which you can download here. I’ve used Zadig-2.5 to install a CircuitPython USB serial driver on my Windows 8.1 installation (which is my main machine).
How do I stop code execution on the Pico in Thonny?
Click into the Shell, and press Ctrl+C. This should stop the current code execution:
Repeating previous statements in Thonny
It is convenient to run the same command again – press the up key on the keyboard in the shell prompt to call up a history of previous commands.
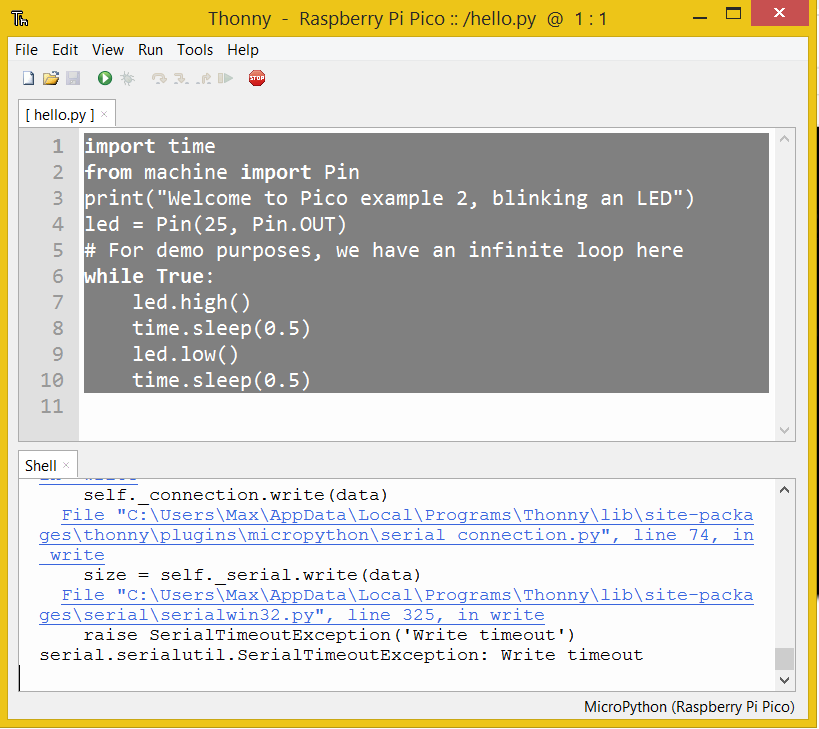
How do I know when my Pi Pico is disconnected from Thonny?
You’ll get an error message when trying to run code, something like this:

This means that Thonny can’t write to the serial port the Pico is expected to be on.
Couldn’t find the device automatically error in Thonny
If you get the following error:
Couldn’t find the device automatically.
Check the connection (making sure the device is not in bootloader mode) or choose
“Configure interpreter” in the interpreter menu (bottom-right corner of the window)
to select specific port or another interpreter.
Check that you have selected the right interpreter. If your device runs CircuitPython instead of MicroPython, you need to select CircuitPython (generic) as interpreter in Thonny. See the relevant information in this article for instructions.
Your tips for Pico/MicroPython on Windows?
Let us know in the comments if you have any other tips for getting started with the Pico and MicroPython on Windows, we’ll update the article accordingly 🙂
Enjoy your Pico & have fun with the amazing projects you can do with it!
More Pico blog posts at PiCockpit
If you enjoyed reading this article, you might enjoy reading the following as well:
I have Win 8.1 and this ist he only site that have the solution for COM problem. Thank you very very much.
Could you please share link of the article in which there is a solution for Board CDC in windows 8.1
This article which you are reading describes how to use Board CDC on Windows 8.1 – use the Zadig tool in Version 2.5.
Thank you, Windows 7 64 bits working smoothly.
A big thank you for this tutorial !
Very nice tutorial You put coffee on the table like we say in Poland, what means without beating about the bush. Greats!
I need help. My windows 11 just shows the pico as “portable device”. Putty cant find it due to this, so I get an error that it cant fine the path.
Dont know how to get past this.
Thanks!
This was a great introduction for me! Thanks!
Hola muy bueno, consulto x la inquietud que se me ha presentado
si despues de subir mi codigo a mi pi pico, y la coloco en una placa para que ejecute una tarea x,
si cualquier otro que no sea yo sacara la pi pico de la placa y la conectara a una pc o notebook,
podria leer el codigo que esta en la pi pico a traves por ejemplo de Thonny dando click al icono de abrir carpeta y seleccionando abrir lo que esta en la pi pico.?
Hay algun modo de hacerlo de no lectura?
gracias
Putty and zadig both worked for me. Excellent tutorial.