PiControl

PiControl is a powerful app which enables you to control your Raspberry Pi remotely from any web browser.
This page gives you an overview of the PiControl App.
PiControl
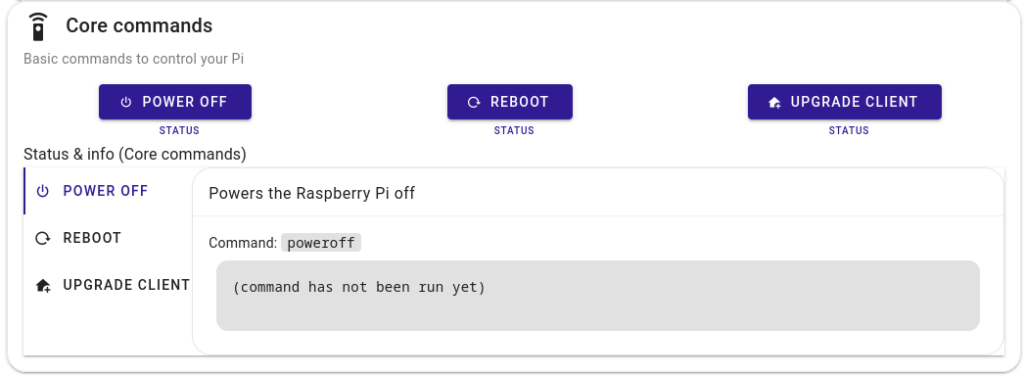
You’ll notice that, by default, three commands are included and immediately available for your Raspberry Pi. Namely, with PiControl, you can power off your Raspberry Pi, reboot your Raspberry Pi, and upgrade the PiCockpit Client.
Customizing PiControl
What makes PiControl particularly useful is that it’s also customizable.
You can easily and securely define your own commands by editing JSON files on your Raspberry Pi.
So here are instructions are for users who do not have experience with the command line.
If you know how to use the command line, you might find it easier and faster to just create the file and edit it with Nano or Vim.
If not, then we’ll go through the steps here.
First, you need to open the file browser in super user mode (this step keeps your PiCockpit PiControl configuration files safe from any user or application wanting to tamper with them).
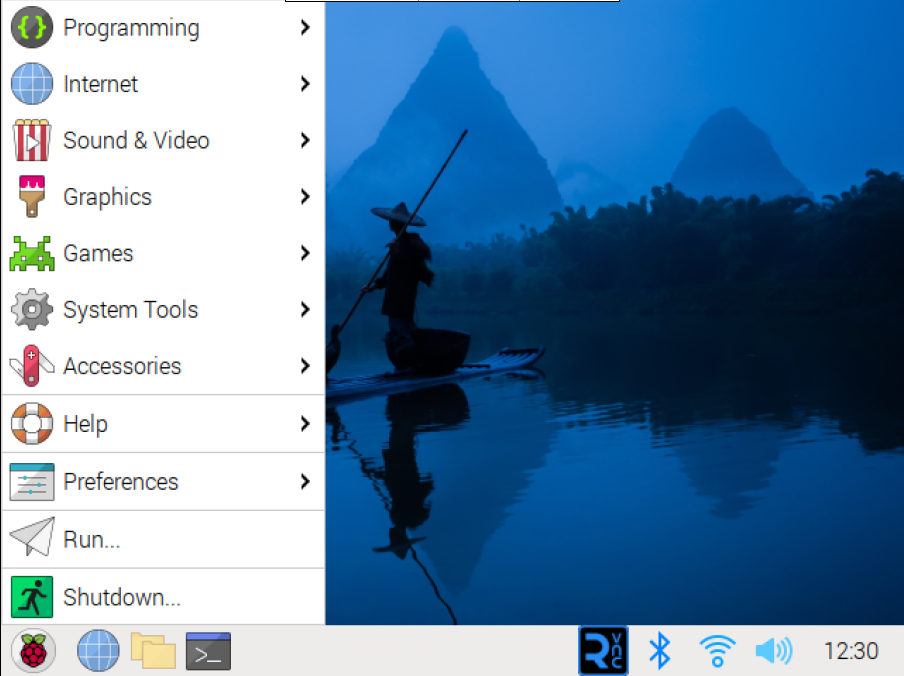
Click on Raspberry Pi OS Menu, and here click the “Run…” command:
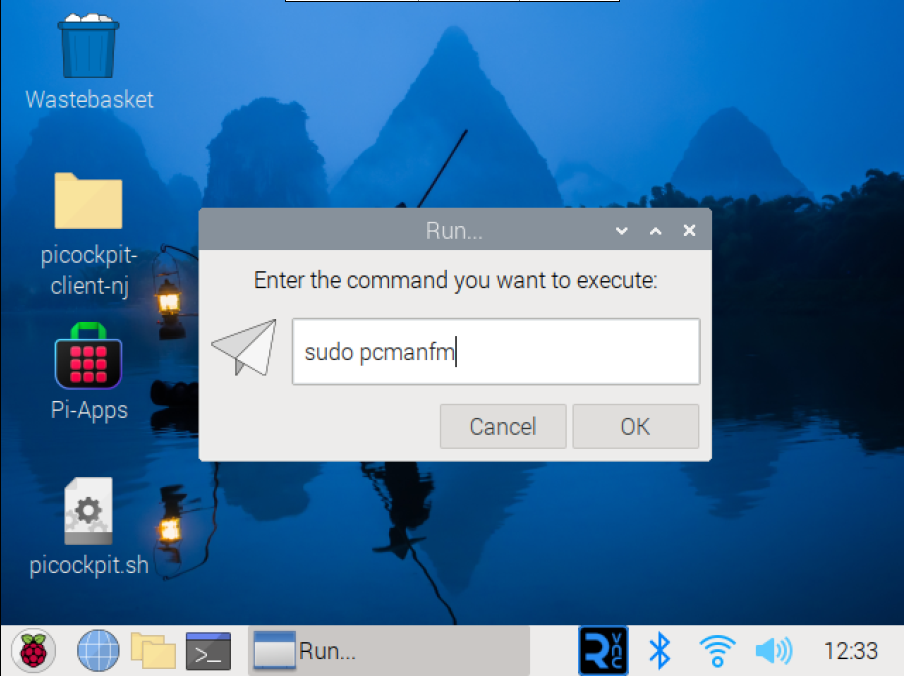
A box will appear that reads “Enter the command you want to execute:”. Type in sudo pcmanfm and click OK.
A new window opens, showing you the contents of the /home/<user> directory:
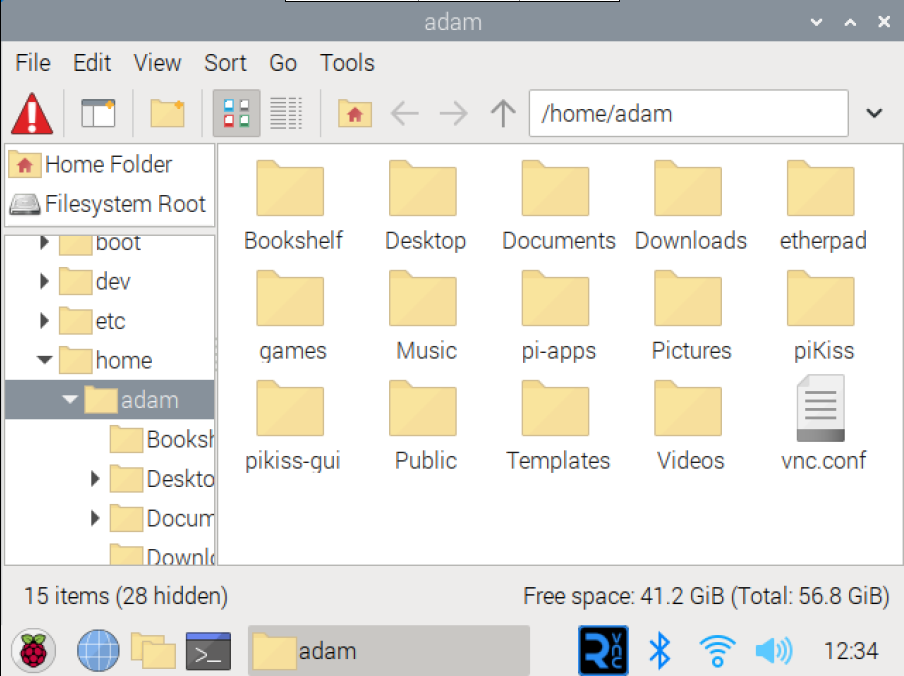
The warning symbol at the top left of the screen indicates that you are in Super User mode. At the top right, you want to navigate to the following directory:
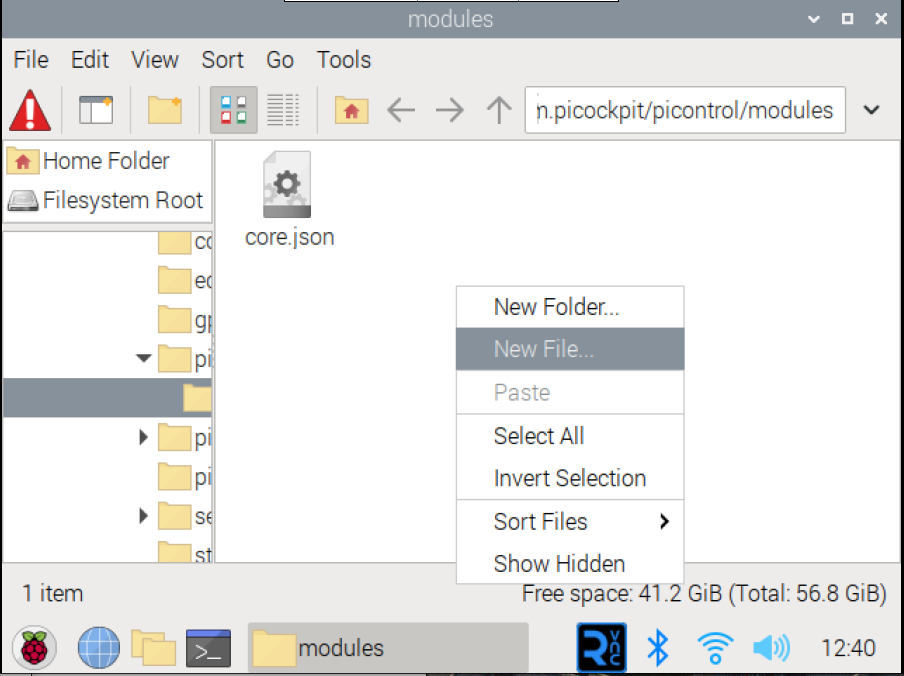
/etc/picockpit-client/apps/com.picockpit/picontrol/modules

Right-click into the empty area next to the existing files, and select “New File…”.
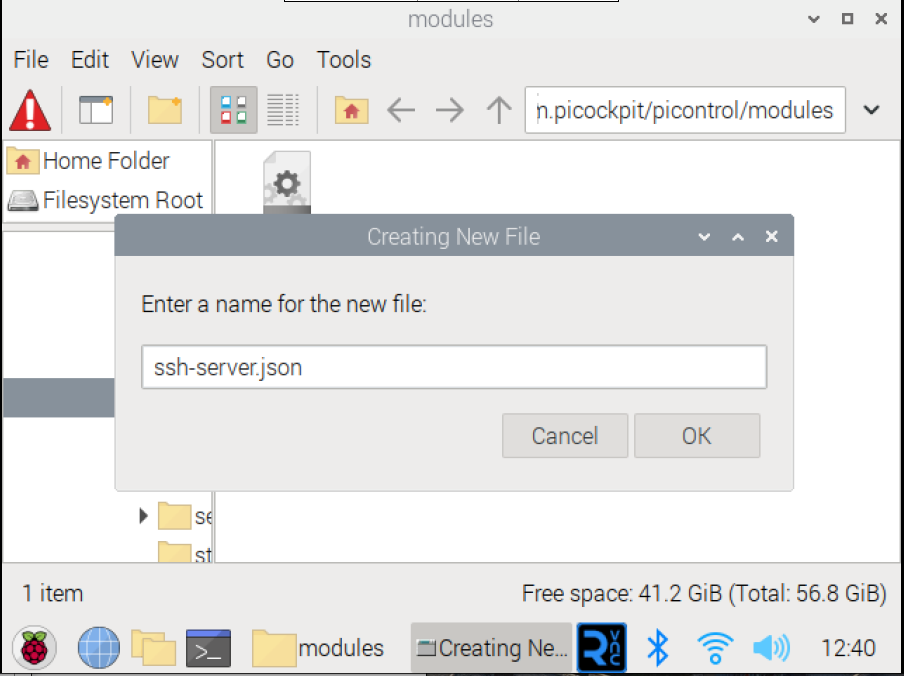
Call the new file ssh-server.json:
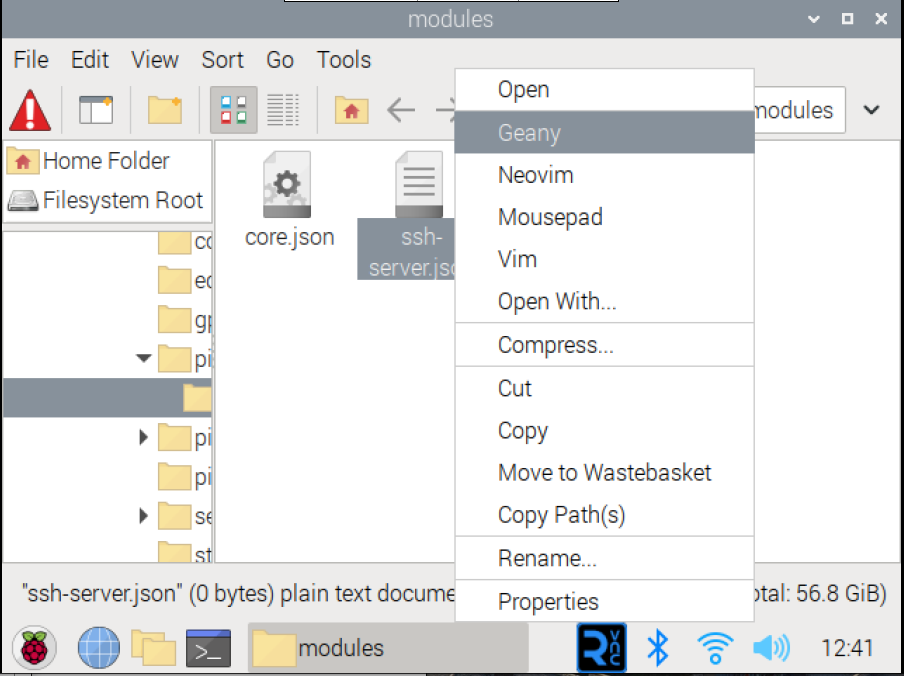
Now, you need to right-click the new file, to bring up the context menu. Choose “Geany”:
You can now see the new file we just created. However, at the moment, it’s empty.
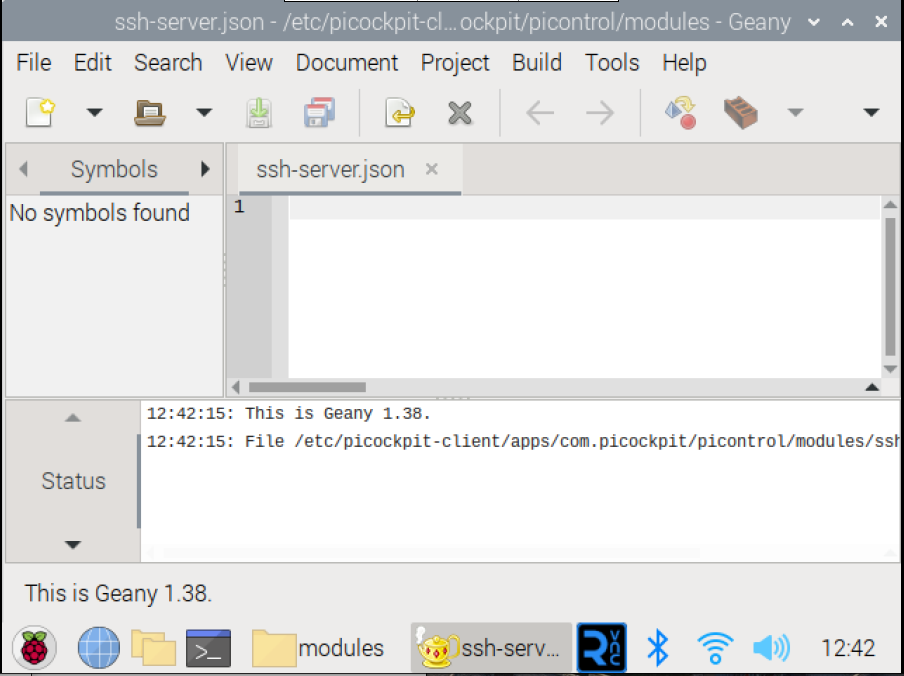
Let’s create two new commands, one for shutting down the SSH server service, and one for starting it. Enter the following into the text field in Geany:
{
  "name": "SSH commands",
  "icon": "mdi-ssh",
  "handle": "ssh",
  "description": "Control the SSH server",
  "commands": {
    "ssh-stop": {
      "name": "SSH Server off",
      "icon": "mdi-server-minus",
      "description": "Shuts the SSH service down",
      "confirm": true,
      "user": "root",
      "command": ["service", "ssh", "stop"]
    },
    "ssh-start": {
      "name": "SSH Server on",
      "icon": "mdi-server-plus",
      "description": "Starts the SSH service",
      "user": "root",
      "command": ["service", "ssh", "start"]
    }
  }
}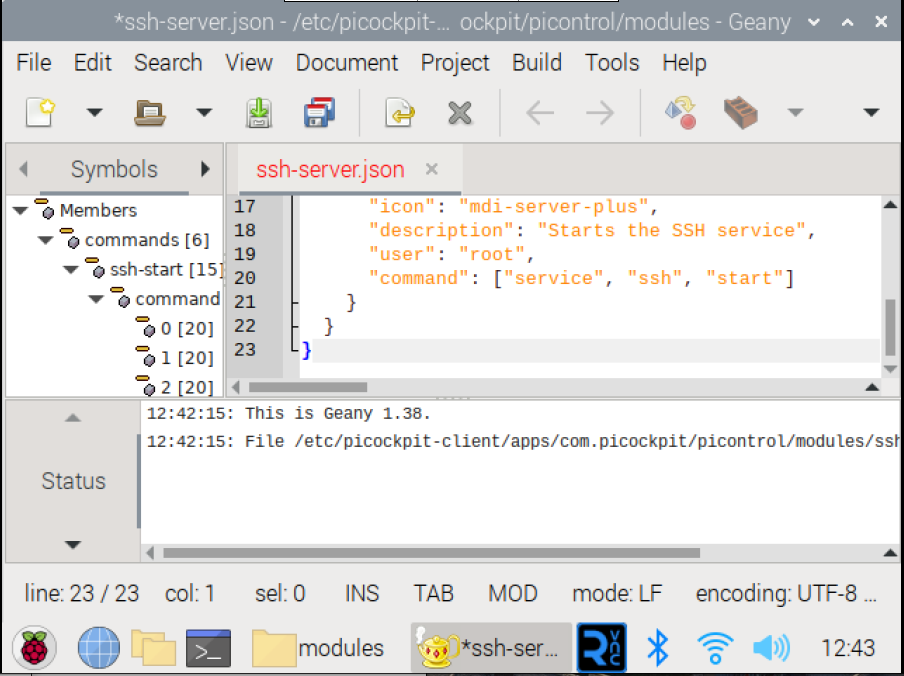
At this point we should save the file. You can do this from Geany’s file menu, for example, by selecting Save or by pressing Ctrl + S:
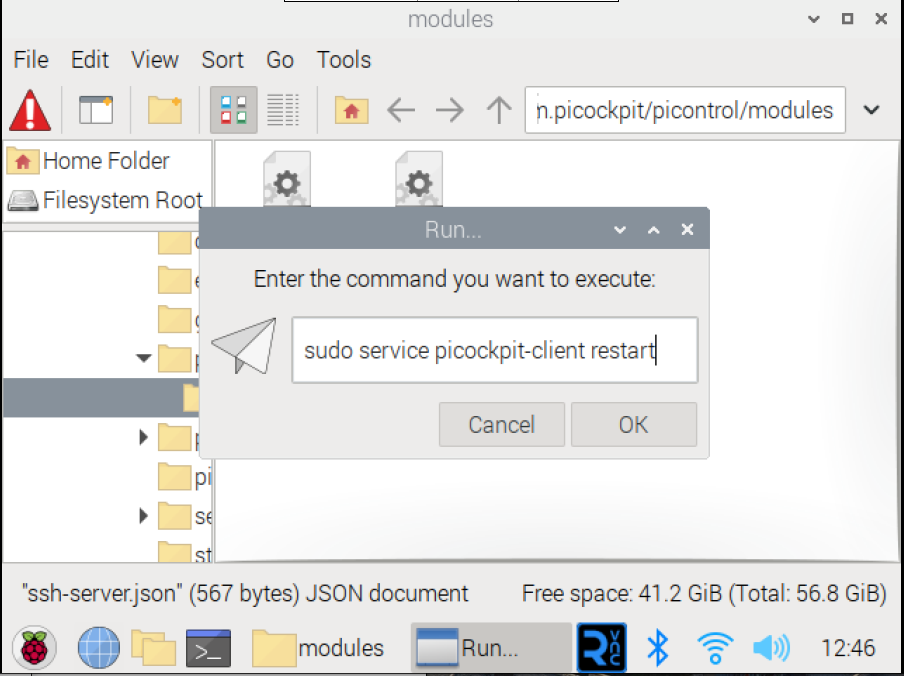
At this point our new commands have not appeared in the web interface yet.
You need to restart the PiCockpit Client for this.
Click on the “Run…” command in the Raspberry Pi OS menu once more and type sudo service picockpit-client restart into the window before clicking OK:
Now take a look at your PiControl web interface:
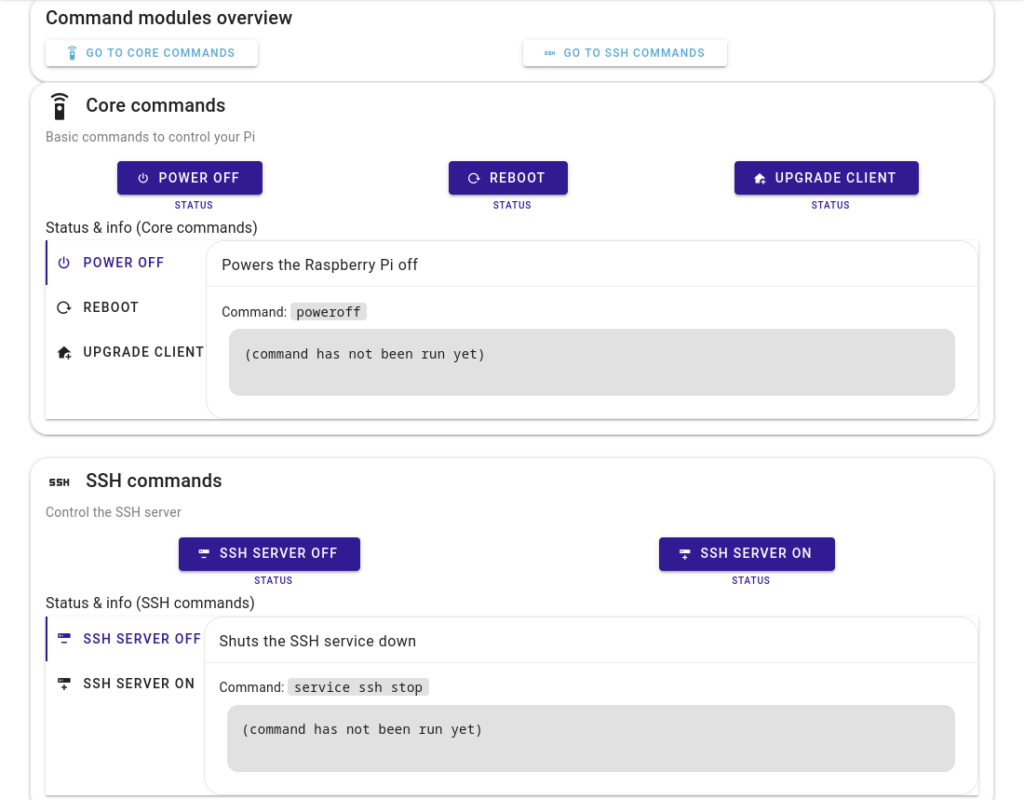
If you’ve typed everything correctly, the new SSH server commands will appear. I
f you have made a mistake in your JSON file (for example, if you’ve forgotten a curly bracket), PiCockpit will simply ignore the “broken” file.
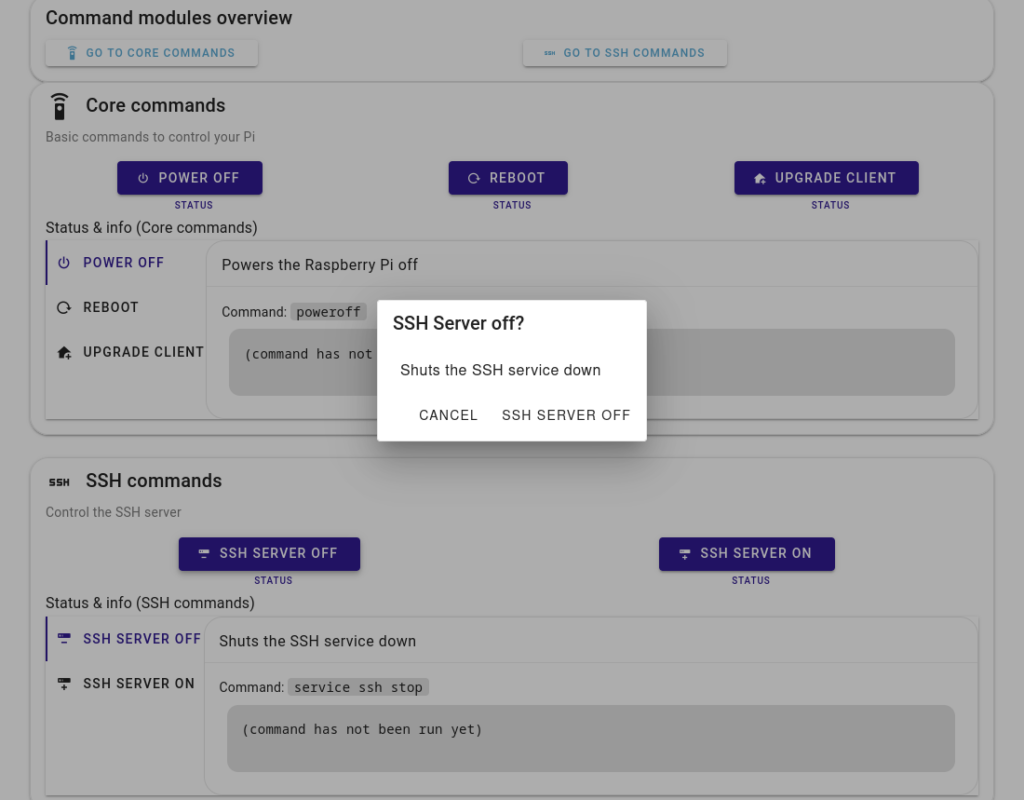
You can now try the commands.
Congratulations! You’ve just created your very own set of commands which you can run from the web interface.
Stay on the page while you run commands. The status will be cleared if you navigate away. To determine whether the SSH server is running, you could build a test on our PiDoctor App.
PiControl is solely for executing remote actions on your Raspberry Pi.
Remember to restart the PiCockpit Client when you add new commands or update commands.
You can also remove commands you don’t want to have. For example if you want to remove the capability to shut your Raspberry Pi down remotely, you can edit the core.json file.
PiControl’s .JSON Syntax
The file configures a new module for PiControl.
As already mentioned, it has a .JSON syntax. Therefore, you need to make sure that you open and end with curly braces in a correct fashion, as presented in the example above.
There is a head, which configures the module itself, and the commands (in the “commands” section). They share some common entries:
name
The “name” entries are human readable names which are shown to you in the web-interface
icon
The “icon” entries are optional to decorate your buttons and module. These are Material Design Icon names, for example “mdi-ssh”.
You can check out a full list of Material Design Icons here. Simply copy the name of the icon (including the mdi- in the beginning).
description
The “description” entries are optional and allow you to add a bit more information for the command or module.
handle
The “handle” entry is explicit for the module, and has to be unique amongst the modules. In the case of the commands, the handle is implicit. “ssh-stop” and “ssh-start” are the two handles I’ve used for the commands in my example.
You can choose anything as a handle, as long as it does not include the characters “/”, “+”, “$”, “*”. I recommend to stick to basic downcase ASCII characters, and using the “-“. The handle is required.
Your file can, by the way, have a different file name than the handle – I encourage you to use at least related names for the file name and the handle, so you can easily identify the module .JSON file on your hard drive.
The commands go into the “commands” block, and have additional configuration possibilities:
confirm
If “confirm” is present, and set to true, the PiControl web interface will show a confirmation dialog before actually running the command. This is useful for making sure “dangerous” commands don’t execute by an accidental tap or click.
user
If “user” is present, the command will run as this particular user (as root in our example, to ensure that we have sufficient privileges).
PiControl will run commands as user “pi” by default. You can also set it to other users with less privileges than “pi“.
If you try to run GPIO commands, or play videos using omxplayer, you might have to give your new user additional capabilities. The user pi has these required privileges by default. Usually these privileges are set by adding the user to a special group.
command
This is the actual command which you should run on your Raspberry Pi. Note that you have to replace the spaces in the command compared to as you would run it on the command line. For example,
service ssh start
should be written as:
["service", "ssh", "start"]
PiControl also supports chaining a sequence of commands (e.g. the usual apt-get update, apt-get upgrade sequence). Check out core.json for an example of how that is being done.
Conclusion
If you have any questions or run into any issues, do not hesitate to contact us and we’ll help you get PiControl up and running!
hello there!
I want to run the following comand with a picontrol button: cd /home/pi/Sensoren ; python3 SCRIPT.py
I did it as described and i can press the button but the comand isnt executed and also the process cant be stopped.
Any advice?
Thanks
remember that picontrol is not a shell – all commands are executed independently. you have to use absolute paths (cd – change directory – is useless in the context of picontrol).
Starting a python script works fine, example:
“command”: [“python3”, “/home/pi/do_something.pyc”]
But I have problems if the script later starts an app with a GUI like Chromium or if Chromium is started directly:
“command”: [“chromium-browser”] results in “Unable to open X display. “.
How do I start scripts or apps that require an X display?
I’ve written a bit more about this here:
https://pi3g.com/2020/05/19/chromium-exit-code-5/
basically you need to tell the application which X display to use.
In the case of Chromium it is done with a flag
chromium-browser –display=:0 –kiosk https://picockpit.com
note, –kiosk starts the browser in kiosk mode. Just throwing that in as an extra information.
note II: these are two dashes for the parameters – WordPress changes them to a single long dash I believe.
For other applications you will need to check. Frequently this is done by setting an environment variable.
Possibly for PiCockpit you would need to write a bash script which sets the variable and then starts the application.
And then run the bash script.
If you have any success with this, please share with us.
Max
Also see these two links for more on command line switches for Chromium:
http://peter.sh/experiments/chromium-command-line-switches/
https://www.chromium.org/developers/how-tos/run-chromium-with-flags
Hi, just setup a command using your software and infrastructure and it is awesome! Thank you so much for this simple and easy to use software. I wanted a bit of advice if you’re free. Basically, I have my Pi setup to wake my pc from sleep, and your software allowing a simple web interface to wake the pc with an etherwake command is working, however I would like a faster way of executing this one command immediately. Do you think there is any way to make this possible? Currently to just wake my pc, i have to login and then go to my command and then choose the button in the pop-up box, but if there was an api or a shortcut to basically running the command in one click, that would be helpful. Either way, thank you so much for this. Very awesome 🙂
Thanks for the feature suggestion, I’ve added it. We’re planning on doing a wake on lan app some time, maybe it might be a bit more convenient.
Hallo,
wie kann ich zum Beispiel Abfragen wie (Do you want to continue? [Y/n]) über das Script mit “Y” bestätigen?
Vielen Dank!
Hallo Herr Hager,
das ist eine sehr gute Frage! Einige Kommandozeilen Programme wie zum etwa apt-get haben eine bereits integrierte –assume-yes Option, die es ermöglicht sie in einem nicht-interaktivem Modus zu nutzen. Das wird etwa gerne in Skripten ausgenutzt, die ohne Bestätigungen per Hand laufen sollen. Alternativ gibt es das klassische Unix ‘yes‘ Programm mit Sie das selbe Ergebnis erzielen können. Beispielsweise mit:
yes | sudo apt upgradeAbhängig von Ihrem konkretem Anwendungsfall sollte eigentlich eine dieser zwei Möglichkeiten eine gute Lösung darstellen. Ansonsten können Sie uns gerne noch einmal schreiben!
Hello, can you use RPi terminal from picockpit?
not yet, planned for a future release. (as of 19.4.2023)
Not all icons from the mentioned website are available / working.
How to use newer icons then version 4.9.95, for example ‘mdi-lamps-outline’ ?
we are in the process of updating the frontend code. I’ll share your comment with our developer, possibly they can look into this before the next update to bring the icons to the most recent version.
Hi, we’ve updated the frontend, which means now you are able to use all icons up to the newest version of Material Design Icons. We’ll also keep the version of the Font up to date in the future.
[…] CLICK HERE: Learn how you can set up your own commands in PiControl. […]
[…] The administrative tools which help you control your Pi are all working. This includes the GPIO, PiControl, PiDoctor, and PiStats apps. Maybe set up your new 64 Bit install with an easy way to toggle your SSH server? Or starting and stopping that media center you have set up? Sending a WoL message? You can find a good introduction into the possibilities our software offers right here. […]
apt-get –just-print upgrade 2>&1 | perl -ne ‘if (/Inst\s([\w,\-,\d,\.,~,:,\+]+)\s\[([\w,\-,\d,\.,~,:,\+]+)\]\s\(([\w,\-,\d,\.,~,:,\+]+)\)? /i) {print “PACKAGE: $1 INSTALLED: $2 AVAILABLE: $3\n”}’
The above command works just fine with SSH but PiControl has a problem and reports:
(100) E: Command line option ‘n’ [from -ne] is not understood in combination with the other options.
I reckon I escaped my JSON correctly as the displayed command in PiControl is the same one I escaped and split spaces into seperate strings.
JSON:
{
“name”: “CISO update commands”,
“icon”: “mdi-update”,
“handle”: “CISO”,
“description”: “CISO install all updates”,
“commands”: {
“ciso-updates”: {
“name”: “CISO Updates”,
“icon”: “mdi-server-minus”,
“description”: “Updates the list of all packages in the repository and upgrades all installed packages”,
“confirm”: true,
“user”: “root”,
“command”: [
[
“apt-get”,
“update”
],
[
“apt-get”,
“upgrade”,
“-y”
],
[
“apt-get”,
“–just-print”,
“upgrade”,
“2>&1”,
“|”,
“perl”,
“-ne”,
“‘if”,
“(/Inst\\s([\\w,\\-,\\d,\\.,~,:,\\+]+)\\s\\[([\\w,\\-,\\d,\\.,~,:,\\+]+)\\]\\s\\(([\\w,\\-,\\d,\\.,~,:,\\+]+)\\)?”,
“/i)”,
“{print”,
“\”PACKAGE:”,
“$1”,
“INSTALLED:”,
“$2”,
“AVAILABLE:”,
“$3\\n\”}'”
]
]
}
}
}
Hallo,
ich versuche die Ersten Schritte mit picockpit. leider gelingt es mir keine Anwendung über die Fernsteuerung zu öffnen. z.B. chromium-browser, dillo, geany
Über die Eingabe im terminal lassen sich die Anwendungen direkt öffnen
“geany”: {
“name”: “EditorG”,
“icon”: “mdi-application-edit-outline”,
“description”: “Text editor”,
“confirm”: true,
“notermination”: true,
“user”: “root”,
“command”: [“geany”]
},
Hallo, der folgende Befehl muss hinzugefügt werden: “–display=:0”
Dann sieht es so aus:“,
{
“name”: “Geany Opener”,
“icon”: “mdi-application-edit-outline”,
“handle”: “open-geany”,
“description”: “Launch Geany”,
“commands”: {
“open-geany”: {
“name”: “Open Geany”,
“icon”: “mdi-application-edit-outline”,
“description”: “Launches Geany”,
“confirm”: true,
“user”: “
“command”: [“geany”, “–display=:0”]
}
}
}
[…] Raspberry Pi can be integrated into inventory management systems to monitor stock levels, track assets, and automate reorder processes. If you want to find ways of developing a customized inventory management system, you can develop scripts that you could then run with our PiControl App through PiCockpit. […]
[…] makes scripting for your Raspberry Pi both intuitive and easy to manage. With our PiControl App, you can easily write a script and create a button to run it from anywhere in the […]