Easily Write a Script on Your Raspberry Pi with PiCockpit
PiCockpit makes scripting for your Raspberry Pi both intuitive and easy to manage. With our PiControl App, you can easily write a script and create a button to run it from anywhere in the world.
In this blog post, I’ll guide you through the process of writing a simple script to open Firefox on your Raspberry Pi using PiControl with a button.
You can use this outline to create your own scripts with PiControl.
Prerequisites
You’ll need a Raspberry Pi with PiCockpit installed. If you haven’t yet, you can sign up for PiCockpit with just the click of a button.
And once you’ve done that, installing PiCockpit is a piece of cake.
Steps to Write the Script
So now that you’ve got a PiCockpit account and you have the PiCockpit Client installed on your Raspberry Pi, writing the script is a fairly straightforward process.
I’m going to show you how to do this with the terminal. If you want to see how to do it with a graphical user interface, you can find our PiControl App documentation here.
Step 1: Access PiControl Configuration Files
So the first thing you need to do is either open a terminal up on your Raspberry Pi or SSH into it. After that, you’ll want to navigate to the following directory:
/etc/picockpit-client/apps/com.picockpit/picontrol/modulesStep 2: Create a New Script File
I’m going to use Nano, but feel free to use whichever text editor you please. So I’ll run:
sudo nano firefox.jsonThus creating a new JSON file. This will then open up an empty file in Nano. And here is where we’ll be putting the script.
Step 3: Edit the Script File
Input the following JSON content into the text field:
{
  "name": "Firefox Opener",
  "icon": "mdi-firefox",
  "handle": "open-firefox",
  "description": "Open Firefox",
  "commands": {
    "open-firefox": {
      "name": "Open Firefox",
      "icon": "mdi-firefox",
      "description": "Launches Firefox",
      "confirm": false,
      "user": "<user>",
      "command": ["firefox", "--display=:0"]
    }
  }
}
Before we move on, allow me to explain each of these elements.
The name gives the module a human-readable name, which will appear on the PiCockpit interface.
The icon is an optional field that gives the module a Material Design Icon.
The handle gives the module a unique identifier. And the description ensures that you will be able to quickly identify the script on your interface.
The name, icon, and description all equally apply to the command itself. But the confirm element indicates whether or not you’d like a confirmation dialogue to appear before running the command. If you put true, then the dialogue will appear.
You’ll then need to enter in the user for the Raspberry Pi.
And finally, the actual command, of which each element is separated. In the above example, PiCockpit will spur Firefox to open then on the primary X server display, which is why I included “–display=:0”.
Ensure that you save the file after entering the content by clicking “Ctrl” + “X” and then typing “Y” and hitting “Enter”.
Step 4: Restart PiCockpit Client
To apply the changes, restart the PiCockpit Client. Run the following command in the terminal:
sudo service picockpit-client restartStep 5: Verify the New Command
Visit the PiControl web interface. If the script is correctly configured, you should now see the “Open Firefox” command.
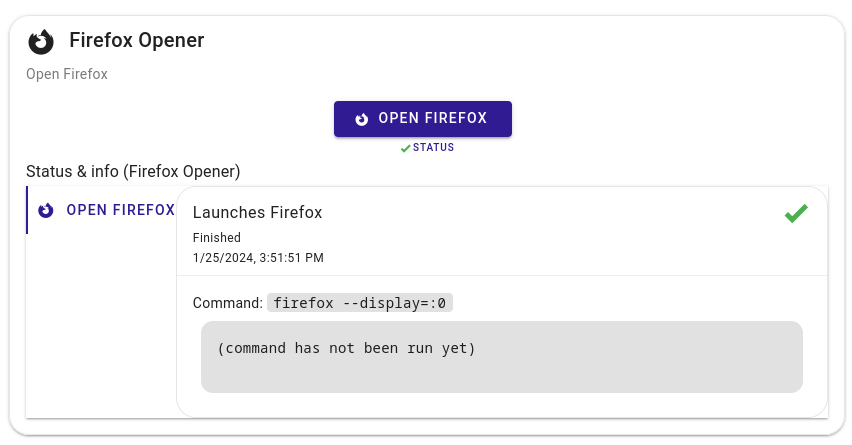
Step 6: Run the Script
Click on the “Open Firefox” command in the PiControl web interface. Firefox should now launch on your Raspberry Pi.
Conclusion
So that’s how you successfully create a script to automate the process of opening Firefox on your Raspberry Pi using PiControl.
This demonstrates the flexibility and customization options that PiControl offers, allowing you to tailor your Raspberry Pi experience to suit your specific needs.