How to Install PiCockpit

This page will show you how to install PiCockpit.
At the moment, there are two ways to install the PiCockpit Client. One way is without an API key. The other way is with an API key.
Installation without an API Key
To install the PiCockpit Client through our web interface, you first need to create a PiCockpit account.
Once you’ve created an account, you should click on the button that says “ADD NEW PI”.
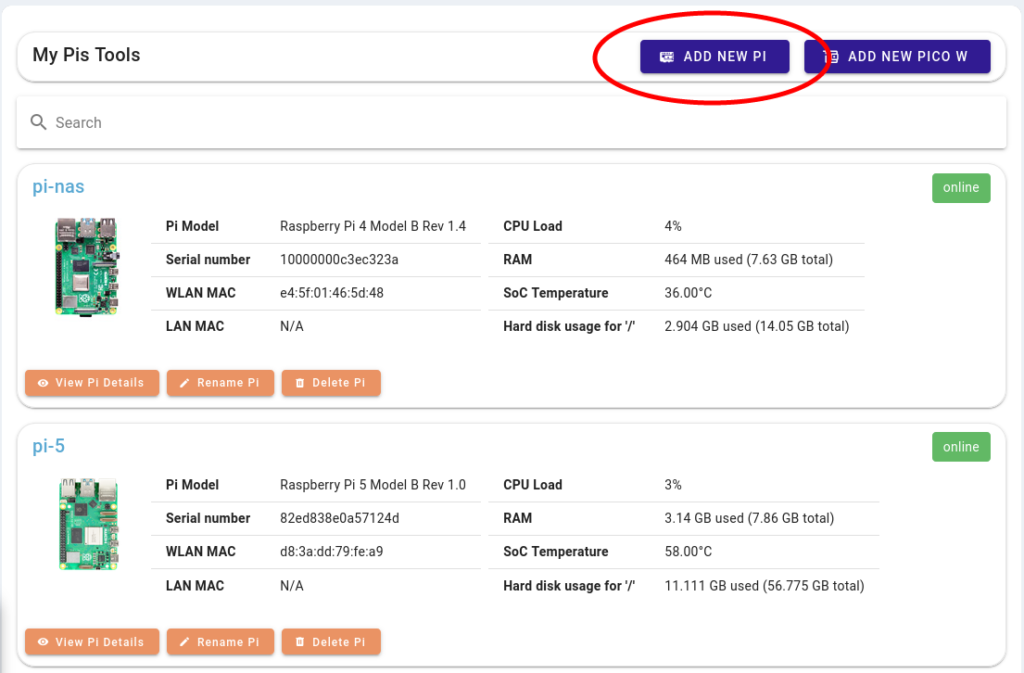
This will download a script to your Downloads folder.
If you’ve downloaded this onto your Raspberry Pi, then all you need to do is make it executable. You can open up your command line and run:
cd DownloadsNow you’re in the Downloads repository. From here, run:
chmod +x picockpit-addrpi-v2.5.0.shAnd finally, run the script:
./picockpit-addrpi-v2.5.0.shThat will run the script on the Raspberry Pi.
If it asks you if you want to continue, simply type “y”.
Once it’s installed, your Raspberry Pi will automatically appear on the My Raspberry Pis page. You may have to reload the page to ensure that it connects.
If you’ve downloaded the script onto another computer and want to ssh into your Raspberry Pi, then you first need to copy the file over to the Raspberry Pi. You can do that with this command:
scp /home/<name>/Downloads/picockpit-addrpi-v2.5.0.sh <your-name>@<raspberrypi-name>.local:/home/<name>/DownloadsPlease ensure that in the script above, you replace each instance of <name> with the correct username and Raspberry Pi name. Once you’ve done that and run the script, it will ask you to type in your password for the Raspberry Pi.
After you’ve successfully copied over the file, you can then ssh into your Raspberry Pi and follow the commands above.
Installation with an API Key
After creating a PiCockpit account, you need to go to your user profile page. Simply click on your name at the top right and it will take you to this screen:
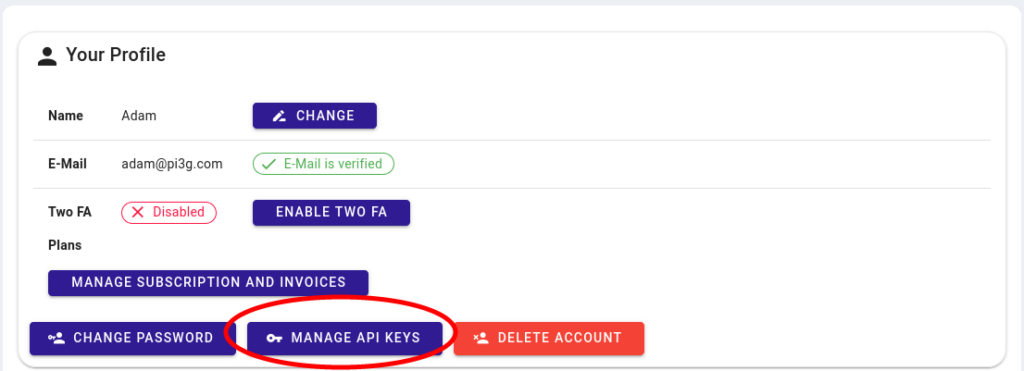
Click on the button hat says “MANAGE API KEYS”.
You’ll then need to click on the button that says “ADD API-KEY”:
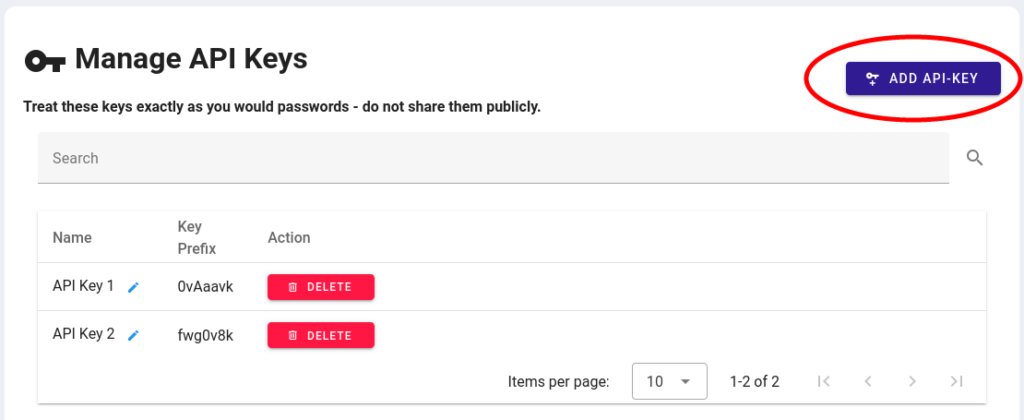
This will create a single API key that you’ll want to save like a password.
It will only show you your API key once. So be sure to save it in a secure location.
Please note API keys are case-sensitive and the “.” is also required.
Also note that one API key can be used for several Raspberry Pis. There is no need to create a new API key every time you add a new Raspberry Pi. However, you are free to create multiple API keys if you would like.
After saving your API key in a secure place, you can run the following one-line installation (on the Raspberry Pi):
bash -c "$(curl -k -s https://picockpit.com/setup.sh)"Press enter when asked whether you want to proceed with the package installation. Also have your API key handy, as the installer will ask you for it.
The installer will acknowledge a successful installation and connection with PiCockpit.com.
Refresh the My Raspberry Pis page in your browser, and you’ll be able to see the new Raspberry Pi.
FAQ
Where can I find detailed installation instructions?
If you’re curious what the one-liner above does, and would like to run the installation manually, please have a look at these manual installation instructions.
The PiCockpit Client needs to be installed only once, it will automatically start on every boot.
Please refer to the documentation for an overview of what you can do with PiCockpit.
Will PiCockpit work on a 32-Bit and 64-Bit operating system?
Picockpit runs on both 32-Bit and 64-Bit versions of Raspberry Pi OS.
Is PiCockpit compatible with Ubuntu or Fedora?
We have developed PiCockpit specifically for Raspberry Pi OS, for both stability and security reasons. So we currently only offer official support for PiCockpit on Raspberry Pi OS.
How can I start, stop, enable, and disable PiCockpit on the command line?
PiCockpit is integrated with Systemd. If you prefer to manually manage PiCockpit through the command line (although it’s not recommended), you can use the following commands to start, stop, enable, and disable the client:
Start:
sudo systemctl start picockpit-clientStop:
sudo systemctl stop picockpit-clientEnable (which autostarts the PiCockpit Client upon reboot):
sudo systemctl enable picockpit-clientDisable (which prevents the PiCockpit Client from autostarting upon reboot):
sudo systemctl disable picockpit-clientPlease note that it’s generally recommended to use PiCockpit through its intended interface rather than directly via the command line for a more user-friendly experience.
How can I uninstall PiCockpit from my Raspberry Pi?
We also have a help page for you detailing how to remove PiCockpit.