Raspberry Pi Pico W (Solar-Powered) Remote Weather Station
One very special feature in the Raspberry Pi Pico W is the SoftAP feature.
SoftAP stands for software-enabled access point, which allows you to broadcast a WiFi network right from the Raspberry Pi Pico W.
This is why we’ve chosen to do this solar-powered project.
How a solar-powered project intersects with SoftAP
Here’s the issue.
If you wanted to create a project that measured data away from your home, you’d find that you won’t be able to get that data wirelessly.
You might as well use the regular Pico in this scenario, since you won’t be able to use its wireless ability.
A solar-powered project is probably one of them, given that you need to put it in a sunbathed area, which is usually outdoors.
This is where SoftAP comes in. Let’s say you want to know what the weather is like outside. You then connect to the SoftAP that the Raspberry Pi Pico W is broadcasting, and then log into the IP address which displays the data.
This is pretty much the best-case scenario of how we can exploit the Raspberry Pi Pico W’s advantages.
I mean, it’s possible to buy an LTE add-on or a long-range wireless add-on, but then it wouldn’t really be a Pico W tutorial, since you could just use those components on the regular Pico.
What about Bluetooth on the Raspberry Pi Pico W?
It would be great if you could use Bluetooth, but as of this tutorial’s publication date, Bluetooth isn’t enabled on the Raspberry Pi Pico W.
On July 1, 2022, Raspberry Pi Engineer & Forum Moderator jamesh said that, “We have already started work on the software for BT, no schedule I can offer as yet. Software need to be written tested, and tutorials written.”
Parts
- Raspberry Pi Pico W
- Solar panel 6V
- TP4056 USB-C charging module
- NR18650 Li-Ion battery 3.6V
- BME688 Breakout Board
- Battery holder for type 18650
- Schottky diode
- Headers for the Pico W and BME688
- Breadboard
Update your Raspberry Pi Pico W’s firmware
The Raspberry Pi Pico W’s firmware is still constantly evolving so it would be best to use the latest firmware. For example, the first public MicroPython UF2 for the Pico W has some issues with security as networks are always open.
Follow this link to learn how to update it. The link will also show you a quick-start method to broadcasting your own WiFi network.
Solar set up
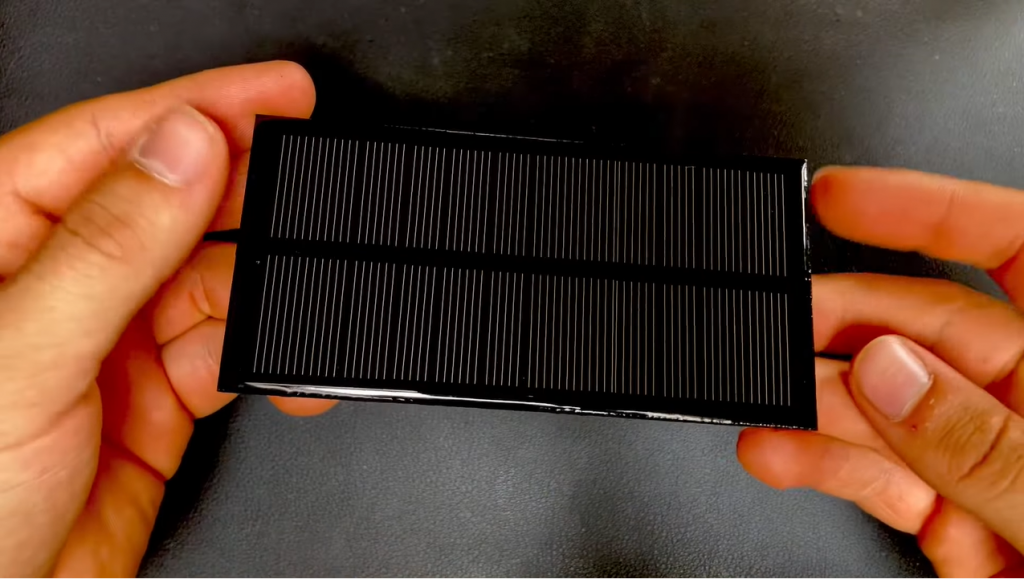
The solar panel should output at least 6 volts and 150mA.
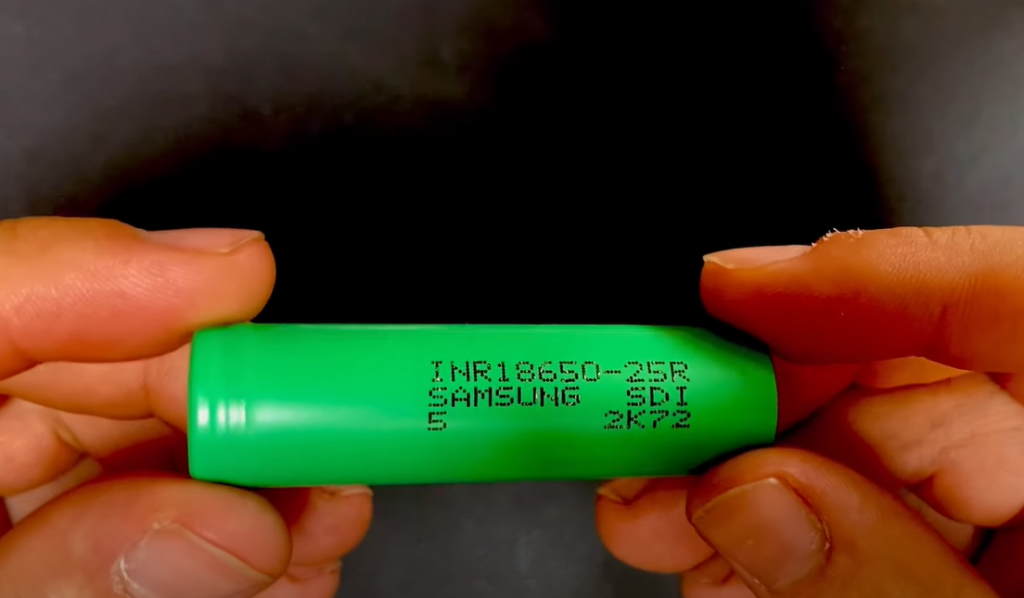
The battery should be a 18650-series lithium battery with a nominal voltage of 3.7V.
The TP4056 module will protect the battery and power the Pico W.
Weather tracking device
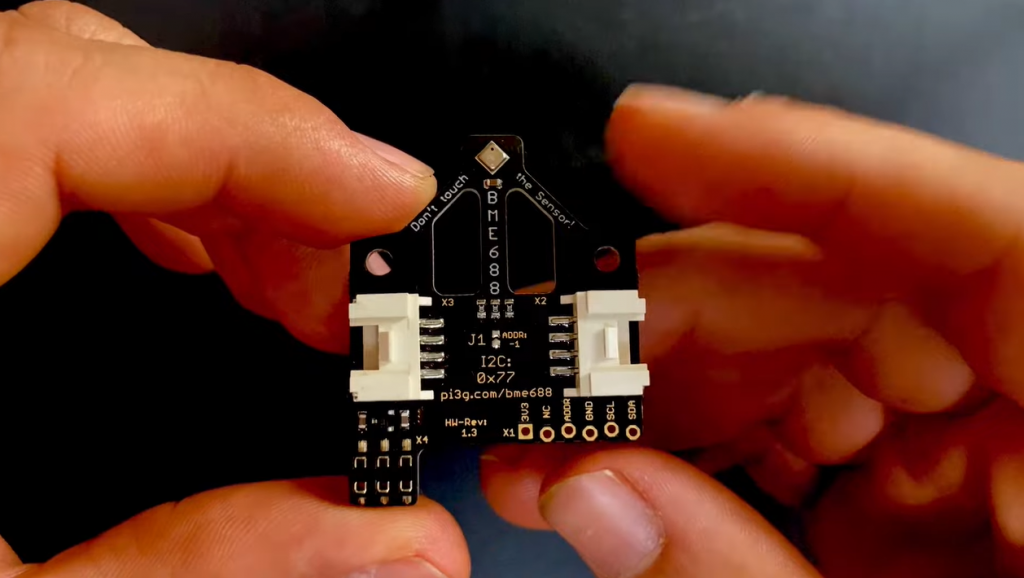
For this project, we are using our BME688 breakout board designed in house.
You can use any weather sensor such as a DHT11 or DHT22, but this article’s code and wiring is really meant for a BME688.
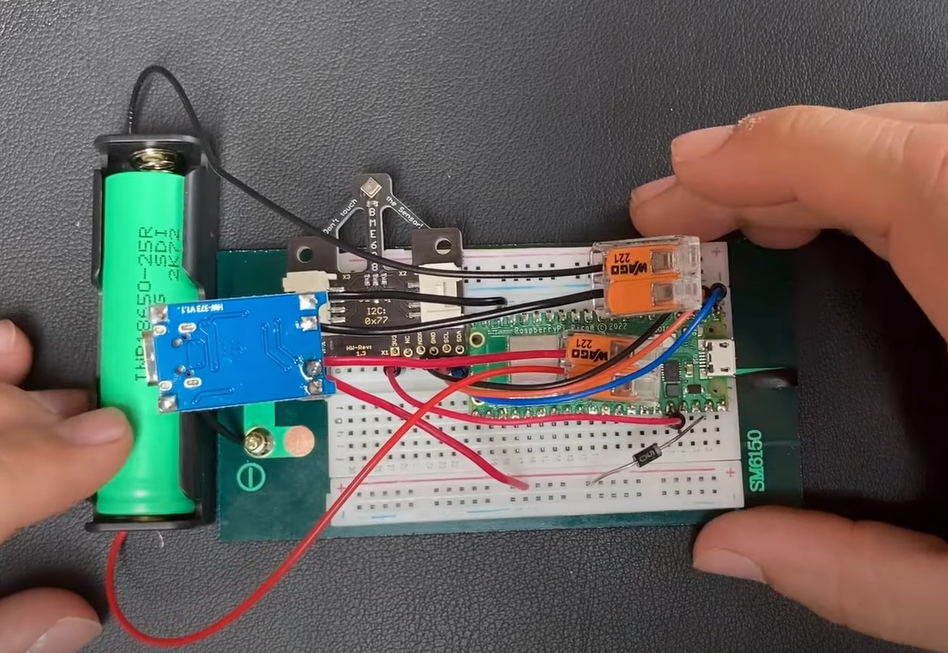
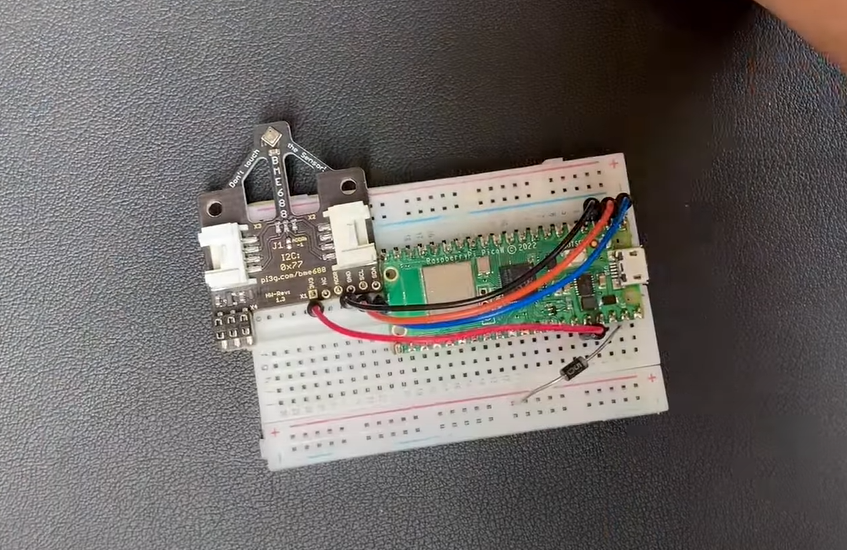
Wiring
Place your Pico W and BME688 onto a breadboard.
There are four pins you need to connect: 3.3V, GND, SCL and SDA on the BME688.
Here’s what we used:
Pico W’s GP1 connects to SCL;
GP0 connects to SDA;
GND connects to GND;
These three pins should be in-line, next to the micro-USB slot.
3V3 connects to 3V3, which is located on the other side of the board.
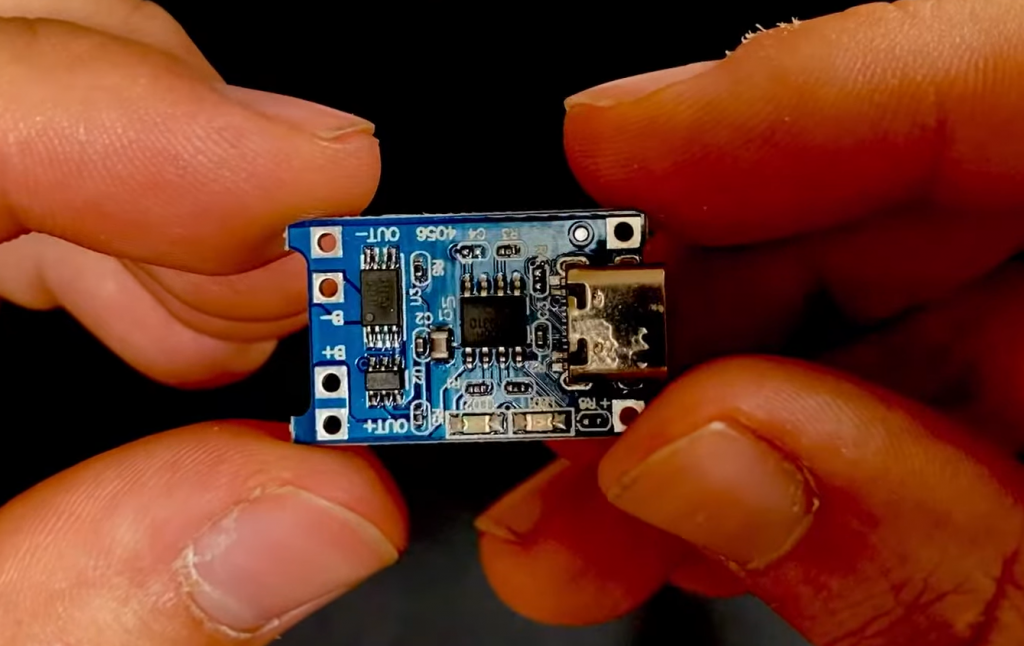
TP4056 USB-C charging module
You will need to solder wires onto the TP4056.
It’s a good practice to solder red-coloured wires to positive connections and black ones to negative.
The pins to the next to the USB-C connector are for an external power connection, like our solar module.
Connect these pins to your solar panel.
On the other side, there are pins that are meant for the power output. The pins labelled B+ and B- need to be hooked up to the battery.
We decided to use clamps to connect our battery holder to the TP4056 in case we need to change the circuit, but you can solder the battery holder directly to the TP4056 if you’d like.
Schottky diode
Connect a Schottky diode to the VSYS pin of the Pico W.
Make sure the grey ring is on the diode is facing the Pico W, and the other end is connected to the positive rail on the breadboard.
Since we are powering the Pico with two power inputs, USB and the solar system, we need to use a Schottky diode.
A Schottky diode prevents back-powering and allows you to run two voltages. Learn more here.
Connect TP4056 to breadboard
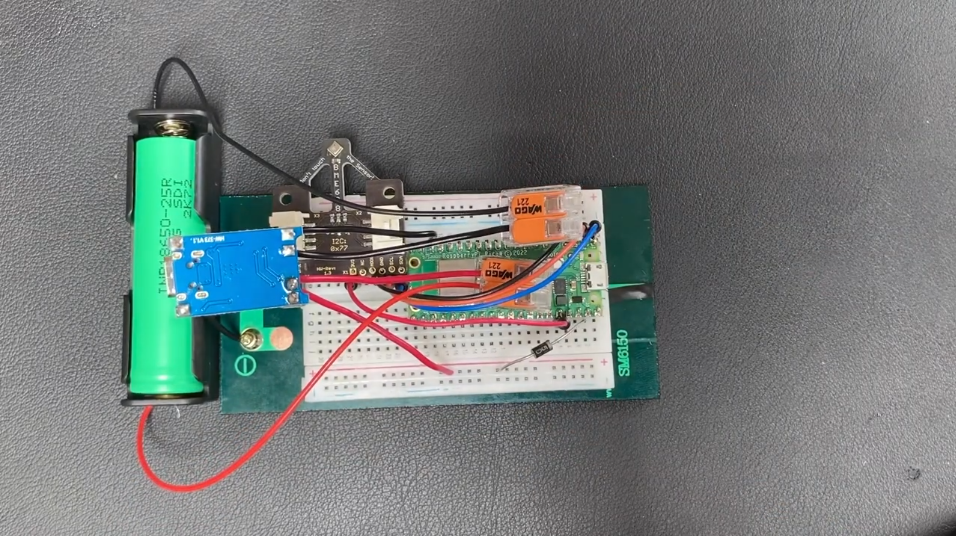
Connect the positive output from the TP4056 to the positive rail of the breadboard, where the Schottky diode is located.
Then, connect the negative output from the TP4056 to a negative pin of the Raspberry Pi Pico W.
Code to run Raspberry Pi Pico W weather station
We have uploaded all our code to our Github repo here.
Here’s a guide on how to upload files to your Pico W.
If you have connected the components as written above, you will be able to run the code without any changes.
That said, here are some things you might want to change.
bme68x.py
This script modifies the BME688’s output.
To get accurate temperature and altitude readings, you will need to modify these lines, highlighted in bold:
 # change this to match the location's pressure (hPa) at sea level
        # bme68x.sea_level_pressure = 1013.25
       <strong> self.bme68x.sea_level_pressure = 1013</strong>

        # You will usually have to add an offset to account for the temperature of
        # the sensor. This is usually around 5 degrees but varies by use. Use a
        # separate temperature sensor to calibrate this one.
        <strong>self.temperature_offset = -9</strong>
main.py
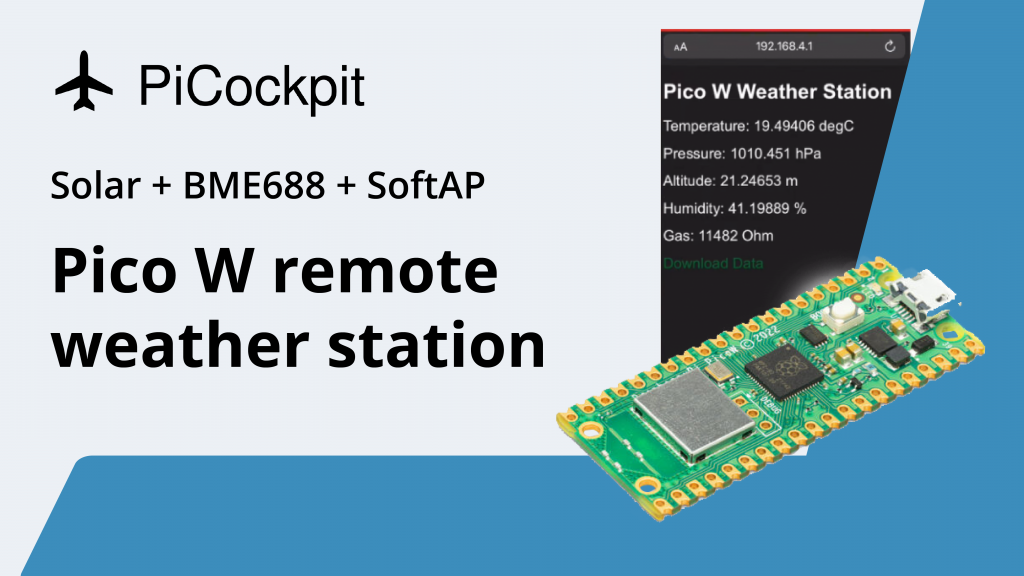
The main.py file launches an access point and also runs a server that delivers a HTML file to anyone who connects.
The HTML file is where you can see the readings from the BME688.
Upon receiving a connection (via sockets), the Pico W will send the index.html file, but before sending it, it will replace some strings with the data taken from the BME688, via this block of code:
data = {
'T': 0,
'P': 0,
'A': 0,
'H': 0,
'G': 0,
}
...
def get_html(html_name):
with open(html_name, 'r') as file:
html = file.read()
return html
...
sensor = bme68x.BME68X()
...
response = get_html('index.html')
data = sensor.save_data('data.json')
blink_onboard_led(1, 0.2)
response = response.replace('id_temp', str(data['T']))
response = response.replace('id_pres', str(data['P']))
response = response.replace('id_alti', str(data['A']))
response = response.replace('id_humi', str(data['H']))
response = response.replace('id_gas', str(data['G']))
print_data(data)
conn.send(response)
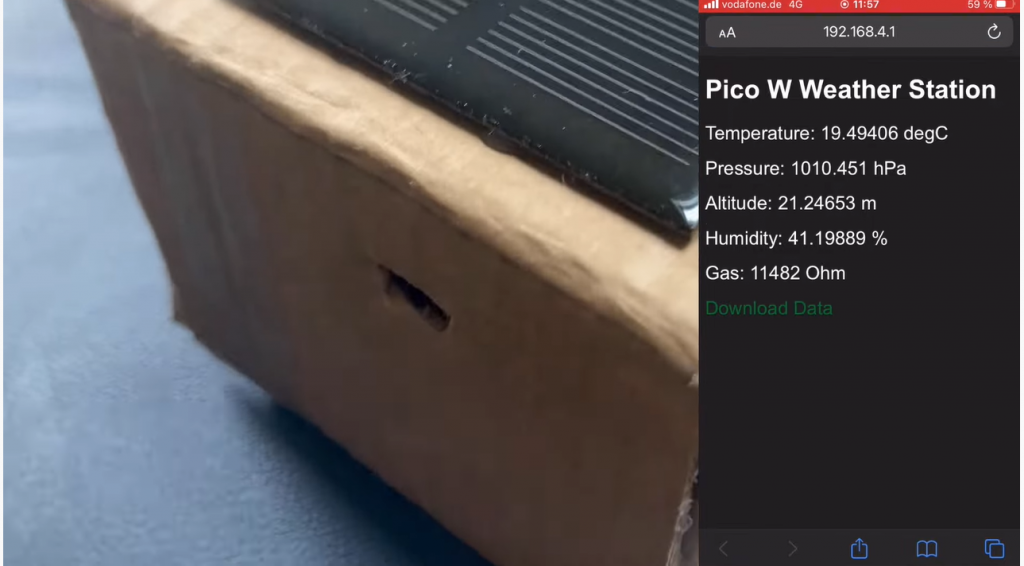
conn.close()As you can see, the line where it says data = sensor.save_data(‘data.json’) is where we get the sensor’s data, and then the code modifies the HTML file with the correct readings for temperature, pressure, altitude, humidity and gas conductivity.
There is an automatic refresh every three seconds.
The following is the block of code required to broadcast the access point on the Raspberry Pi Pico W:
essid = 'Pico-W-Weather-Station'
password = '#FreeThePicoW'

ap = network.WLAN(network.AP_IF)
ap.active(True)
ap.config(essid=essid, password=password)

while ap.active() == False:
    pass

print('Connection successfull')
print(ap.ifconfig())

# Create sensor object
sensor = bme68x.BME68X()

s = socket.socket(socket.AF_INET, socket.SOCK_STREAM)
s.bind(('', 80))
s.listen(3)
blink_onboard_led(3, 0.2)
Note: if you are using the original firmware, you should update it or else you won’t be able to rename the SSID or have wireless security. We tested it on the July 15, 2022 nightly build and it finally worked. There are some more quirks and bugs so be sure to read our walkthrough here.
CLICK HERE: Broadcasting a WiFi network (SoftAP access point)
Connecting to your Pico W access point
Upon successful broadcasting of the AP, your Pico W will blink three times with the code provided.
Connect to your AP, which should be named Pico-W-Weather-Station.
Type in the password #FreeThePicoW
Connect to your Pico by using the IP address. If you ran it from Thonny, you will see the IP address in the shell.
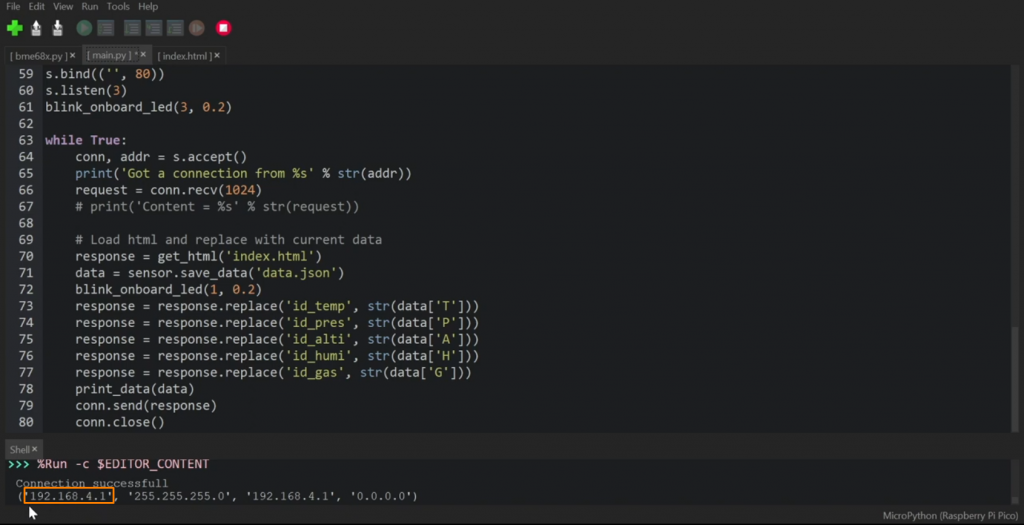
Otherwise, you might try 192.168.4.1 as this is most commonly the IP address of the Pico W and you should see the screenshot on the right:
You’re done
In this project, you learned how to broadcast a network from the Raspberry Pi Pico W’s SoftAP feature. You also learned how to connect a solar panel and battery to the Pico W.
If you want to learn more about the Pico W, why not read our mega article here?
CLICK HERE: Everything you need to know about the Raspberry Pi Pico W
Specs of TP4056 says to keep the voltage input in 5.5v or 6V, solar panel of 6V can give 6V and probably 7V+ en some cases. I am about confused about this end. Could you please clarify?
Thanks!
I have done this project and had some great results very accurate readings. But have struck a problem it only runs for about 10 2 15 minutes then stops. I have found that if I delete the json file it is the only way to get it back working again
Is there a way of stopping it from store them and just send data
Have to say tho good job keep them coming plz👍
In the file bme68x.py the method save_data keeps adding lines to the Jason file. At some point it must be getting too big. You can modify to keep only the last x lines of data_list before saving the file. you’ll have to figure out tue ideal x. You could also keep the current measurement only. This way the file will stay small enough.
After 4.104 Characters the ‘data.json’ fills the memory of the tiny pico .-/
Question is: How to limit this to get the above project to a functional finish??
An example / code addition (as an update) would be highly appreciated!
TiA – and keep the good work coming.. .
PS: a correspondent Issue in the GitHub Repo was also published.
Using the TP 4056 for such a Project is not an effective solution, see:
https://www.best-microcontroller-projects.com/tp4056.html
Constructive Design maybe using a MPTT Set Switch, like the Waveshare,
Description here:
https://www.waveshare.com/solar-power-manager.htm
Cheers!
Great project idea! Anybody design a 3D printed case for this that they want to share?
Hi,
thank you for the manual.
According to TP4056 specs LED-Anzeige Rot: (Ladevorgang), LED-Anzeige Blau: (Standby, Ladevorgang abgeschlossen)
In my case I have both LEDs On on TP4056 when solar panel is placed under direct light. Is that intended?
Is it possible, that battery can be charged from solar and can supply power to Pico simultaneously?