I read the RP1 documentation so you don’t have to
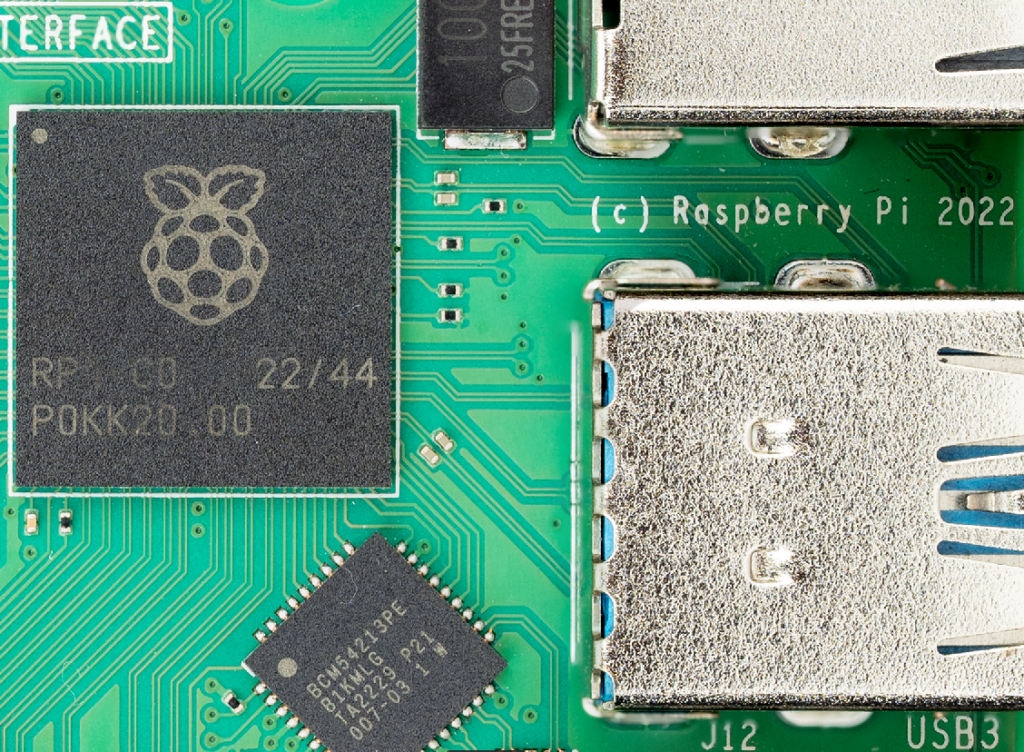
One of the most notable features of the new Raspberry Pi 5 is the inclusion of RP1 – the first in-house designed silicon chip on a Raspberry Pi flagship product. In this article, I want to go over the essentials of RP1 and tell you what makes it so revolutionary.
Unfortunately, this article can’t be the equivalent of an “Everything About RP1”, because they haven’t released the full documentation yet.
Instead, they’ve released a 90-page draft datasheet that goes over some of the fundamentals of RP1.
So let’s start with the history of RP1.
History
So, RP1 is the longest running in-house silicon project at Raspberry Pi. That’s why it’s called “RP1“.
In the announcement for Raspberry Pi 5, Eben Upton wrote, “Under development since 2016, RP1 is by a good margin the longest-running, most complex, and (at $15 million) most expensive program we’ve ever undertaken here at Raspberry Pi.”
It’s the longest-running, most complex, and most expensive program.
However, it’s not the first in-house developed silicon that Raspberry Pi has released. For that, you have to turn to RP2040, which is the microcontroller on the Pico and Pico W. So they launched RP2040 in 2021, even though the program actually started later.
Internally at Raspberry Pi, everybody referred to RP1 as “Project Y”.
So let’s dive into what the RP1 is all about.
Features
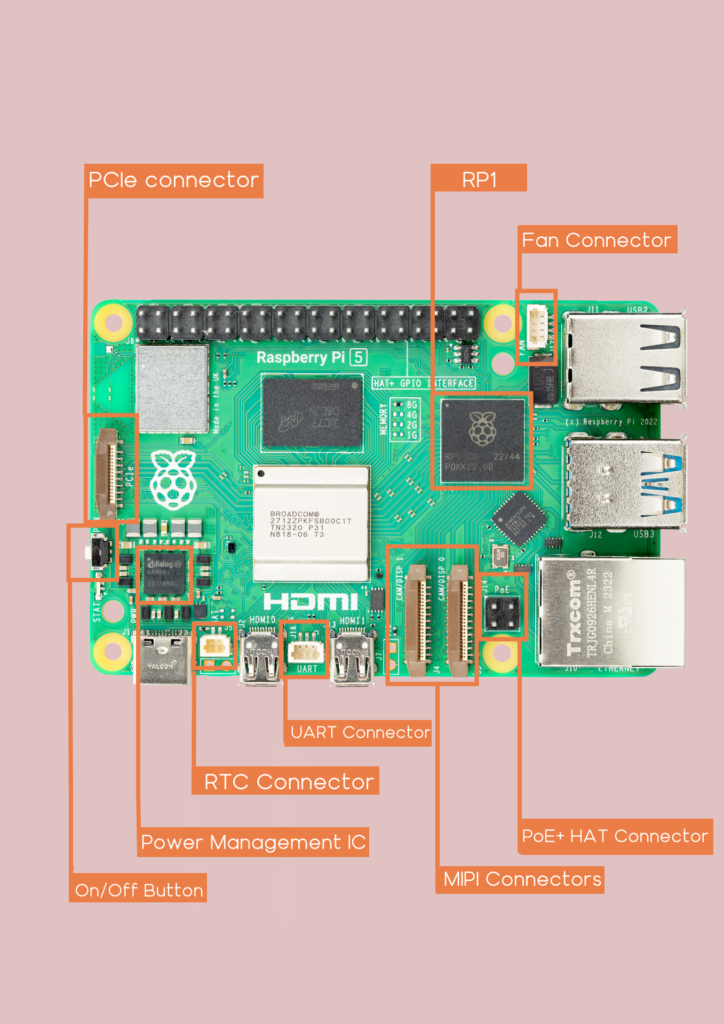
With previous models, basically all the I/O was integrated into the main processor.
So, the main idea behind RP1 is to separate I/O from the main processor – in this case, the Broadcom BCM2712. So it’s a southbridge that takes over the vast majority of the I/O functions for Raspberry Pi 5.
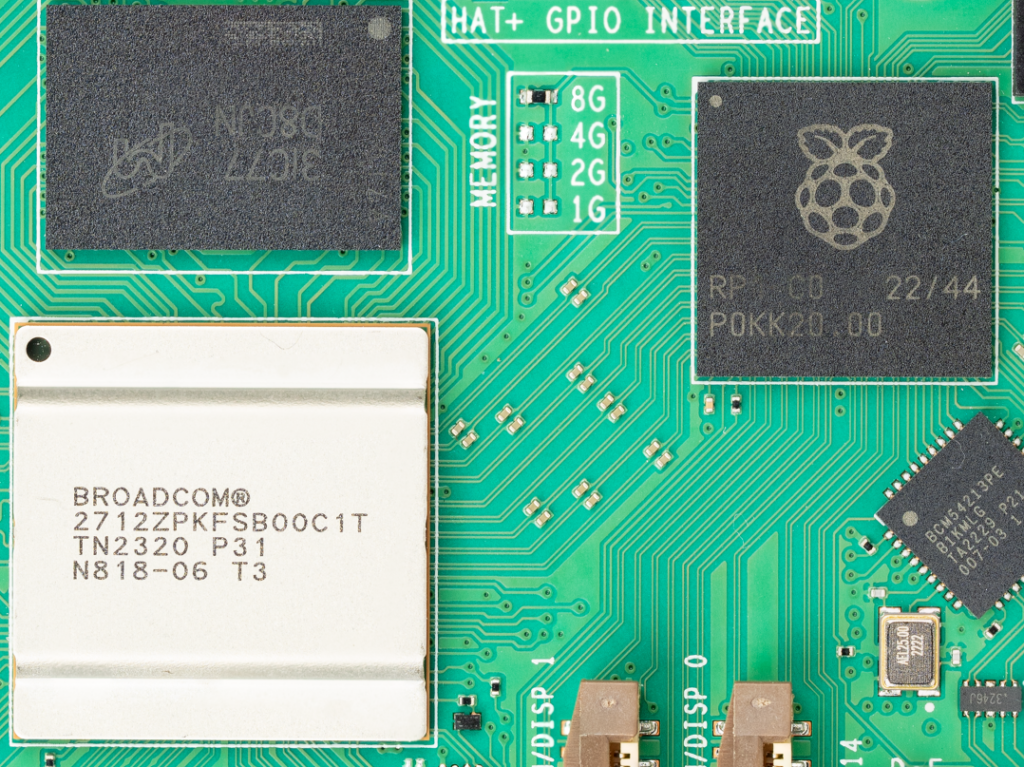
This has a number of effects – one of them is to offer smaller geometry processes for the main processor. The BCM2712, as we’ve already covered, is at 16nm process nodes.
Meanwhile, RP1 itself is at 40nm process nodes.
This also leaves the main processor to focus on more complex tasks.
So, the BCM2712 takes over the fastest interfaces, while leaving the slower interfaces for the RP1. I’ll explain that more in the next section.
But the two chips – RP1 and BCM2712 – work together and connect via a 4-lane PCIe 2.0 bus. It’s a fast connection, but there is inevitably some latency between the two.
Let’s turn to the internal specs of the RP1.
I’ve included a picture below of the diagram of the RP1 for reference.
So, the RP1 contains two processor cores based on the Arm Cortex-M3 architecture (Cortex M3 0 and Cortex M3 1 in the red boxes at the top left of the diagram).
It’s also got an eight-channel DMA controller, which allows the chip to manage data transfers for up to eight different peripherals simultaneously.
The chip incorporates three integrated PLLs: 2 fractional-N PLLs for generating independent video and audio clocks, and 1 integer PLL to generate system clocks.
RP1 also has a 12-bit resolution, five-input successive-approximation analog-to-digital (ADC) converter operating at 500kSPS, with four external inputs and one internal temperature sensor.
If you look at the diagram below, you’ll notice a yellow box at the bottom left that says “Shared SRAM 128bit 64kB) 4x 4kx32”. This refers to the face that there is a 64kB portion of memory accessible by both the BCM2712 and RP1 bus masters.
This memory has four separate blocks, each of which consists of 4 kilobytes and includes data transfers of 32 bits at a time.
Finally, the RP1 has timebase generators that you can configure to pace DMA. They are there primarily for to pace DMA as well as to stabilize GPIO input events.
Here’s the picture of the internal architecture of the RP1 from the datasheet:
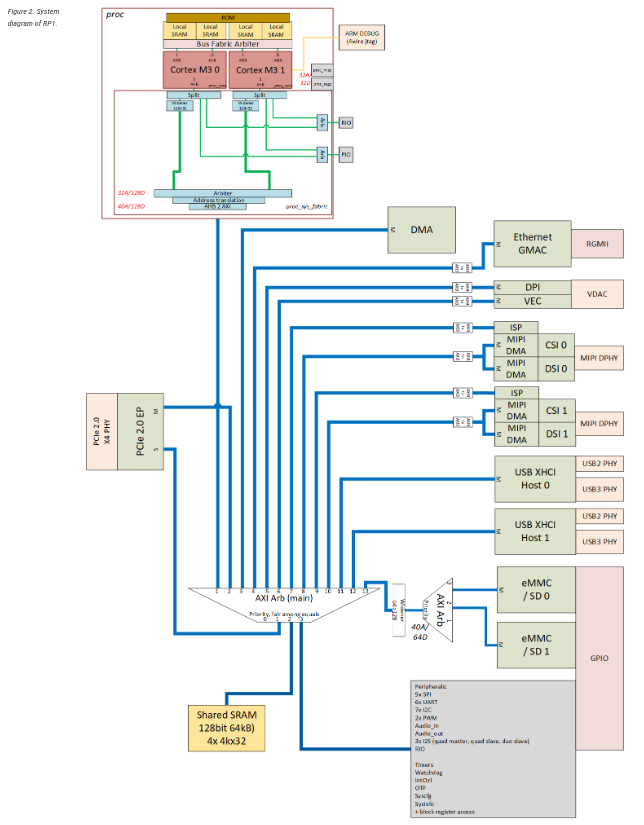
So in that picture, you can see generally how the RP1 works, but you can also see which peripheral functions it controls.
Peripheral Controls
You can see the following at the right, starting at the bottom: GPIO, USB 3 PHY, USB 2 PHY, USB 3 PHY, USB 2 PHY, MIPI DPHY, MIPI DPHY, VDAC, and RGMII.
So, RP1 controls the GPIO pins and their associated peripheral interfaces: SPI, UART, I2C, PWM, I2S. It also controls the Delta Sigma PWM audio out, but you can’t get typical analogue audio, because Raspberry Pi 5 doesn’t have an audio jack.
It also controls the USB 2.0 and USB 3.0 ports – each host controller manages a downstream USB 2.0 and USB 3.0 port. As the datasheet puts it, this means that “every downstream port has independent and uncontended bandwidth”
According to Liam Fraser, “[B]ecause of the bandwidth of the PCIe link, we should be able to run both USB 3 ports at full bandwidth.” This is a huge upgrade from Raspberry Pi 4!
The RP1 is in charge of the MIPI transceivers, which are four lanes that support DSI and CSI-2.
It’s got a 3-channel video digital-to-analogue converter that supports PAL/NTSC and VGA.
And finally, it’s also the responsibility of the RP1 to control the Gigabit Ethernet MAC.
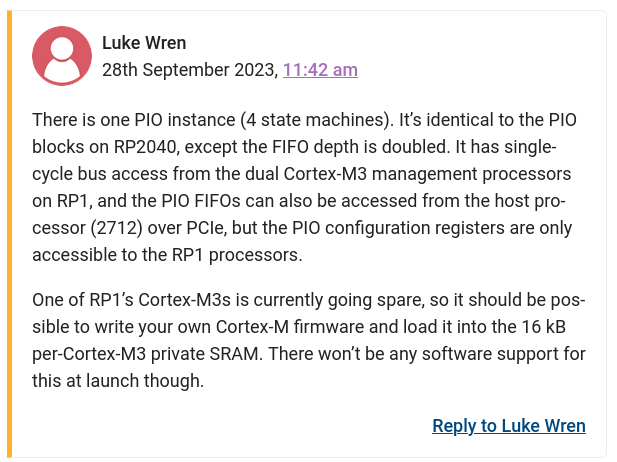
At this point, you might be wondering about PIO. Unfortunately, there is a lot of information we just don’t have at the moment, because they haven’t released all the documentation for the RP1.
What we do know is that the PIO block in RP1 works a bit differently from RP2040. So while there is one PIO block with four state machines (like the RP2040), it has double the FIFO depth. Check out this comment from Luke Wren:
So there’s what we know about peripheral controls at the moment.
Stay tuned, because as time goes by, they’ll definitely be releasing a significant amount of information about the RP1.
Downsides
We’ve talked about some of the cool things about the RP1, but it’s not entirely a bed of roses.
Obviously, the first thing is that the PIO on RP1 works differently than RP2040. Check out this comment from Phil:
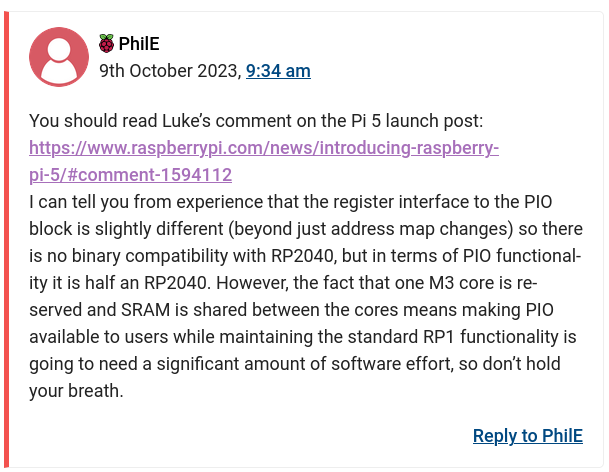
Another one of the downsides of separating the I/O controller from the main SoC is that you introduce a certain amount of latency.
According to the datasheet, this latency is “typically 1μs at the design link width and speed”, which could be a problem “for applications that rely on rapid but timely write sequences, e.g. bit-bashed protocols, or applications that need to respond quickly to the state change of a pin.”
What does the future hold?
One of the big questions is whether or not Raspberry Pi will sell RP1 separately. After all, they sell RP2040 separately. In a comment a few days ago, Alasdair Allan over at Raspberry Pi had the following answer:

Of course, that could be deflection or that could be a genuine answer that we shouldn’t be expecting a separate RP1. With that question then, only time will tell.
It’d be fantastic if they sold the RP1 separately, in my opinion.
One of the most interesting alternatives has come from Jeff Geerling though:
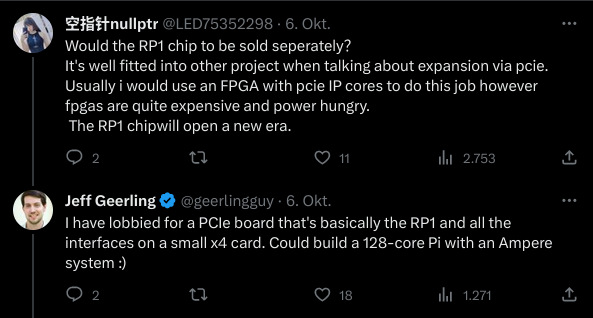
Maybe Raspberry Pi will give us both at some point – a separate RP1 chip and a PCIe board!
We’ll have to wait and see.
Contest & Newsletter
We know how frustrating it is to have to wait until October 23rd for a Raspberry Pi 5.
So we wanted to make it possible for you to play around with one as soon as possible.
So we’ve set up a contest: What’s the craziest thing you can come up with for Raspberry Pi 5?

Provided your idea doesn’t destroy it, you can send us your idea and we’ll enact it on ours – and write an article about it!
We’ll announce the winner here and on buyzero.de on October 23rd.
The winning idea (determined by us) will win a full Raspberry Pi 5 kit – including with a 27W USB-C Power Delivery (PD) Power Supply, a Raspberry Pi 5 case, an SD card, and a Raspberry Pi 5. All with free shipping within the EU.
The runner-up will win a Raspberry Pi 5 with free shipping within the EU.
So be sure to send in your ideas – you can go to the following link for more information: WIN A FREE RASPBERRY PI 5!
Conclusion
So there you have it: the essentials of RP1.
Like I stressed at the beginning though, some of this information is liable to change. We’ll be sure to put out a new article once Raspberry Pi releases more permanent documentation.
In the meantime, be sure to check out some of our other articles on Raspberry Pi 5:
- Raspberry Pi 4 vs. Raspberry Pi 5
- A First Look at Raspberry Pi 5
- Keeping Raspberry Pi 5 Cool
- DOOM on a Raspberry Pi 5
- Win a FREE Raspberry Pi 5
- 5 Surprising Features of Raspberry Pi 5
- Raspberry Pi 5 Micro SD Card Speed
- 4 Frequently Asked Questions about Raspberry Pi 5
Do you want to see RP1 sold separately? Or perhaps a PCIe board like Jeff Geerling?
Let us know in the comments below!
interesante de separar al procesador principal de todos los perifericos de E/S del chip principal,
quizas no desean vender por separado al RP1 por tener solo nucleos M3, y que tendrian que competir con nucleos M4 y M7