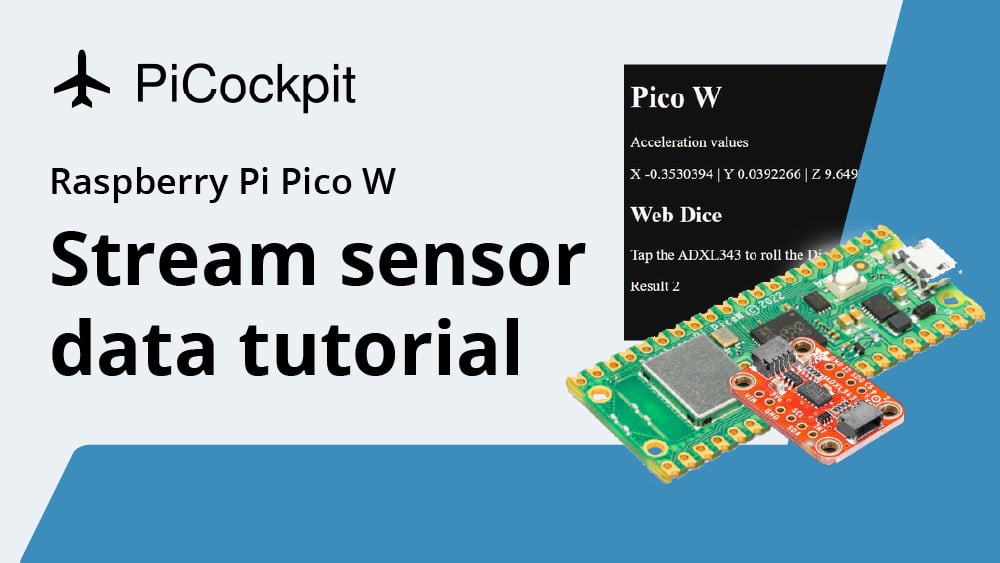
Stream Sensor Data over WiFi with your Raspberry Pi Pico W
Have you ever wanted to stream sensor data with your Raspberry Pi Pico W?
One of the best uses for the Raspberry Pi Pico W involves its ability to serve a web page. This means that you can use it to monitor sensor data from your phone as long as you are in WiFi range. This project will provide a simple basis on how you can monitor acceleration data and also create a digital dice, which is activated when you tap the ADXL343 sensor.
Video
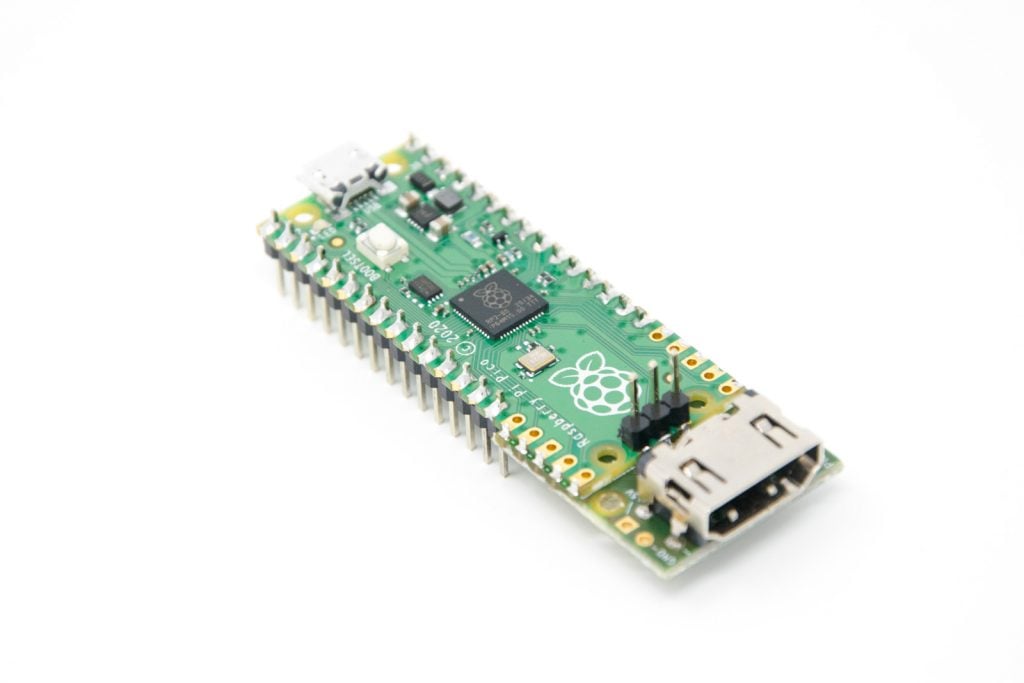
Parts needed
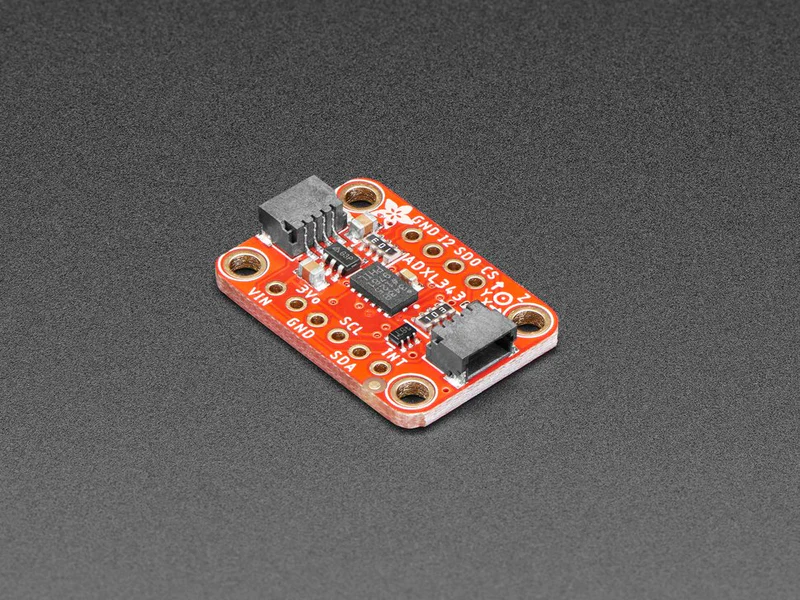
What is the ADXL343?
Analog Devices’ ADXL343 is a follow-up to its predecessor, the ADXL345.
The sensor can measure three axes of measurement and has four settings of sensitivity,+-2g, +-4g, +-8g or +-16g. The lower range gives more resolution for slow movements, the higher range is good for high-speed tracking.
The ADXL343 also has a CircuitPython library that we can use in MicroPython, making it a lot easier to get started.
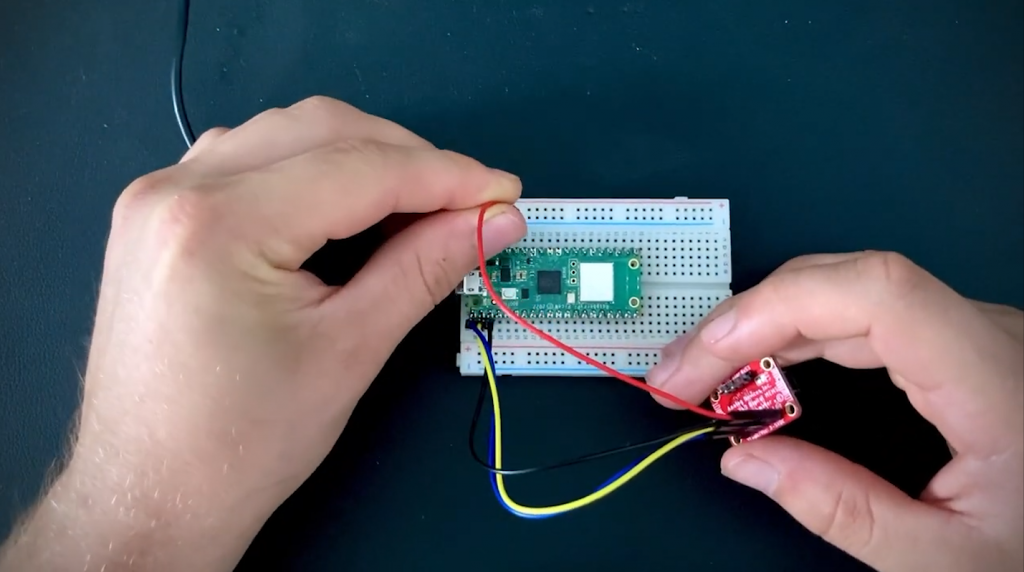
You will need to have the headers soldered onto the ADXL343 as well as the Pico W in order to do stream sensor data with your Pico W.
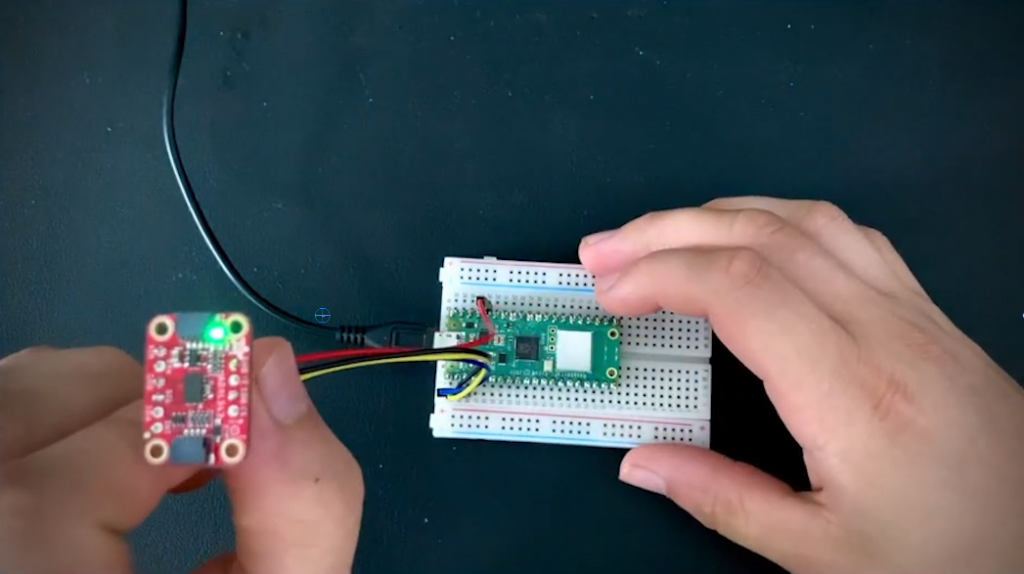
Connecting the ADXL343 to the Pico W
There are four pins that you need to connect to the Raspberry Pi.
Connect the VIN pin to a 3.3V output on your Raspberry Pi Pico W;
Connect the GND to a ground pin on your Pico W;
Connect the SDA pin to GPIO0;
Connect the SCL pin to GPIO1.
Flashing MicroPython firmware for the Raspberry Pi Pico W
First, you will need to flash the MicroPython firmware onto the Pico W, if you haven’t already.
Then, press and hold the BOOTSEL button and plug in your Pico to your computer. You should see a new drive. Copy the .UF2 file you downloaded onto that drive.
Set up Thonny for the Raspberry Pi Pico W
Open up Thonny. If you haven’t downloaded it, get it here.
Set the interpreter to MicroPython (Raspberry Pi Pico) on the bottom left of the Thonny IDE’s window.
Copy libraries onto the Pico W
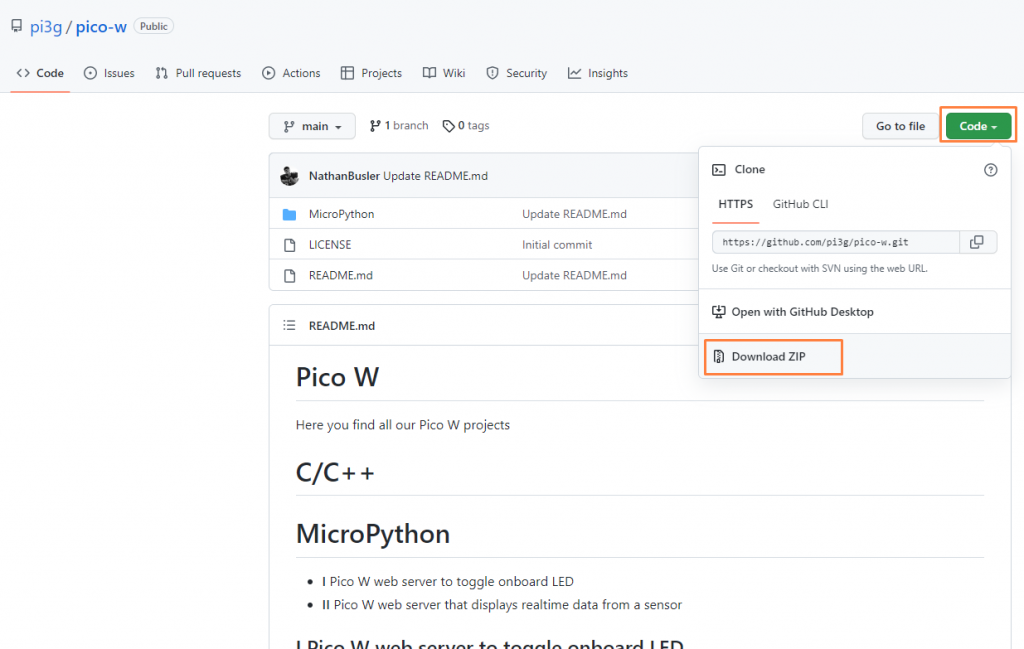
Download the libraries and files here from our Github repo.
You can download a ZIP file by going to that link and clicking the green “Code” button and clicking Download ZIP.
Once downloaded, unzip it somewhere that you’ll remember.
Then, in your Thonny IDE, click on View > Files to see your file system and the Pico W’s file system.
Navigate to the unzipped files and go into the folder MicroPython > II Pico W Sensor Server. Copy everything onto your Pico W by right-clicking on each item and clicking “Upload to /”
Modifying the code
In order to get the Raspberry Pi Pico to connect to your WiFi network, you will need to open up secrets.py and modify the ssid and pw‘s value. Enter your network’s SSID (name) into the former and the password into the latter. Save the file.
The index.html is the web page that will be served. The line “<p>X AccX | Y AccY | Z AccZ</p>” and <p>Result DiceVal</p> will be replaced with sensor data when the project runs.
Connect your Raspberry Pi Pico to WiFi
The main.py is where the action happens.
These lines connect it to your WiFi. Don’t forget to change the string in rp2.country if your country is not Germany (DE).
# Set country to avoid possible errors
rp2.country('DE')

wlan = network.WLAN(network.STA_IF)
wlan.active(True)
# If you need to disable powersaving mode
# wlan.config(pm = 0xa11140)

# See the MAC address in the wireless chip OTP
mac = ubinascii.hexlify(network.WLAN().config('mac'),':').decode()
print('mac = ' + mac)

# Other things to query
# print(wlan.config('channel'))
# print(wlan.config('essid'))
# print(wlan.config('txpower'))

# Load login data from different file for safety reasons
ssid = secrets['ssid']
pw = secrets['pw']

wlan.connect(ssid, pw)
The onboard LED will blink three times if a WiFi connection was successful, thanks to these lines of code. It will also print a message and your IP address which can be viewed in Thonny. This IP address is useful in order to access the server later.
   led = machine.Pin('LED', machine.Pin.OUT)
    for i in range(wlan.status()):
        led.on()
        time.sleep(0.2)
        led.off()
        time.sleep(0.2)
    print('Connected')
    status = wlan.ifconfig()
    print('ip = ' + status[0])
If there’s an error, the LED will blink based on the value of the error code.
Error meanings
- 0 = Link Down
- 1 = Link Join
- 2 = Link NoIp
- 3 = Link Up
- -1 = Link Fail
- -2 = Link NoNet
- -3 = Link BadAuth
Connect Pico W to ADXL343
This line initializes an I2C object:
# Initialize I2C
# busio.I2C(SCL, SDA)
i2c = busio.I2C(board.GP1, board.GP0)
Then, these two lines creates the accelerometer and enables tap detection (for dice reading).
# Create Accelerometer object
accelerometer = adafruit_adxl34x.ADXL343(i2c)

accelerometer.enable_tap_detection()
Time to run the code
To run the code, press the Run button in Thonny, which is the button with a play icon in a green button on the top toolbar.
Then, connect to the IP address of your Raspberry Pi Pico W. If you have Thonny’s shell open, you can view it there. Or else, you can log into your router and find out what the Pico W’s IP address is.
The Pico W runs a HTTP server with a socket connection and it listens for connections, defined here:
addr = socket.getaddrinfo('0.0.0.0', 80)[0][-1]

s = socket.socket()
s.bind(addr)
s.listen(1)
When you connect to your Pico W’s IP address, it will trigger this code that will refresh index.html with the latest data every second.
   cl, addr = s.accept()
        print('Client connected from', addr)
        cl_file = cl.makefile('rwb', 0)
        while True:
            line = cl_file.readline()
            if not line or line == b'\r\n':
                break

        response = get_html('index.html')
        data = accelerometer.acceleration
        tapped = accelerometer.events['tap']
        response = response.replace('AccX', str(data[0]))
        response = response.replace('AccY', str(data[1]))
        response = response.replace('AccZ', str(data[2]))
        if tapped:
            dice_val = str(random.randint(1,6))
        response = response.replace('DiceVal', dice_val)

        cl.send('HTTP/1.0 200 OK\r\nContent-type: text/html\r\n\r\n')
        cl.send(response)
        cl.close()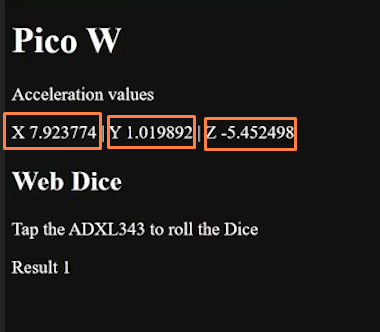
As you can see, it replaces AccX, AccY and AccZ with the data from your sensor.
If the sensor is tapped, then it will print a random integer from 1 to 6 into the “DiceVal” string on the HTML page.
What’s next?
This tutorial represents one simple way to stream sensor data to a web page with your Raspberry Pi Pico W.
In fact, this is the code that you can use for other sensors too.
The methodology remains the same. You need to find the correct libraries for your sensors, then modify the main.py and index.html so they can get the sensor data and push the right values onto the web page.
There are many other projects you can embark on, such as a temperature-and-humidity sensor or perhaps an air quality project with a DHT22 or BME688, or a brightness sensor with a light resistor.
Sure would be nice to use HTML5 features so we could see how HTML5 is done
Could the data simply be streamed out as maybe a string on a port by TCP/UDP rather than in a web page format, so that it could be read by another computer (to make gauges or something?)
something like
192.168.1.24:9060
AccX, 7.923, AccY, 1.093, AccZ, -5.452
AccX, 6.423, AccY, 1.241, AccZ, -8.769
Mal angenommen man hätte einen Pico W, der in einer Dauerschleife läuft und Messwerte erfasst; wie können diese Messwerte von einem anderen Pico W über WLAN abgefragt werden?
In deinem Beispielcode ist es so, das der Pico W etwas macht, wenn er über HTML angesprochen wird. In meinem Fall bräuchte ich sowas wie eine
“getvaluefromotherpico(192.178.2.44, variablename)” – sprich er soll immer in seiner Schleife laufen und die per WLAN angefragten Anfragen nebenher bedienen, z.B. per Interrupt.
Wie wäre sowas möglich?
Besten Dank und Gruß
Ingo
Der andere Pico könnte in einer Schleife laufen, und die Werte per REST API vom ersten Pico abfragen?
Ich verstehe die Problemstellung sonst vielleicht nicht ganz?
Wenn es ein kommerzielles Projekt ist, können wir gern consulting-technisch aktiv werden 🙂
cómo puedo mandar esos datos a thinspeak
guten Tag, ich habe dasselbe Problem. Mit curl oder wget funktioniert es nicht. Ich möchte die Messwerte vom Pico auf meinem Raspi4 speichern und später grafisch darstellen und statistisch auswerten. ???
no module named network if add add netwrk module from thonny it then complains of no module named socket lol