Run a web server on your Raspberry Pi Pico W
This project can be regarded as the ‘Hello World!’ of the Pico W. It demonstrates how to connect to Wi-Fi, how to run a HTTP web server on the Pico W, and how to control the GPIO pins.
If you’re looking for a quick and easy project to get started with your Pico, this is for you!
Steps to blink LED via WiFi on Pico W
There are three overarching themes in order to get this done.
Set up MicroPython
First, you need to set up MicroPython. Download the UF2 file here that’s specifically meant for the Pico W.
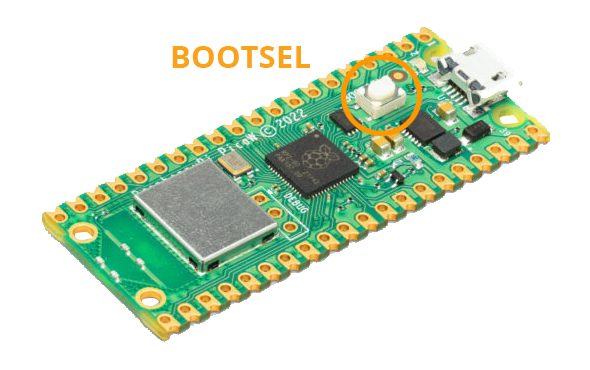
Hold down the BOOTSEL button and connect your Pico W via USB.
Once it’s mounted, copy the UF2 file that you just downloaded onto the Pico.
Use Thonny to program Pico W
Thonny makes it easy to program the Pico W and it comes pre-installed on the Raspberry Pi OS. You can also download it for Windows, Mac and Linux here.
Make sure your interpreter is set to MicroPython (Raspberry Pi Pico).
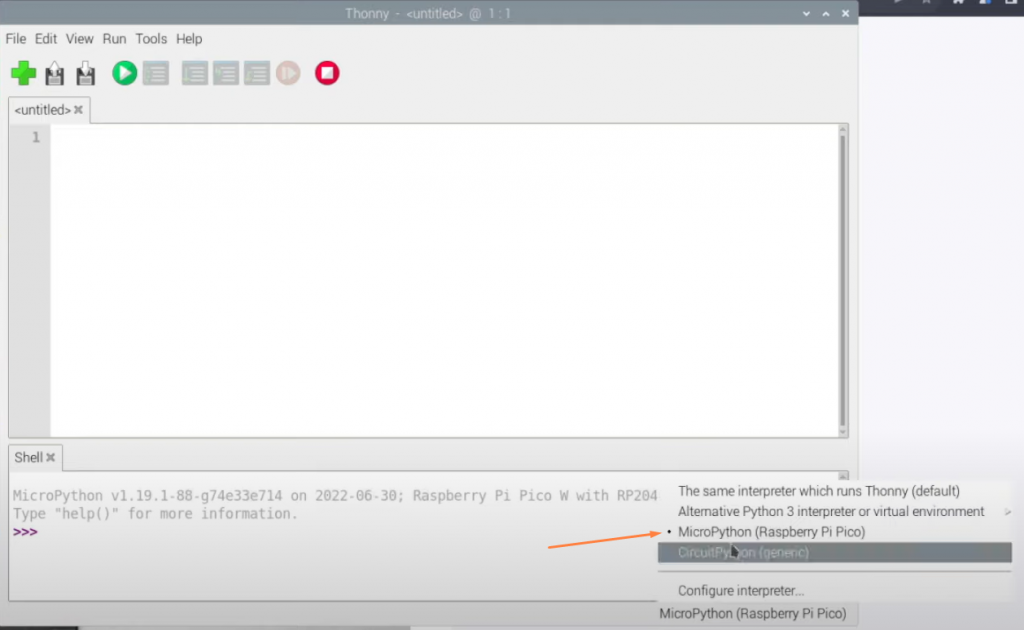
Thonny will connect to the Raspberry Pi Pico W and you can run commands in the shell (the bottom segment of the Thonny IDE).
Run a network scan to confirm Pico W wireless is working
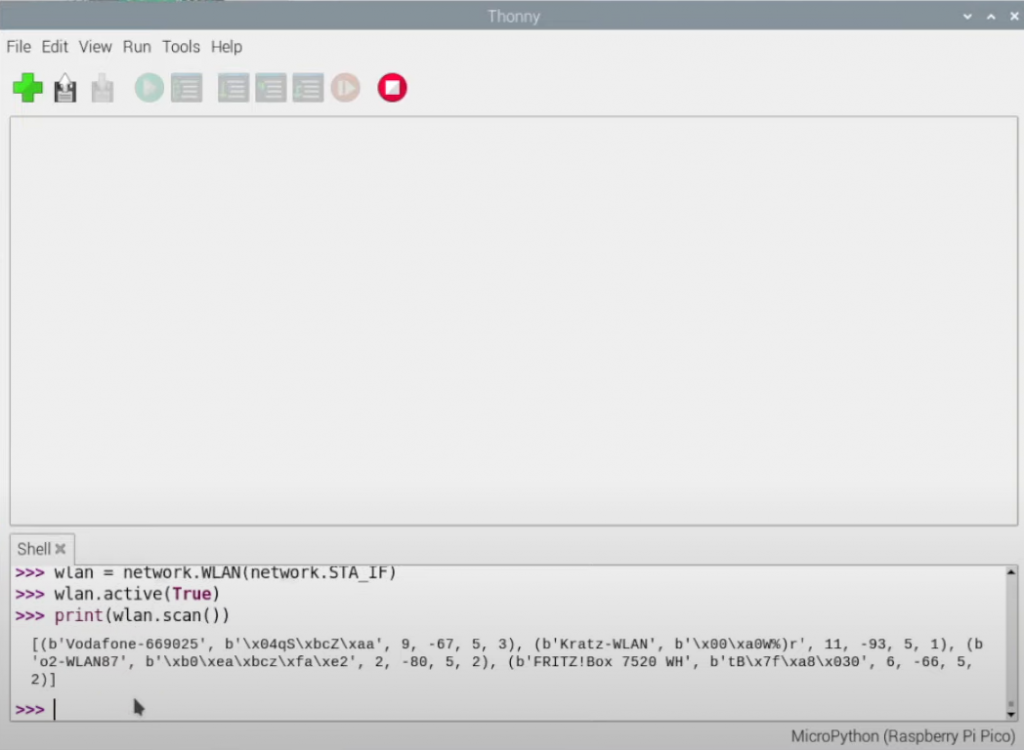
In the Shell, you can run this code to test whether your wireless chip is working.
Use this code to print out all available wireless networks in your area.
import network
wlan = network.WLAN(network.STA_IF)
wlan.active(True)
print(wlan.scan())
Program the web server
Create a dictionary called secrets.py and use the following content, replacing the value for ssid and pw with your network.
secrets = {
    'ssid': 'Replace-this-with-your-Wi-Fi-Name',
    'pw': 'Replace-this-with-your-Wi-Fi-Password'
    }
Then, create main.py which will host your main code. As the code is many lines long, you can find it here in our Github.
Create the HTML page which will get served

The following file will be the HTML file that’s served when you load the Pico W’s IP address. Save it as index.html
It’s a simple page with two buttons that allow you to turn the Pico W’s LED on and off.
<!DOCTYPE html>
<html>
    <head>
        <title>Pico W</title>
    </head>
    <body>
        <h1>Pico W</h1>
        <p>Control the onboard LED</p>
        <a href=\"?led=on\"><button>ON</button></a>
        <a href=\"?led=off\"><button>OFF</button></a>
    </body>
</html>
Time to run it all
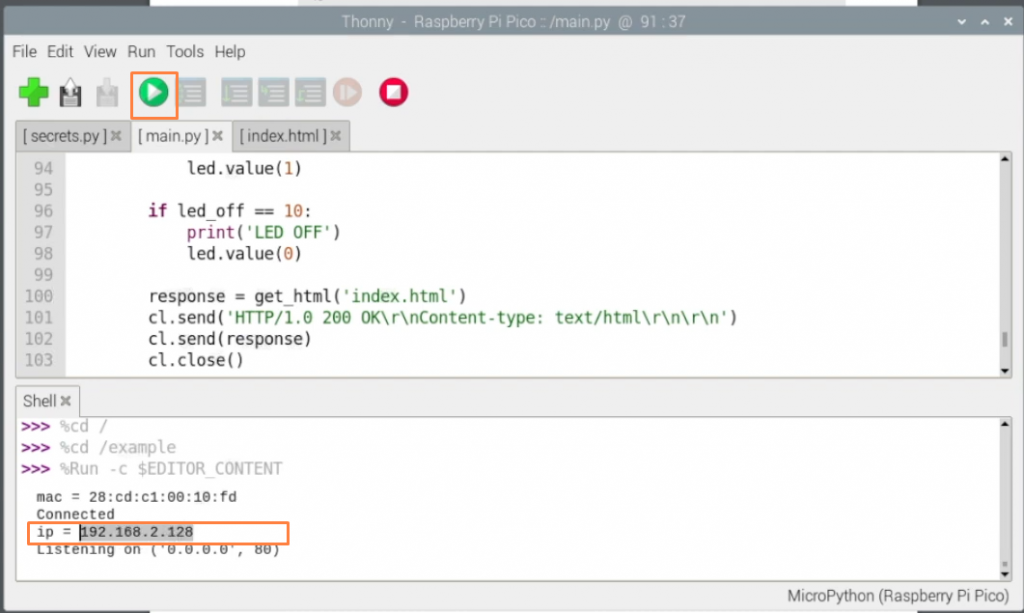
Click on the run button in Thonny which is a green button with a play symbol.
You will see the IP address of the Pico W. Copy that into your web browser that’s connected to the same wireless network.
Click on the buttons and you should see the change.
You can find the Github repo here which has all the files.
Our YouTube video for this project also goes into deeper detail such as code explanation.
And if you’re looking for more projects to inspire you, then check out our Paragon Projects series here.
Error found when i trie it
%Run -c $EDITOR_CONTENT
Traceback (most recent call last):
File “”, line 1, in
ImportError: no module named ‘network’
Hi Pablo – make sure you are using the latest UF2 file for the Pico W (not just the Pico) – found here. https://www.raspberrypi.com/documentation/microcontrollers/micropython.html
The network module is there as standard!
In line 100 you use get_html() function. When I run your code I get a ‘get_html’ isn’t defined error.
The search by find function does also return a value if eg. the referrer contains the ‘led=xx’ string. So both led_on and led_off get a positive value at the same time and the LED is switched off again, when it was desired to switch on. To overcome this, the if statement has to be extended to check for a small index value (I used 20 only as a rule of thumb):
if (led_on > -1 and led_on -1 and led_off < 20):
Now it works as expected.
J’ai résolu le problème en ajoutant la ligne :
r = r[:50]
avant
led_on = r.find(‘?led=on’)
led_off = r.find(‘?led=off’)
Cela retire les caractères superflus de la requête
I tried to comment, but somehow the comment does not come out correctly…