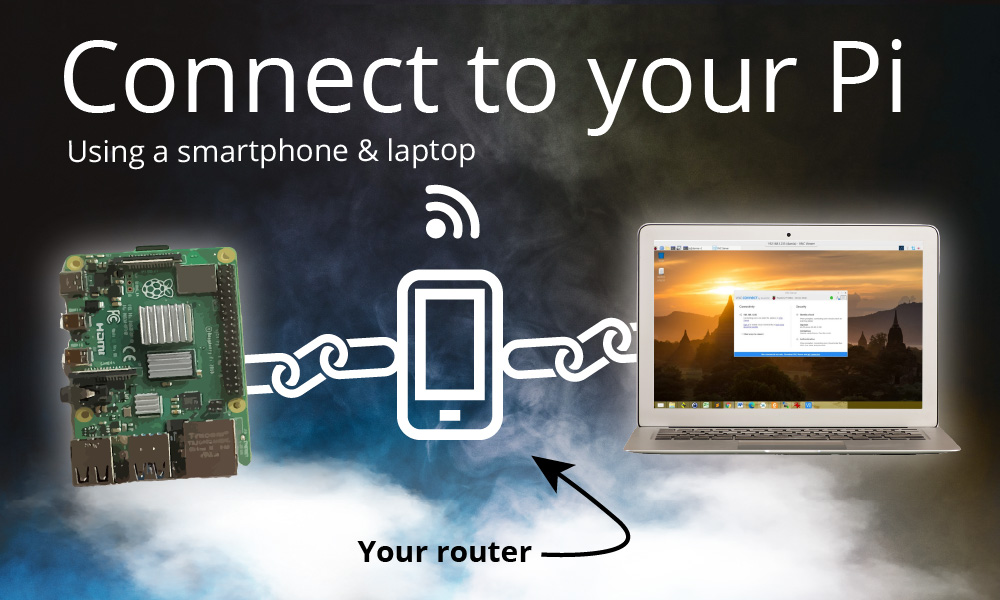
Connect to your Raspberry Pi without a monitor (Remote Working!)
If you travel regularly, the last thing you want is to lug around a monitor, keyboard and mouse just for your Raspberry Pi.
It’s a real pain. Check-in luggage is expensive and takes time at the carousels.
But one thing you’ll always bring with you as a remote worker is your laptop.
Your laptop has a monitor, keyboard and a trackpad.
As a modern-day worker, you probably also have a modern smartphone.
And I have a bright idea…
Setup
The goal is to allow you to control your Raspberry Pi via VNC, which gives you a Remote Desktop experience where you can control the Raspberry Pi using your laptop’s mouse and keyboard.
I managed to setup SSH and VNC access to my Raspberry Pi 4 and the only thing plugged in was the USB-C power.
That would be the bare minimum equipment necessary.
USB-C power supply won’t be extra baggage because you will likely have it if you are using an Android phone. Since USB-C chargers are generally universal, you can probably bring either the Pi’s power supply or your phone’s supply. Or bring a USB-C to Lightning converter if you are an iPhone user, to avoid bringing two power supplies.
How a smartphone helps you connect to the Raspberry Pi
All the smartphones that I have owned since the HTC Desire can act as a hotspot.
Generally, this is meant to share your phone’s data connection.
But in reality, the hotspot also acts like a router.
Generally, if you want to SSH or VNC into your Raspberry Pi, you need a router. It’s generally not a problem because you’re at home and have a proper router.
But when you are away from base, you can use your phone as a router.
The question is: how do you connect to your phone’s hotspot when you don’t have a display, keyboard or mouse?
Option 1: flash a new image
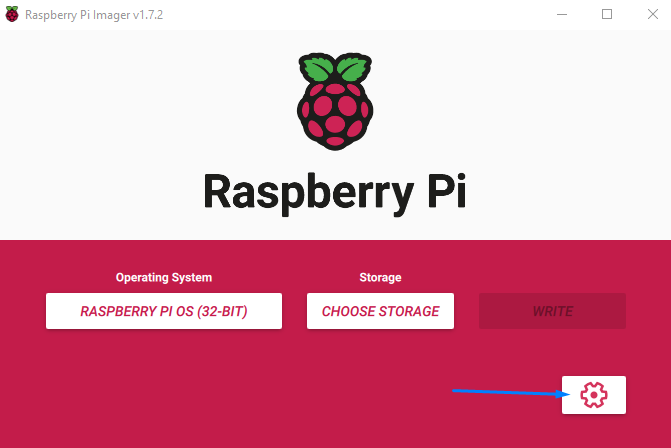
Raspberry Pi added a new settings menu in the latest version of its Imager utility. This is where the magic happens. Click on the gear icon.
The settings here allow you to flash a new image with your phone’s hotspot SSID and password.
Upon boot, the Raspberry Pi will connect to that WiFi. Once you connect your laptop to it, you will both be on the same network.
The added benefit of using the Raspberry Pi Imager is that you can enable SSH here too.
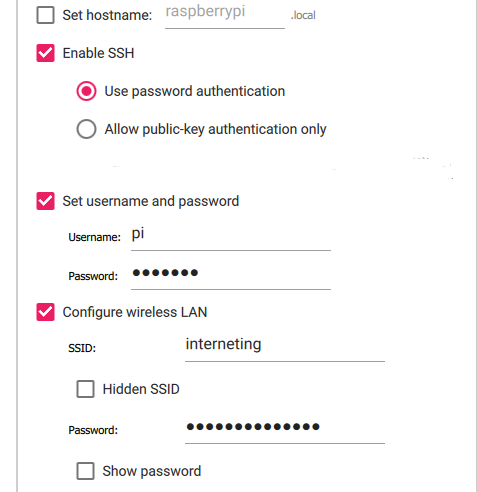
Make sure to tick “Enable SSH”, “Set username and password” and “Configure wireless LAN”.
Fill in the appropriate details, and make sure to fill in the wireless LAN details of your phone.
Option 2: no flash, add config files instead
If you do not want to start from scratch by flashing a new image, you can tell your Raspberry Pi to connect to a specific WiFi by adding a wpa_supplicant.conf file in the boot volume of your Pi’s SD card.
For this, you will need a microSD card reader. My laptop has a SD card reader so I could also bring a microSD to SD adaptor.
In Windows, use Notepad to add the code (below).
On a Mac, you can use TextEdit, but you need to ensure you Format > Make Plain Text before saving.
In the wpa_supplicant.conf file, add this:
country=US # US = USA, CA = Canada, DE = Germany, etc.
ctrl_interface=DIR=/var/run/wpa_supplicant GROUP=netdev
network={
    ssid="WIFI_NETWORK_NAME"
    psk="WIFI_PASSWORD"
    key_mgmt=WPA-PSK #This works with WPA2-PSK
}
If you haven’t already, you can also enable SSH by placing a blank file named “ssh“. No extensions, and no content in the file. Just a blank file.
Finding your Raspberry Pi’s IP address
Once you’ve booted your Raspberry Pi, it will connect to the WiFi hotspot that you set it up.
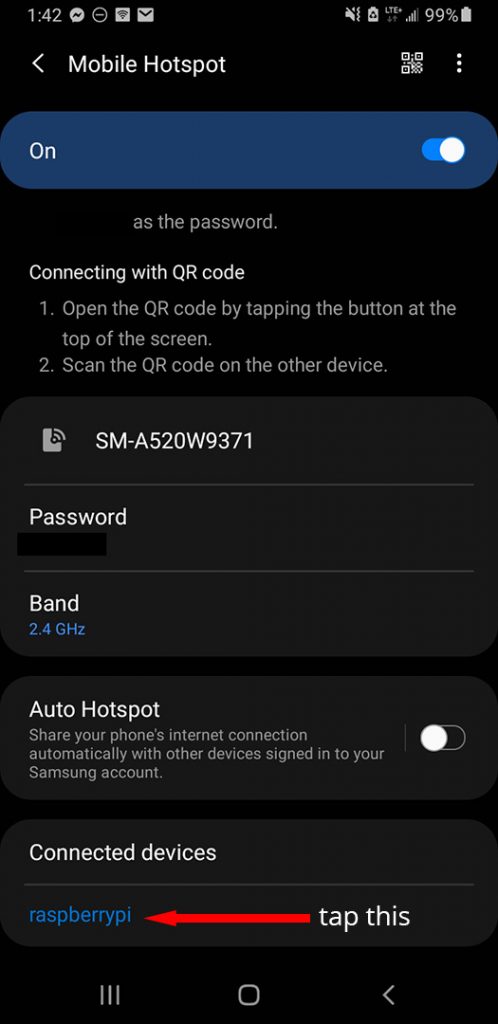
On my Samsung phone, you can find the IP address of the Raspberry Pi by tapping on the “raspberrypi” connected device. You might have to fiddle around to find the Raspberry Pi’s IP address if you have another brand of smartphone.
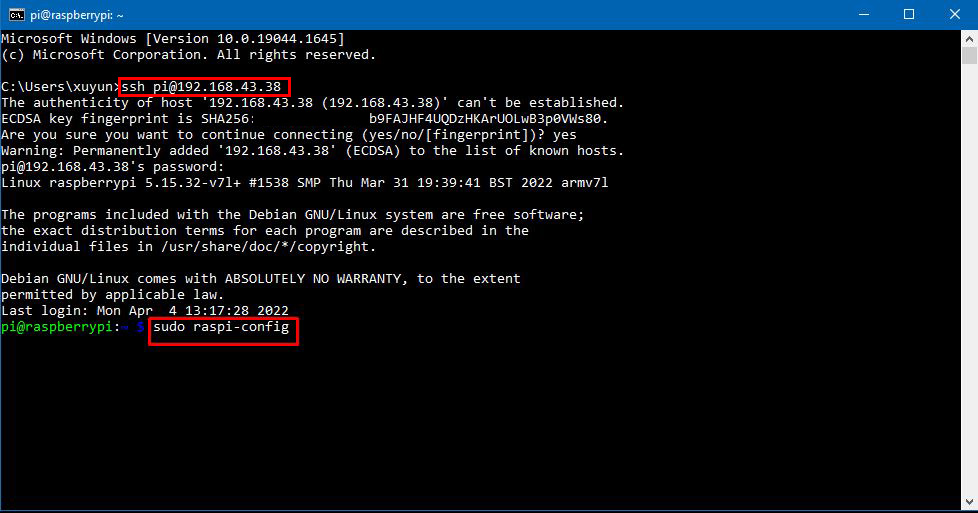
The IP address of my Raspberry Pi was 192.168.43.38.
On your computer, open a Terminal or Command Prompt and type ssh pi@[your-pi-ip-address] (e.g. ssh [email protected])
You should have no problems SSHing into your Pi if you followed the instructions above and if you don’t have a firewall stopping this from happening.
If you get a prompt that asks you if you want to trust your Pi, you must say “yes” in order to continue.
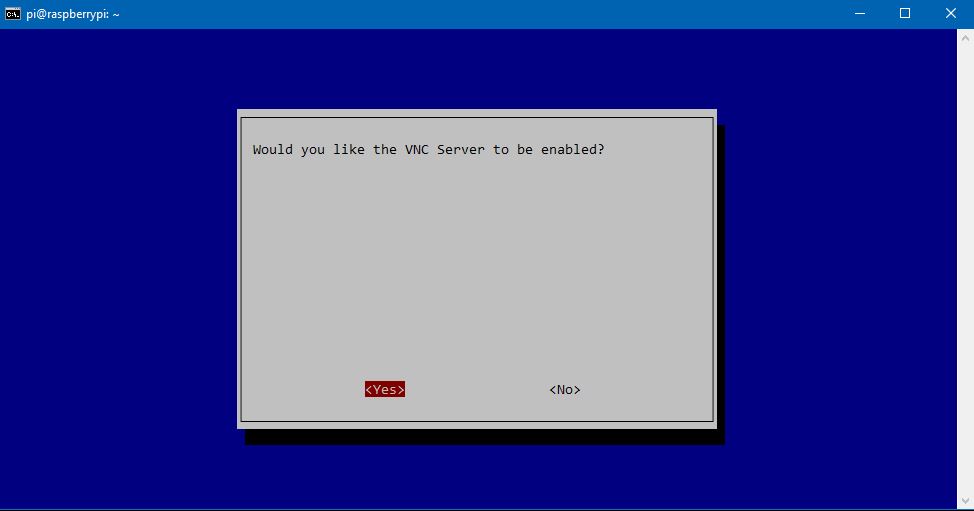
Enabling VNC using Raspberry Pi SSH
In order to enable VNC so that you can have a remote desktop experience, you need to use the command sudo raspi-config.
Go to Interface Options > VNC and enable VNC.
Connecting to your Raspberry Pi using VNC
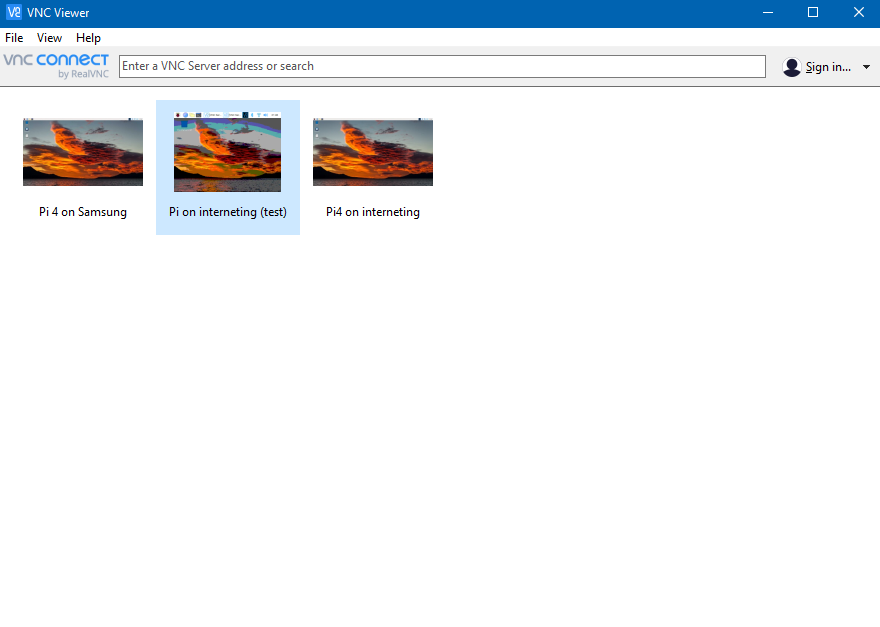
And there you have it. You can now connect to your Raspberry Pi using the RealVNC viewer.
It’s pretty easy. Download VNC Viewer on your laptop and connect to the Raspberry Pi with the same IP address that you used to SSH into the Pi.
Type in the IP address into the bar which says “Enter a VNC Server address or search”.
Enter your user name and password, and you should be able to control your Raspberry Pi remotely.
Downsides
The downside to using your smartphone as a router is that it can get slow. Your phone wasn’t really meant to be a router.
The first time I connected to my Raspberry Pi via my phone, I found it to be excruciatingly slow. Clicking on buttons would take seconds before I got a response.
So, I lowered the graphics to the lowest resolution and lowest quality. You can reduce the quality by right-clicking on the photo, go into Properties and then go to Options and lower the quality of the image in Picture Quality.
The second time I connected to it, things got a lot better and it was very useable.
If you have another router, you could use VNC Viewer to change the connection from your smartphone to the router, and repeating the steps to reconnect to your Pi from your laptop.
But this leads to another issue… how do you find the IP address of your Raspberry Pi?
A better way to find your local IP address
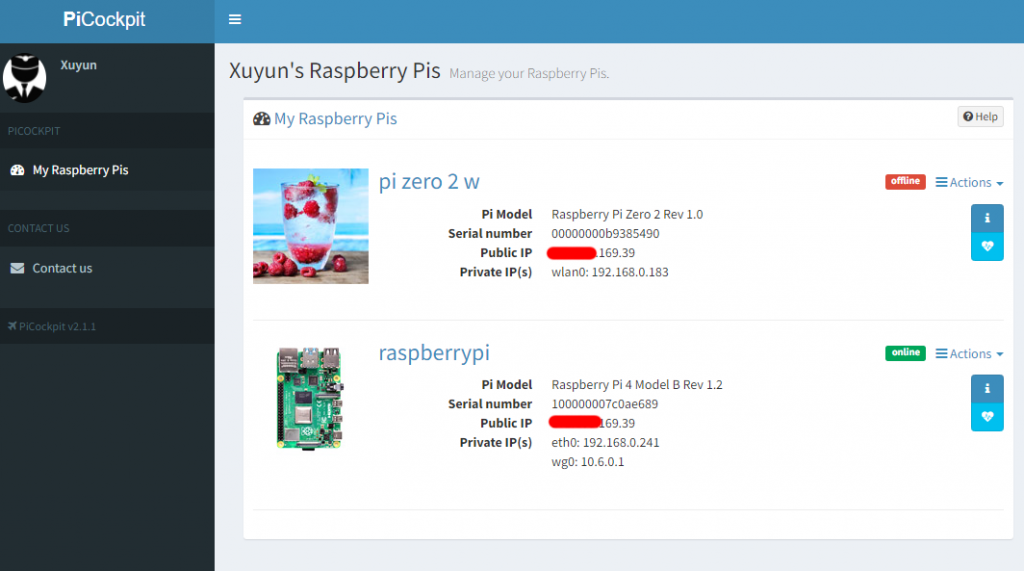
You can use our tool called PiCockpit which allows you to find out the Raspberry Pi’s IP address.
After installing PiCockpit, you can log into the web interface to find out the IP address of your Raspberry Pi. Just refer to the “Private IP” section.
For example, in the image above, the Raspberry Pi’s IP address is 192.168.0.241. You could ask VNC Viewer to connect to this IP address.
Detailed guide to RealVNC
If you need a more thorough guide, click on the link below for a detailed step-by-step guide.