Control your Raspberry Pi Remotely

There are many ways to remotely control your Raspberry Pi.
Do you want to be able to control it as if you were in front of your Raspberry Pi?
Or do you want to control its GPIO pins?
Remote control can mean using your Raspberry Pi as if you were on the device itself. In other words, you are on your preferred computer and want to use your Raspberry Pi as a remote desktop. You want to remotely control the mouse, keyboard and see the screen from this main computer.
If this is what you want, then you’re looking for SSH or VNC remote control of your Raspberry Pi.
On the other hand, you might want your Raspberry Pi to do something upon receiving a signal from the internet or some other form of input such as an IR signal. You may want your Raspberry Pi to turn off the lights or turn on a fan, etc.
In this case, you wouldn’t want to use remote desktop features in order to achieve this goal. There are many more straight forward ways to doing this and one of the ways is through our PiCockpit app.
Let’s see the various ways to remote control your Raspberry Pi.
Remote control via SSH (command line)

Probably the most fundamental way to control your Raspberry Pi remotely is via SSH.
Here are some things you can do with SSH:
- Run commands
- Install software
- Play music
- Reboot/shut down
- Toggle GPIO
Knowing how to use SSH is a fundamental skill in a Linux user’s toolbox. If you have ever managed a virtual private server on Amazon EC2 or DigitalOcean Droplets, using SSH to control your Raspberry Pi is more or less the same.
If this is what you seek, you can learn how to set up a “headless” set up here.
The downside of doing it this way is that you get no graphical user interface. While you can code and run programs this way, it becomes very tedious and slow.
The next step up is using VNC to get a remote desktop.
CLICK HERE: Play-by-play stock outlook from an Approved Reseller in Germany
/
Remote desktop via VNC (Virtual Network Computing)
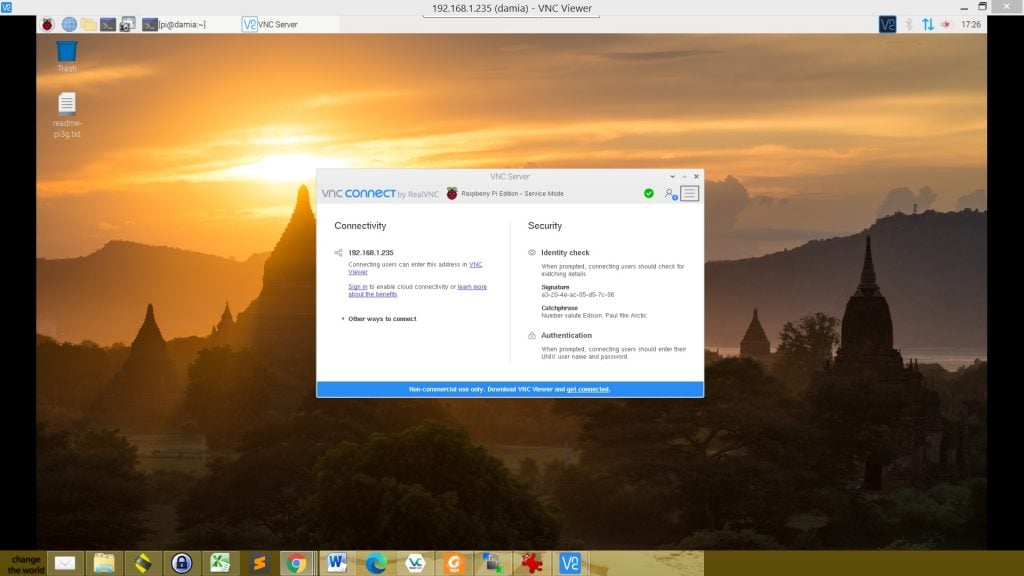
Being able to remotely control your Raspberry Pi gives you the ability to do much more.
For example, you’ll be able to use the Terminal. So basically, you can do everything listed in the SSH section above.
An even greater benefit here is that you can use programs with their graphical user interface. If you are coding, this really helps because you’ll be able to see syntax highlights and automatically get your code prettified. You can also use Thonny or VS Code rather than nano on the command line.
The downside is that getting a remote desktop system to work on the Raspberry Pi takes more time to set up than SSH.
Let’s put it this way: Macs, Windows and Linux all have a command line which means that they can SSH into your Raspberry Pi out of the box.
However, getting VNC to work requires you to enable it and download a VNC viewer on your computer.
The other downside is that VNC takes more bandwidth. It’s rarely a problem unless you are using a lacklustre router such as when I used my smartphone’s hotspot as a roaming router.
We have a guide on how you can set this up via RealVNC. It’s super simple.
CLICK HERE: Learn how to set up VNC on your Raspberry Pi here.
PiCockpit: remote GPIO control, remote diagnostics

While you could do everything through SSH and VNC, you might want something more straightforward and direct.
PiCockpit is particularly useful because it allows you to control your Raspberry Pi through the internet. If you wanted to do this via SSH or VNC, you would have to set up port forwarding on your router or create a tunnel of some sort. That’s a hassle.
With PiCockpit, you can do various repetitive tasks easily through your mobile or desktop browser. Let’s take a look at some of the use cases.
CLICK HERE: Get a PiCockpit account here (FREE)
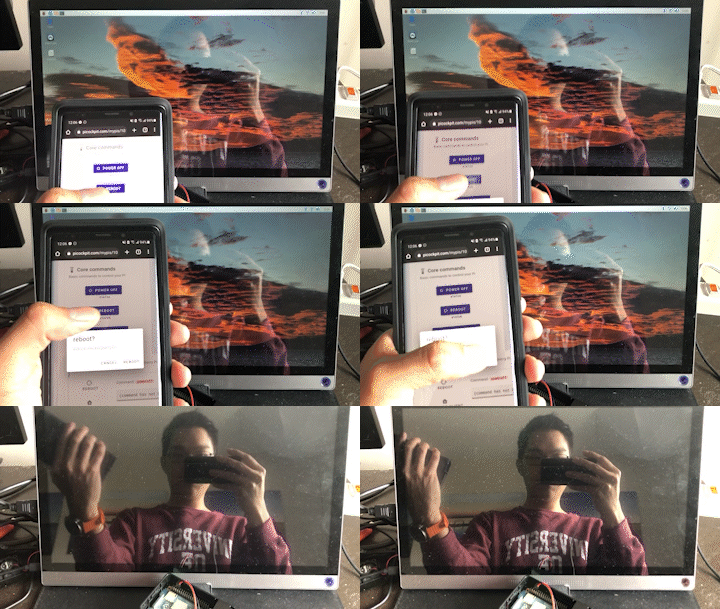
Reboot and shut down Raspberry Pi remotely

I’m finding that when things go wrong, rebooting can solve quite a lot of problems.
Say a program you wrote always crashes hours into operation. The program runs on boot.
You’re not sure why it crashes after a few hours but you need it to run now. An easy way is to restart your computer.
Here’s a demo:
In fact, the best thing about PiControl is that you can write your own commands to do exactly what you need.
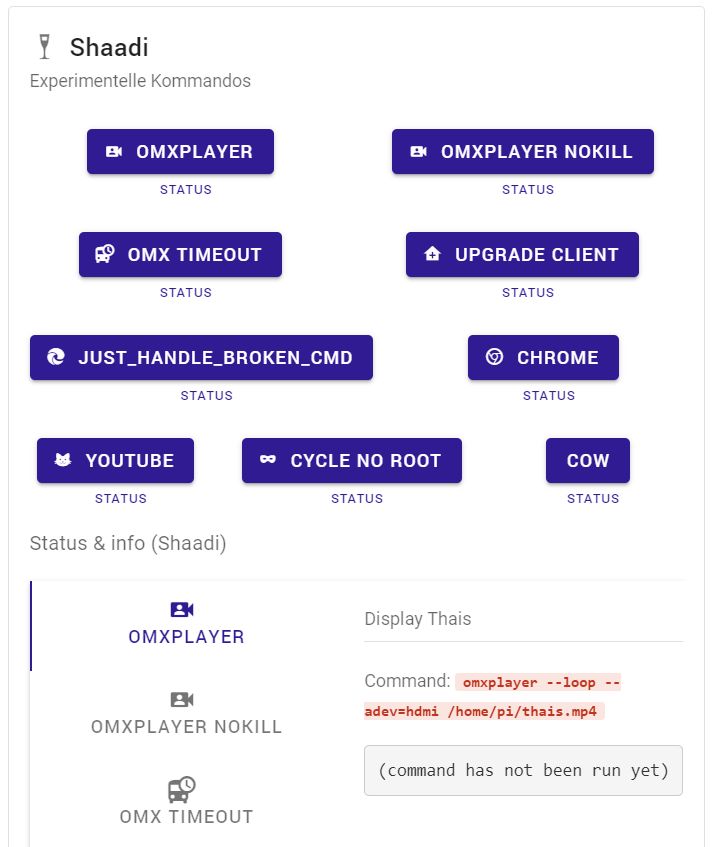
The potential of such a customizable tool is limitless. Here are some use cases that you can build:
- Take a snapshot using a camera
- Start your Raspberry Pi Minecraft server, and stop it as well
- Play a video using omxplayer (great for stores)
- wake up a local computer in the same network as your Raspberry Pi with Wake on LAN functionality
- play a sound
- open a door – for example a garage door, by issuing appropriate control commands via Z-Wave, etc.
- start the SSH service on your Raspberry Pi, and shut it down
- switch a relays on and off (will require two buttons, or can be done using a “toggle” button)
- control the TV (switch channels, change volume, …) using an IR LED, for example to simulate activity while you are travelling
- Launch a rocket from the web interface
CLICK HERE: Learn how you can set up your own commands in PiControl.
Remote control GPIO

The GPIO app in the PiCockpit toolbox makes things really interesting for prototyping and actual projects.
There are four aspects to the GPIO app:
- GPIO Input
- GPIO Output (On/Off)
- GPIO Output (Software PWM)
- I2C
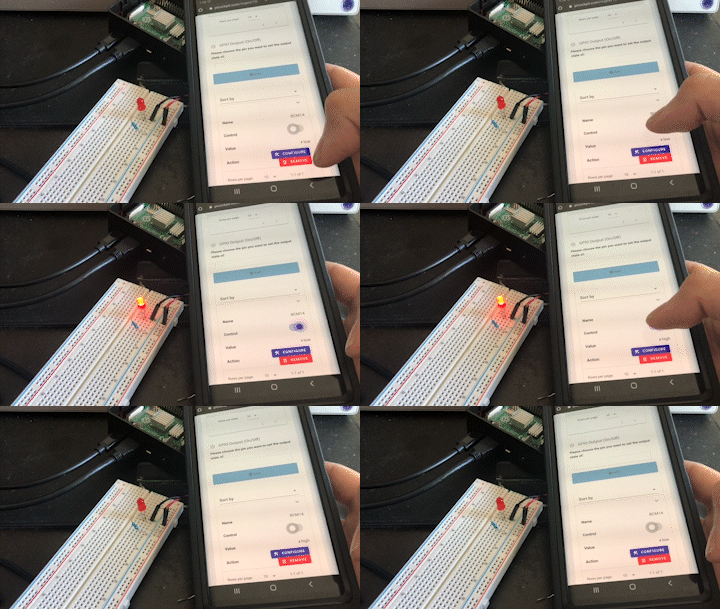
Let’s do a little “Hello World” project where we try to light an LED using the PiCockpit GPIO app. Once you master this, the possibilities are endless.
Requirements
- Red LED
- 220 ohm resistor
- Jumper wires
- PiCockpit installed
Schematics
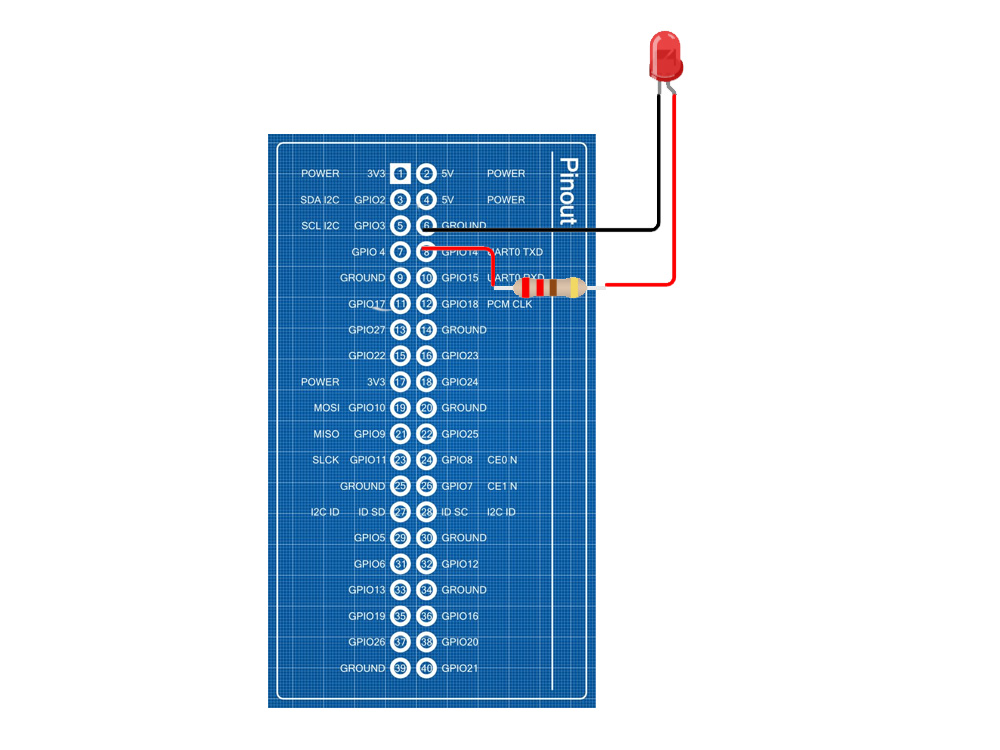
The image above shows the pinout for a Raspberry Pi 4 and in our example, we will connect the anode to GPIO 14, which is the fourth pin on the right column from the top.
The cathode connects to the ground pin which is the third pin from the top, just above GPIO 14.
If you are confused as to which part of the LED is the positive and negative, the longer of the two legs on the LED is the positive.
Setting up PiCockpit for remote control of LED
Here’s what you need to do.
In the PiCockpit dashboard, go to your Raspberry Pi. For me, it was easy to detect because it was the only Raspberry Pi that’s online.
- Choose your Raspberry Pi.
- Click the GPIO app.

- Scroll down to “GPIO Output (On/Off”).
- Click on the selection drop-down next to the “Add” button
- choose BCM14.
- Press “Add”

Right now, you will see a toggle switch under the “Control” column. Click on that.
And just like that, you have just turned on your LED remotely.
Software PWM to remote control LEDs. Step it up a notch!

The instructions above allow you turn an LED on or off at full brightness. But what if you want to be able to modulate its brightness?
Let’s try the Software PWM. It’s super easy and an quick step up from the basic project above.
- Go to “GPIO Output (Software PWM)” in the GPIO app
- Choose BCM14 from the drop-down selection menu.
- Click “Add”
- Move the slider under the “Control” column. Notice how the LED brightness modulates.
Installation of PiCockpit
If you are convinced that PiCockpit can help you remotely control your Raspberry Pi, then follow this link for the installation instructions.
CLICK HERE: Get a PiCockpit account here