Headless setup for Raspberry Pi
With this Headless setup all you need to run your Raspberry Pi is a MicroSD and a power adapter. Learn how to connect to your Pi from Windows.
Requirements
Hardware
- Raspberry Pi
- MicroSD Card (16GB or more)
- MicroSD Card Adapter / SD Card Reader
- Power adapter
- Windows PC
Software
Make sure that you have alle the hardware requirements at hand and download the free software that we are going to need for this setup.
Steps
1 Configure the OS
Plug your MicroSD into the windows PC. I am using a MicroSD to SD adapter, as my PC has a SD card slot.
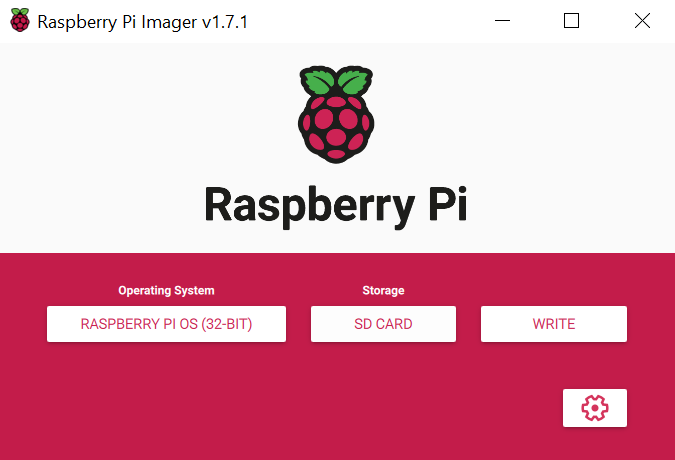
Fire up the Raspberry Pi Imager and select the MicroSD card. Choose the Raspberry Pi OS (32-bit) if you want a desktop environment. If not, the best option is the Raspberry Pi OS Lite (32-bit).
Klick the settings icon in the bottom right corner or Ctrl+Shift+x to open the advanced options.
In the Advanced options tick Enable SSH and Use password authentication. You can set the default Username and Password if you wish. Enable Configure Wifi, provide your SSID and Password and choose your Wifi country.
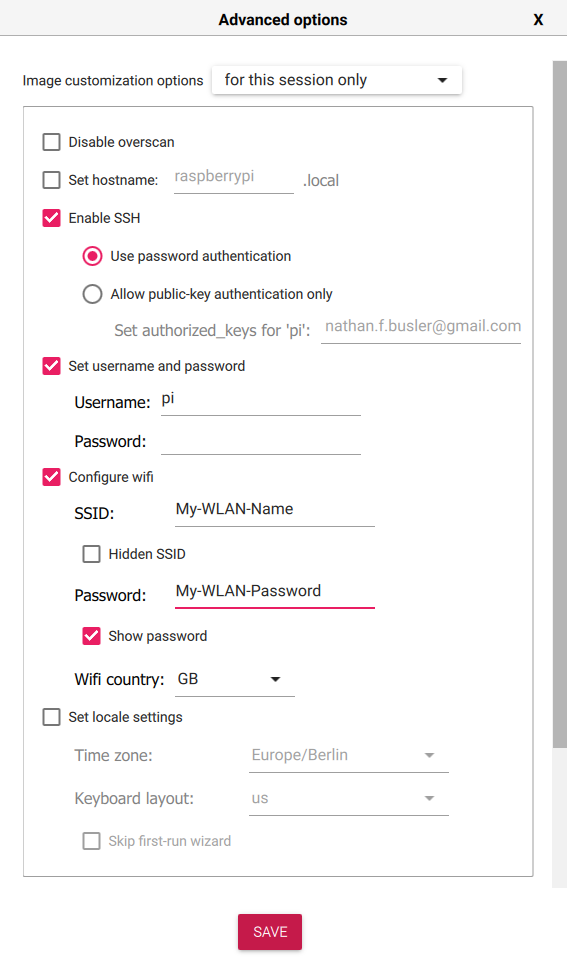
Save the settings and click the Write button. It will take a couple minutes until the OS is flashed onto the MicroSD card.
Once that is done, plug the MicroSD card into your Raspberry Pi and power it on. Again you need to wait about one minute before continuing with the next step because the Pi needs a little time to boot and connect to your Wifi.
Congrats! Your Pi is now set up for Headless use.
2 Log in Headless via SSH
Now you need to find out your Pi’s IP address. The easiest way to check the IP from Windows is to use the command line. Press Ctrl+r and enter cmd to start the command line.
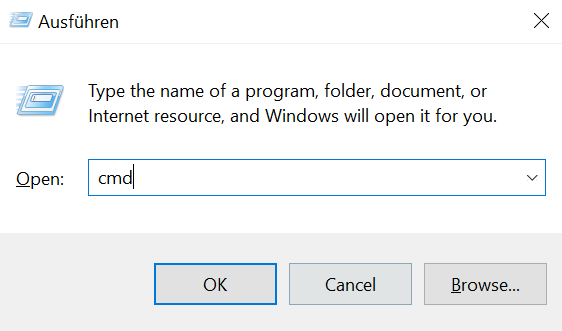
The standard host name of a Raspberry Pi is raspberrypi.local unless you configured it differently in the advanced options of the Raspberry Pi Imager above. So to find out the IP address execute
nslookup raspberrypiYou should see something like this.

The first IP under Addresses: is the IP we are looking for, in my case 192.168.1.140
If you get an error your Pi might not have booted yet or is not connected to the Wifi. Check the Raspberry Pi Imager settings again to make sure there are no typos.
Now that we figured out the IP address, the next step to complete our Headless setup is to use PuTTY to start an SSH session. SSH stands for Secure SHell and is a way to remotely log into devices.
Start PuTTY and enter the IP address into the Host Name (or IP address) field. Make sure SSH is selected as connection type and click Open.
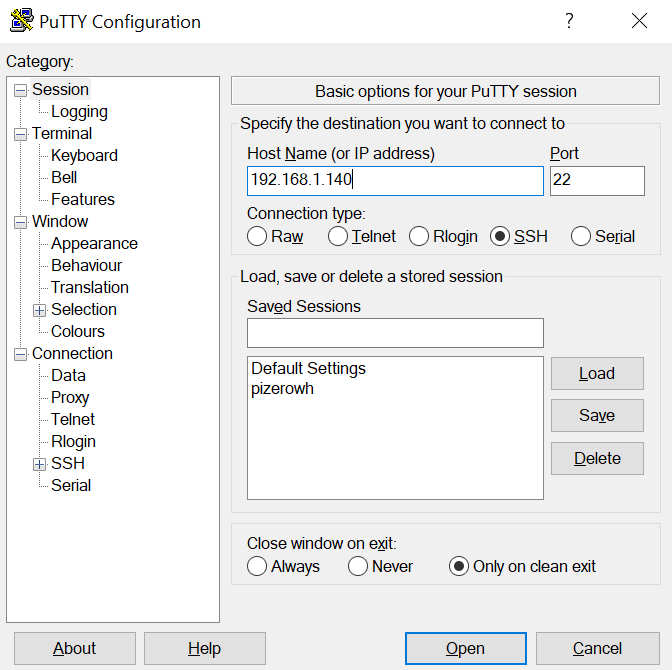
Log into your Pi. The standard Username is pi and the standard password is raspberry. Make sure to change the password on first use.
If you only need access to your Raspberry Pi’s console then you are done at this point. However if you want to access the desktop environment then read on.
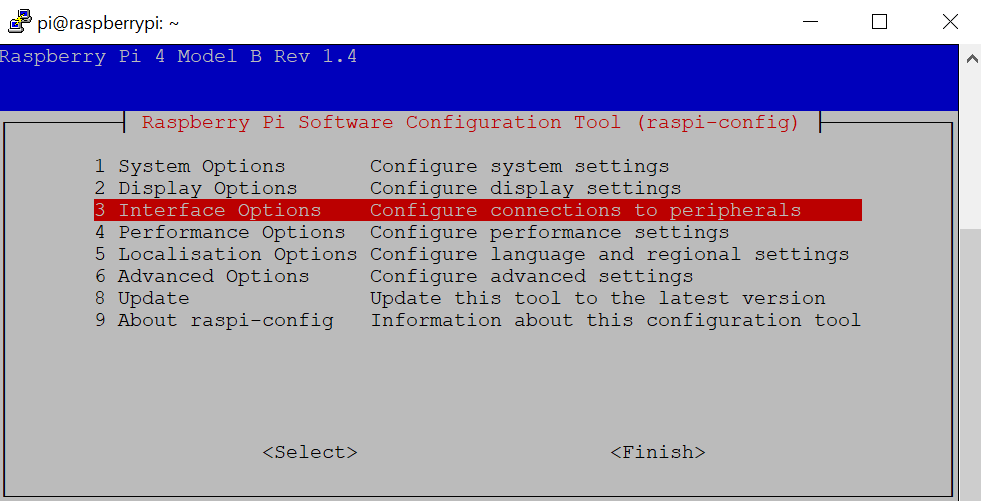
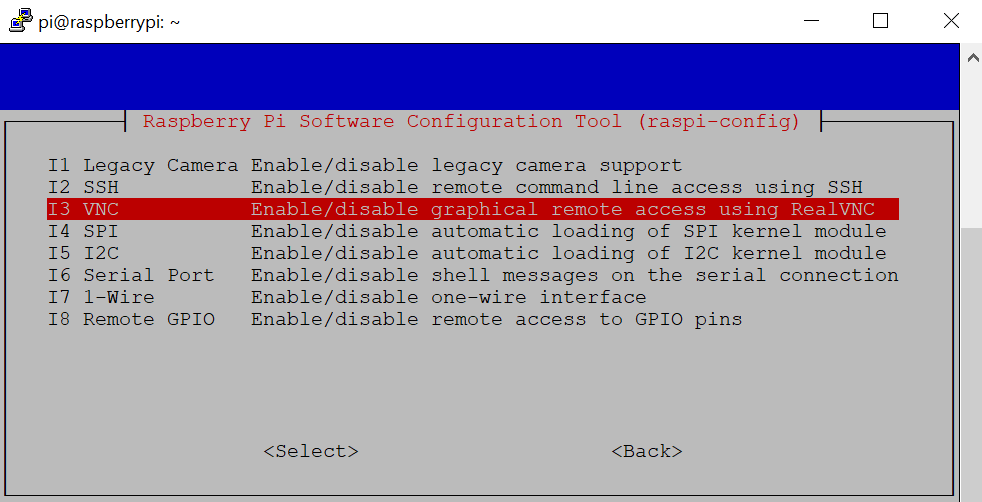
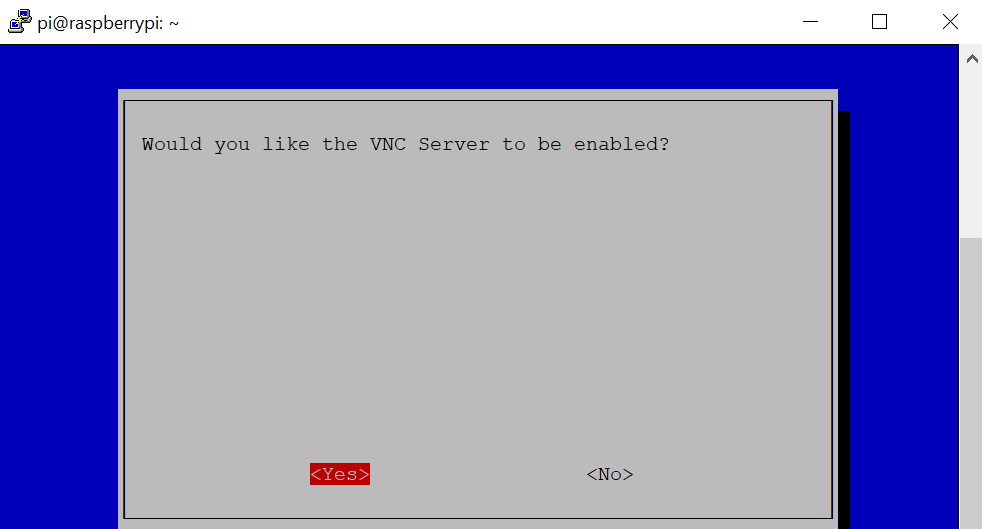
3 Enable VNC Server
Since we are going to use VNC Viewer to display the desktop we need to enable the VNC Server on our Raspberry Pi. Thankfully this is pretty straight forward.
In the PuTTY SSH Session execute
sudo raspi-configSelect 3 Interface Options, then I3 VNC and finally Yes and OK.
You can leave the PuTTY SSH session now by closing the window or executing
exit4 Connect Headless via VNC Viewer
Open the VNC Viewer and enter your Pi’s IP address.

You will be asked to enter your log in credentials.
Et Voila! You should see your beloved Raspberry Pi Desktop environment now.